Introduction
In this article, you will see an example of a project implementation based on the Transactional outbox, Inbox, and Saga event-driven architecture patterns. The stack of technologies includes Kotlin, Spring Boot 3, JDK 21, virtual threads, GraalVM, PostgreSQL, Kafka, Kafka Connect, Debezium, CloudEvents, Caddy, Docker, and other tools.
In event-driven architecture (EDA), the interaction between services is carried out using events, or messages. A message can contain, for example, an update of some entity state or a command to perform a given action.
Transactional outbox is a microservices architecture design pattern that solves dual writes problem; the problem is that if some business event occurs in an application, we can’t guarantee the atomicity of the corresponding database transaction and sending of an event (to the message broker, queue, another service, etc.), for example:
-
if a service sends the event in the middle of transaction, there is no guarantee that the transaction will commit.
-
if a service sends the event after committing the transaction, there is no guarantee that it won’t crash before sending the message.
To solve the problem, an application doesn’t send an event; instead, the application stores the event in the message outbox. In case of use a relational database where we have
ACID guarantees, the outbox represents an additional table in the application’s database; for other types of databases there can be different solutions, for example, the message
can be stored as an additional property along with changed business entity. In this project, PostgreSQL is used as a database, so an event is inserted into the outbox table as a
part of a transaction that also includes a change of some business data. Atomicity is guaranteed because it is a local ACID transaction. The table acts as a temporary message queue.
Inbox pattern is used to process incoming messages from a queue and operates in the reverse order
when compared with Transactional outbox: a message is first stored in a database (in an additional inbox table), then it is processed by an application at
a convenient pace. Using the pattern, a message won’t be lost in case of an error at processing and can be reprocessed.
When a business transaction spans multiple services, implement it as a Saga, a sequence of local transactions. Each local transaction updates the database and publishes a message to trigger the next local transaction in the saga. If a local transaction fails because it violates a business rule, then the saga executes a series of compensating transactions that undo the changes that were made by the preceding local transactions.
Kafka Connect is a framework for connecting Kafka with external systems such as databases, key-value stores, search indexes, and file systems, using so-called connectors.
Debezium is an open source distributed platform for change data capture (CDC). It converts changes in your databases (inserts, updates, or deletes) into event streams so that your applications can detect and immediately respond to those row-level changes.
CloudEvents is a specification for describing event data in a common way.
The accompanying project is available on GitHub. It represents a microservices platform for a library; its architecture looks as follows:

The project contains the following components that compose the aforementioned platform:
-
three Spring Boot applications and their databases (PostgreSQL):
These services are native (GraalVM) applications running as Docker containers.
-
one Kafka Connect instance with nine Debezium connectors deployed:
-
three connectors to
bookdatabase:-
The connector reads messages intended for
book-servicefrom a Kafka topic and inserts them intobook.public.inboxtable. -
The connector is an end part of user data streaming (replication) from
user.public.library_usertable; it inserts records intobook.public.user_replicatable. It is a counterpart ofuser.source.streamingconnector. -
The connector captures new messages from
book.public.outboxtable by reading WAL file and publishes them to a Kafka topic.
-
-
five connectors to
userdatabase:-
The connector reads messages intended for
user-servicefrom a Kafka topic and inserts them intouser.public.inboxtable. -
The connector reads messages not processed by
user.sinkconnector from a dead letter queue (Kafka topic) and inserts them intouser.public.inboxtable. -
The connector reads messages not processed by
user.sink.dlq-ce-jsonconnector from a dead letter queue (Kafka topic) and inserts them intouser.public.inbox_unprocessedtable. -
The connector captures new messages from
user.public.outboxtable by reading WAL file and publishes them to a Kafka topic. -
The connector is a start part of user data streaming (replication) from
user.public.library_usertable. It is a counterpart ofbook.sink.streaming.
-
-
one connector to
notificationdatabase-
The connector reads messages intended for
notification-servicefrom a Kafka topic and inserts them intonotification.public.inboxtable.
-
-
-
Kafka
It runs in KRaft mode. KRaft is the consensus protocol that was introduced to remove Kafka’s dependency on ZooKeeper for metadata management.
The project runs only one instance of Kafka, as well as Kafka Connect. This is done to simplify configuration, focus on the architecture itself, and reduce resource consumption. To set up clusters for both tools, do your own research.
-
schema registry (Apicurio Registry)
-
reverse proxy (Caddy web server)
-
tools for monitoring: Kafka UI and pgAdmin
compose.yaml and
compose.override.yaml files contain all the listed components.
The project is deployed to a cloud.
How does this architecture work? The following is a sequence of steps that the platform performs after the user has initiated a change in the library data, for example, in a book data, using the library’s REST API; eventually the message about that change will be delivered to the user’s Gmail inbox or to admin HTML page through WebSocket (depending on the settings):
-
The user makes a change in a book data, for example, changes publication year of the book; for that, he performs REST API call
-
book-serviceprocesses a request to its REST API by doing the following inside one transaction:-
stores the book update (
book.booktable) -
inserts an outbox message containing an event of type
BookChangedand its data into thebook.outboxtable
-
-
book.sourceDebezium connector does the following:-
reads the new message from the
book.outboxtable -
converts it to CloudEvents format
-
converts it to Avro format
-
publishes it to a Kafka topic
-
-
user.sinkDebezium connector does the following:-
reads the message from a Kafka topic
-
deserializes it from Avro format
-
extracts
id,source,type, anddatafrom the CloudEvent and stores them in theuser.inboxtable
-
-
user-servicedoes the following:-
each 5 seconds a task polls the
user.inboxtable for new messages -
the task marks the inbox message to be processed by the current instance of the service
-
starts processing the inbox message of
BookChangedtype in a new virtual thread
If the book is taken by a user, the service:
-
obtains a delta between the latest and the previous states of the book
-
generates a notification for the user about the book change; the message includes the delta obtained above
-
inserts an outbox message containing a command of type
SendNotificationCommandand its data directly into the WAL (unlike tobook-servicewhich inserts messages into itsoutboxtable) -
marks the inbox message as processed
-
-
user.sourceDebezium connector does the following:-
reads the new message from the WAL
-
converts it to CloudEvents format
-
converts it to Avro format
-
publishes it to a Kafka topic
-
-
notification.sinkDebezium connector does the following:-
reads the message from a Kafka topic
-
deserializes it from Avro format
-
extracts
id,source,type, anddatafrom the CloudEvent and stores them in thenotification.inboxtable
-
-
notification-servicedoes the following:-
each 5 seconds a task polls the
notification.inboxtable for new messages -
the task marks the inbox message to be processed by the current instance of the service
-
starts processing the inbox message of
SendNotificationCommandtype in a new virtual thread -
takes a user’s email and the notification text from the message and sends an email or, in a non-testing environment, a notification to an HTML page through WebSocket
-
marks the inbox message as processed
-
This and other use cases will be demonstrated in the Testing section.
Event-driven architecture implies that event producers and event consumers are decoupled and all interactions between microservices are asynchronous. Further, if you use
Transactional outbox and Inbox patterns, you should provide Message relay — a component that sends the messages stored in the outbox to a message broker (NATS, RabbitMQ,
Kafka, etc.) or reads messages from a message broker and stores them in inbox. Message relay can be implemented in different ways, for example, it can be a component of an
application; for Transactional outbox pattern, it will obtain new messages by periodic polling the outbox table. In this project, though, as you have seen above, message
relays are implemented with Kafka Connect and Debezium source/sink connectors. The above leads to the following feature of the described architecture: the microservices
don’t communicate directly neither with each other, nor with a message broker (in this project, it is Kafka). To communicate with each other, services interact only with
their own databases. As you can see in the diagram above, passing a message between two services, that is from an outbox table of a database of one service to an
inbox table of a database of another service, is carried out only by infrastructure components (PostgreSQL, Kafka Connect, Debezium connectors, and Kafka).
In total, the project includes two examples of Transactional outbox pattern (book-service and user-service and their corresponding Debezium source connectors; they differ
in that book-service stores messages in its outbox table while user-service stores messages directly in the WAL) and three examples of Inbox pattern (all three
services and their corresponding Debezium sink connectors; all examples are implemented the same).
In this project, the messages produced by all source connectors (that is messages for interaction between services and for data replication) are delivered exactly-once. But exactly-once message delivery only applies to source connectors, so on the sink side I use upsert semantics that means that even if a message duplicate occurs, a microservice won’t process the same message more than once (that is exactly-one processing). More details on this in the Connectors configuration section.
The whole chain of interactions between microservices — book-service → user-service → notification-service (through PostgreSQL, Kafka Connect with Debezium connectors,
and Kafka) — is a choreography-based implementation of Saga pattern.
The messages through which microservices interact with each other are in CloudEvents (specification for describing event data in a common way) format and are serialized/deserialized using Avro, compact and efficient binary format.
The following table summarizes the stack of technologies used in the project:
| Name | Type |
|---|---|
Microservices |
|
Programming language |
|
Application framework |
|
JDK to compile native executables |
|
ORM |
|
Build tool |
|
Tool to create OCI image of an application |
|
Infrastructure |
|
Database |
|
Event streaming platform |
|
Framework for connecting Kafka with external systems |
|
CDC platform |
|
Specification for describing event data in a common way |
|
Data serialization format |
|
Schema registry |
|
Reverse proxy |
|
Containerization platform |
|
Tool for defining and running multi-container applications |
|
Monitoring |
|
UI for Apache Kafka (Kafka UI) |
Monitoring tool for Kafka |
Administration platform for PostgreSQL |
|
Of course, none of the technologies above are mandatory for the implementation of event-driven architecture and its patterns (in the considered project, this is Transactional outbox, Inbox, and Saga). For example, you can use any non-Java stack to implement microservices, and you don’t have to use Kafka as a message broker. The same applies to any tool listed above since there are alternatives for each of them.
Key domain entities
of the project are Book, Author, BookLoan, and Notification. The library began its work recently, so there are only
a few books in
it. REST API of book-service allows to make CRUD operations on Book and Author entities and to lend/return a book by a user of the library.
I structured the article as follows:
-
implementation of all three microservices
-
setting up of the infrastructure components
The core part is the setting up of Kafka Connect and Debezium connectors.
-
local launch and CI/CD
-
testing
You can read the article in any order, for example, first read about a microservice and then how to set up a connector to that microservice’s database. If you are not a Java/Kotlin developer, you may be more interested in sections covering the setting up of the infrastructure components, specifically, data streaming pipelines; nevertheless, the principles of implementation of the architectural patterns under consideration are the same for applications in different programming languages. Theory will go hand in hand with practice.
Microservices implementation
All three microservices are Spring Boot native applications, use the same stack of technologies, and implement Transactional outbox and Inbox patterns
(only notification-service doesn’t implement Transactional outbox pattern). As said earlier, no one microservice interacts with Kafka; they just put
messages in outbox table or process messages from inbox table. Database change management (that is tables creation and population them with business
data) is performed with Flyway.
Versions of plugins and dependencies used by the services are specified in
gradle.properties file. bootBuildImage Gradle task
of each service is set up to produce a Docker image containing GraalVM native image of an application.
Common model
common-model module unsurprisingly contains the code that is shared by all
three microservices, specifically:
-
You can think of data model classes as a contract for microservices interaction.
Book,Author,BookLoan,CurrentAndPreviousStatemodels are shared betweenbook-serviceanduser-service.CurrentAndPreviousStatestructure is needed when some entity (a book or an author) is updated so the receiving service has different options for how to process that data depending on the use case. In this project, the service determines a delta between current and previous states of an entity and includes that delta to a message that will be sent to a user (messagefield ofNotificationmodel). But instead of obtaining the delta, if a use case requires only the latest state, a service can use only the current state of entity thanks to that universal structure.Notificationmodel is shared betweenuser-serviceandnotification-service. -
AggregateTypeenumeration contains types of entities that can be published in the system.EventTypeenumeration contains all event types that can occur in the system; each microservice uses a limited set of event types. -
runtime hints for Spring Boot framework
You need the runtime hints only if you compile your application to a native image. They provide additional reflection data needed to serialize and deserialize data models at runtime, for example, when a service stores a message in
outboxtable or process a message frominboxtable. This will be discussed in more detail in the Build section.
Book service
This section covers:
-
the basics on how all microservices in this project are implemented
-
implementation of Transactional outbox pattern on the microservice side, specifically, how to store new messages in
outboxtable -
a scenario of usage of replicated data, that is, the data from a database of another microservice
-
an example of Saga pattern with a compensating transaction
-
generation of a microservice’s REST API layer (specifically, controllers and DTOs) with OpenAPI Generator Gradle Plugin
The service stores data about all books and their authors, allows to access and manage that data by its REST API and allows a user to borrow
and return a book. When some domain event occurs (for example, a new book was added to the library or a book was lent by a user), the service
stores an appropriate message in its outbox table implementing thus the first part of Transactional outbox pattern. The second part of the
pattern implementation is to deliver
the message from a microservice’s database to Kafka; it is done using Kafka Connect and Debezium and is discussed in the Connectors configuration section.
The main class looks like this:
@SpringBootApplication
@ImportRuntimeHints(CommonRuntimeHints::class)
@EnableScheduling
class BookServiceApplication

fun main(args: Array<String>) {
    runApplication<BookServiceApplication>(*args)
}
@ImportRuntimeHints tells the service that additional reflection data should be used by importing it from common-model module.
@EnableScheduling is needed to enable execution of scheduled tasks; this service, as the other two, polls periodically inbox table of its
database for the new messages. This is the part of Inbox pattern implementation that is covered in detail in the User service section.
REST API is described in
OpenAPI format. openApiGenerate task of org.openapi.generator Gradle plugin is configured as shown in the
build script and produces controllers, DTOs,
and delegate interfaces. You need to implement the delegate interfaces to specify how to process incoming requests. This project contains
implementations of delegates for:
-
books REST API:
-
This is a default implementation.
-
This is a limited implementation that permits only read and update operations on a book (that is doesn’t permit create and delete operations). It is used on testing environment (when
testprofile is active).
-
-
authors REST API:
AuthorsApiDelegateImpl
A generated controller calls an implementation (or one of implementations) of an appropriate delegate interface to process an incoming request.
The config for testing environment also enables limited converters for books and authors; that means that a user is allowed to change fewer fields compared to default converters. Also, the values for these fields will be coerced to lie in a given range, for example, when updating a book, a user is allowed to change only its publication year and the value of the field will lie in a range between 1800 and 1950 years even if the user entered a value not in that range.
In the introduction, I described the high-level algorithm of what book-service (as a part of a whole system) does when it processes a request to its REST API. Now we
will look at what the service does in detail, including how the Transactional outbox pattern is implemented on the microservice side. Again, we consider an update of a book
scenario; it is initiated by a call of PUT {{baseUrl}}/book-service/books/{bookId} REST API method. You can start the process locally by calling
PUT https://localhost/book-service/books/3 and passing the following request body:
{
    "name": "The Cherry Orchard",
    "authorIds": [2],
    "publicationYear": 1905
}
both the considered implementations of BooksApiDelegate interface call
BookService.update() method
which opens a new transaction:
BookService.update() method@Transactional(propagation = Propagation.REQUIRES_NEW, rollbackFor = [Exception::class])
override fun update(id: Long, book: BookToSave): BookDto {
log.debug("Start updating a book: id={}, new state={}", id, book)
val existingBook = getBookEntityById(id) ?: throw NotFoundException("Book", id)
val existingBookModel = bookEntityToModelConverter.convert(existingBook)
val bookToUpdate = bookToSaveToEntityConverter.convert(Pair(book, existingBook))
val updatedBook = bookRepository.save(bookToUpdate)
val updatedBookModel = bookEntityToModelConverter.convert(updatedBook)
outboxMessageService.saveBookChangedEventMessage(CurrentAndPreviousState(updatedBookModel, existingBookModel))
return bookEntityToDtoConverter.convert(updatedBook)
}As said in the introduction, the following two actions are performed inside the transaction:
-
storing an updated book
-
an attempt to find an existed book by id from the request
-
if the book was found, its is updated with the new values of the fields coming from the request (the conversion is done in
BookToSaveToEntityConverterorBookToSaveToEntityLimitedConverter, depending on a Spring profile used) -
the updated book is stored in
booktable throughBookRepository
-
-
storing a new outbox message
This step is a necessary part of implementation of the Transactional outbox pattern that solves dual problem: instead of writing the message to a different system (that is to a message broker), the service stores in the same transaction in the
outboxtable. The step includes the following:-
conversion of the updated book entity (an internal state of a book) to a model (an external state of a book that is intended for interservice communication)
-
call of
OutboxMessageService.saveBookChangedEventMessage()method and passingCurrentAndPreviousStatedata model to it
-
The first action is quite common; let’s consider the second. saveBookChangedEventMessage does the following:
OutboxMessageService.saveBookChangedEventMessage() methodoverride fun saveBookChangedEventMessage(payload: CurrentAndPreviousState<Book>) =
save(createOutboxMessage(AggregateType.Book, payload.current.id, BookChanged, payload))At first, the saveBookChangedEventMessage method creates an instance of OutboxMessageEntity:
OutboxMessageEntity@Entity
@Table(name = "outbox")
class OutboxMessageEntity(
@Id
@Generated
@ColumnDefault("gen_random_uuid()")
val id: UUID? = null,
@Enumerated(value = EnumType.STRING)
val aggregateType: AggregateType,
val aggregateId: Long,
@Enumerated(value = EnumType.STRING)
val type: EventType,
@JdbcTypeCode(SqlTypes.JSON)
val payload: JsonNode
) : AbstractEntity()by using the following method:
OutboxMessageEntityprivate fun <T> createOutboxMessage(aggregateType: AggregateType, aggregateId: Long, type: EventType, payload: T) = OutboxMessageEntity(
aggregateType = aggregateType,
aggregateId = aggregateId,
type = type,
payload = objectMapper.convertValue(payload, JsonNode::class.java)
)-
aggregateTypeisBook -
aggregateIdis id of the changed book; the source connector will use it as key of an emitted Kafka message -
typeisBookChanged -
payloadis an instance of theCurrentAndPreviousStatedata model
BookChanged is one of event
types
in this project. There are two main types of messages in event-driven architectures:
-
events notify that something has changed in a given domain or aggregate.
-
commands are orders to perform a given action. Examples of commands usage will be in the User service section.
In different sources, in addition to the above, you can find also the following message types:
-
queries are messages, or requests, sent to a component to retrieve some information from it.
-
replies are responses to queries.
-
documents are much like events; the service publishes them when a given entity changes, but they contain all the entity’s information, unlike events which typically only have the information related to the change that originated the event
According to this classification, events in this project are documents because they contain the latest state (and some can also contain a previous state of an entity), but I decided to leave familiar naming and call them events.
In the considered scenario, the payload field has the type of the mentioned
CurrentAndPreviousState
model containing both new and old states of the book; using it, any consumer can process the message in any way. For example, one consumer can be only interested in the
latest state of a book, while another needs to receive the delta between the new and the old states of the book. In this project, the only consumer of
BookChanged type of event is user-service that needs the delta to notify a user about changes in the library but still I preferred
more flexible data model which may be suitable for consumers with other needs in the future. Such an approach also allows to use just one
message type (BookChanged) to describe any change in a book instead of multiple events (BookPublicationYearChanged,
BookNameChanged, etc.); but such a structure doesn’t give information about what change triggered the event, unless we specifically add it
to the payload. It should also be noted that such messages need more storage space for Kafka. Do your own research to find out which message
type is best suited for your system: events or documents.
All the fields used in OutboxMessageEntity constructor above except the type field are required by
Outbox Event Router single message transformation; the
type field is required by CloudEvents converter. This will be covered
in the Connectors configuration section. All the fields are mapped to the appropriate columns of the outbox table:
outbox tablecreate table outbox(
id uuid primary key default gen_random_uuid(),
aggregate_type varchar not null,
aggregate_id varchar not null,
type varchar not null,
payload jsonb not null,
created_at timestamptz not null default current_timestamp,
updated_at timestamptz not null default current_timestamp
);The save method stores OutboxMessageEntity through OutboxMessageRepository
in the outbox table:
OutboxMessageEntityprivate fun save(outboxMessage: OutboxMessageEntity) {
log.debug("Start saving an outbox message: {}", outboxMessage)
outboxMessageRepository.save(outboxMessage)
outboxMessageRepository.deleteById(outboxMessage.id!!)
}As you see above, the outbox message is deleted right after its creation. This might be surprising at first, but it makes sense when remembering how log-based CDC
works: it doesn’t examine the actual contents of the table in the database, but instead it tails the append-only transaction log (the WAL). The calls to save() and
deleteById() will create one INSERT and one DELETE entries in the log once the transaction commits. After that, Debezium will process these events: for any INSERT,
a message with the event’s payload will be sent to Apache Kafka; DELETE events, on the other hand, can be ignored because they don’t require any propagation to the
message broker. So we can capture the message added to the outbox table by means of CDC, but when looking at the contents of the table itself, it will always be empty.
This means that no additional disk space is needed for the table and also no separate house-keeping process is required to stop it from growing indefinitely.
In the next section, we will look at another implementation of the Transactional outbox pattern, which stores outbox directly in the WAL, that is, without using the outbox table. We will also look at the advantages and disadvantages of each implementation.
Further, the transaction is committed and the following happens:
-
the controller returns to a user the updated state of the book as the body of the REST response.
-
the new outbox message is passed to the database of the
user-servicethroughbook.sourceanduser.sinkconnectors (we will discuss that in the Connectors configuration section).
The service also is an example of a consumer of data replicated from a database of another service. The database of book-service contains user_replica table with
just two columns:
user_replica tablecreate table user_replica(
id bigint primary key,
status varchar not null
);The source table, library_user of the database of user-service,
has more fields
but in the source connector we specify
that only id and status fields will be included to change event record values. Then the record will be published to the streaming.users Kafka topic which is
listened by the sink connector; it will
insert the records into the user_replica table.
book-service can use the data from the table in a scenario when a user take a book from the library. To lend a book, it is needed to perform
POST {{baseUrl}}/book-service/books/{bookId}/loans request (for example, POST https://localhost/book-service/books/5/loans with the following body:
{
    "userId": 2
}
The method to borrow a book acts similar to the method of a book update: it starts a new transaction that includes a change of a business data and insertion of an appropriate outbox message:
BookService.lendBook() method@Transactional(propagation = Propagation.REQUIRES_NEW, rollbackFor = [Exception::class])
override fun lendBook(bookId: Long, bookLoan: BookLoanToSave): BookLoanDto {
log.debug("Start lending a book: bookId={}, bookLoan={}", bookId, bookLoan)
val bookToLend = getBookEntityById(bookId) ?: throw NotFoundException("Book", bookId)
if (bookToLend.currentLoan() != null) throw BookServiceException("The book with id=$bookId is already borrowed by a user")
if (useStreamingDataToCheckUser) {
if (userReplicaService.getById(bookLoan.userId) == null) {
throw NotFoundException("User", bookLoan.userId)
}
}
val bookLoanToCreate = bookLoanToSaveToEntityConverter.convert(Pair(bookLoan, bookToLend))
bookToLend.loans.add(bookLoanToCreate)
bookRepository.save(bookToLend)
val lentBookModel = bookEntityToModelConverter.convert(bookToLend)
outboxMessageService.saveBookLentEventMessage(lentBookModel)
return bookLoanEntityToDtoConverter.convert(bookToLend.currentLoan()!!)
}If you set user.check.use-streaming-data: true in the service’s
config,
then useStreamingDataToCheckUser is true which tells the method to use streaming data to check a user before creation of a book
loan: the method tries to find an
active
user with the specified id. If it is successful, the method changes business data (that is, it inserts into the database
BookLoan entity
with specified the book and the user) and stores an outbox message of BookLent type. Otherwise, the method throws an exception and returns it to a user in a
response body.
If you set user.check.use-streaming-data: false, the scenario differs from the one discussed above only in that the lendBook() method
skips checking that the specified user exists and is active despite the fact that the user_replica table still exists, that is, this
simulates the case where you have not configured replication of the user data table. However, the further continuation of the saga may
differ because now we rely on the user verification to happen in user-service. If we use the request body above with "userId": 2,
everything is fine, and the saga continues in the next service, notification-service. But if we use in the request body certainly not
existing in the database userId (for example, 502), the user-service receives a message of BookLent type containing userId value
that doesn’t exist in its library_user table; therefore, user-service publishes a message of RollbackBookLentCommand type which will
mean that book-service should perform a compensating transaction that is to rollback somehow the creation of a BookLoan entity. The
message eventually occurs in inbox table of the database of book-service through
user.source and
book.sink connectors and
is processed
using Inbox pattern. When processing the message, the
cancelBookLoan()
is called:
BookService.cancelBookLoan() method@Transactional(propagation = Propagation.REQUIRES_NEW, rollbackFor = [Exception::class])
override fun cancelBookLoan(bookId: Long, bookLoanId: Long) {
log.debug("Start cancelling book loan for a book: bookId={}, bookLoanId={}", bookId, bookLoanId)
val bookToCancelLoan = getBookEntityById(bookId) ?: throw NotFoundException("Book", bookId)
val modelOfBookToCancelLoan = bookEntityToModelConverter.convert(bookToCancelLoan)
val bookLoanToCancel = bookToCancelLoan.loans.find { it.id == bookLoanId } ?: throw NotFoundException("BookLoan", bookLoanId)
val currentLoan = bookToCancelLoan.currentLoan()
if (currentLoan == null || bookLoanToCancel.id != currentLoan.id) throw BookServiceException("BookLoan with id=$bookLoanId can't be canceled")
bookLoanToCancel.status = BookLoanEntity.Status.Canceled
bookRepository.save(bookToCancelLoan)
outboxMessageService.saveBookLoanCanceledEventMessage(modelOfBookToCancelLoan)
}The method sets the status of the
BookLoan entity
to Canceled. After that, it publishes a message of BookLoanCanceled type that user-service will process as well as one of BookLent type.
cancelBookLoan() method differs
from other methods of BookService in that it is initiated by processing of an inbox message (not by request to REST API of the book-service). RollbackBookLentCommand type is the only inbox message type processed by
book-service.
You will find more details about transaction management when implementing the Inbox pattern in the User service section.
user-service processes all messages published by book-service and we will consider the implementation of Inbox pattern in more detail on
its example (see the User service section), specifically, using messages of the mentioned BookChanged, BookLent, and BookLoanCanceled types.
The following is a combined table containing a
full list
of message types produced by the book-service and a
full list of REST API methods of the service
(Initiated by REST API method table column):
| Message type | Type of message payload | Message meaning | Initiated by REST API method (or type of inbox message) |
|---|---|---|---|
|
|
A book was created |
|
|
|
Data of a book was changed |
|
|
|
A book was deleted |
|
- |
- |
Returns list of all books |
|
|
|
A book was lent to a specified user |
|
|
|
A book loan was cancelled |
( |
|
|
A user returned a book to the library |
|
|
|
Data of an author was changed |
|
- |
- |
Returns list of all authors |
|
Because of, as mentioned above, the service implements Inbox pattern, it would be possible to put all commands for a change in
the library initiated by methods of the REST API to the inbox table for further processing. That would allow to return the response
to a user almost immediately; the response would contain the information that the service accepted the request and will process it soon.
However, it is unknown whether the processing will complete successfully or will fail, so I decided to make the service respond to a
user after committing the changes (updated business data with an appropriate outbox event) to the database. The only event type
processed
by book-service is RollbackBookLentCommand (it is published by user-service).
User service
This section covers:
-
implementation of Inbox pattern on the microservice side, specifically, how to process new messages from
inboxtable -
implementation of Transactional outbox pattern on the microservice side based on direct writes to the WAL and comparison of it with the approach that uses the outbox table
-
some aspects of error handling and transaction management when implementing the Transactional outbox and Inbox patterns
-
how to publish a compensating transaction
-
creation of notifications with custom CSS using
kotlinx-htmllibrary
This service stores information about users of the library. It also processes all the messages from inbox table (the messages are published
by book-service (see the previous section)) implementing thus the second part of Inbox pattern. The first part of the pattern implementation
is to deliver the message from
Kafka to a microservice’s database; it is done using Kafka Connect and Debezium and is discussed in the Connectors configuration section. As a
result of message processing, the service creates commands to send appropriate notifications to the users. For example, if a user borrowed a
book and later the book’s data has changed, the user will receive a notification about that. There is also a scenario when the service shouldn’t
proceed with the message and should publish thus a compensating transaction (a message of RollbackBookLentCommand type); that was considered in the previous
section. As book-service, this service sends the messages using Transactional outbox pattern. The service’s database contains library_user table which
is the data source for user_replica table of the database of book-service.
The main class is the same as in book-service and looks like this:
@SpringBootApplication
@ImportRuntimeHints(CommonRuntimeHints::class)
@EnableScheduling
class UserServiceApplication

fun main(args: Array<String>) {
    runApplication<UserServiceApplication>(*args)
}
The high-level algorithm of what is done inside user-service (as a part of a whole system) when it processes an inbox message was described in the introduction.
We will now take a detailed look at what the service does, including how the Inbox pattern is implemented on the microservice side. We will continue to use an
update of a book scenario; now it will help us to consider Inbox pattern implementation.
The structure of the inbox table looks like this:
inbox tablecreate table inbox(
id uuid primary key,
source varchar not null,
type varchar not null,
payload jsonb not null,
status varchar not null default 'New',
error varchar,
processed_by varchar,
version smallint not null default 0,
created_at timestamptz not null default current_timestamp,
updated_at timestamptz not null default current_timestamp
);The table is populated with the messages passing in this way: book-service →
book database → book.source
connector → Kafka → user.sink
connector → user database. As you see from the listing above, the messages in inbox table are not in CloudEvents format; instead, they have a custom
structure containing only four columns corresponding to appropriate fields of CloudEvents envelope: id, source, type, and payload (data field of the
envelope). These columns are sufficient for the user-service to process an event. The processing algorithm expects that the payload column contains a
message in JSON format. Using Hibernate, the mapping between the table and InboxMessageEntity looks as follows:
@Entity
@Table(name = "inbox")
class InboxMessageEntity(
    @Id
    val id: UUID,
    val source: String,
    @Enumerated(value = EnumType.STRING)
    val type: EventType,
    @JdbcTypeCode(SqlTypes.JSON)
    val payload: JsonNode,
    @Enumerated(value = EnumType.STRING)
    var status: Status,
    var error: String?,
    var processedBy: String?,
    @Version
    val version: Int
) : AbstractEntity() {

    enum class Status {
        New,
        ReadyForProcessing,
        Completed,
        Error
    }
}
I designed the processing of inbox messages based on the following requirements to the parallelization of the processing:
-
multiple instances of the service can process different messages independently and in the same time
-
the processing task running on each instance can process multiple messages in parallel
Obviously, we don’t want a message to be processed by more than one instance. For that, I use pessimistic write lock that ensures that the current service instance obtains an exclusive lock on each record (message) from the list to be processed and, therefore, prevents the records from being read, updated or deleted by another service instance.
Further, considering the processing on a service instance, there should be a transaction that acquires the pessimistic write lock when retrieving a batch of inbox messages to process them. If the microservice processes the messages in the same transaction, it can only process them in the sequential manner because it is technically difficult in Spring to process each message in a separate thread but inside the original transaction. Therefore, to support the parallel processing of the messages by a service instance, each message should be processed inside its own separate transaction. Based on the above, I designed the following algorithm of messages processing:
-
defining the list of messages that will be processed by the current instance of the service (marking process)
-
processing the messages intended for the current instance
If there is only one instance of our service, or we don’t need to process the messages by multiple instances, the algorithm will be much simpler,
specifically, we won’t need the first step of the algorithm as we don’t need to define which inbox messages are processed by which instances. If there
are multiple instances of our service, we can use, for example, shedlock library which prevents the task from being executed by more than one instance.
Let’s look at how these thoughts are implemented in code.
InboxProcessingTask
starts processing new messages in the inbox table at a specified interval
(5 seconds) and looks like this:
InboxProcessingTask implementation@Component
class InboxProcessingTask(
private val inboxMessageService: InboxMessageService,
private val applicationTaskExecutor: AsyncTaskExecutor,
@Value("\${inbox.processing.task.batch.size}")
private val batchSize: Int,
@Value("\${inbox.processing.task.subtask.timeout}")
private val subtaskTimeout: Long
) {
private val log = LoggerFactory.getLogger(this.javaClass)
@Scheduled(cron = "\${inbox.processing.task.cron}")
fun execute() {
log.debug("Start inbox processing task")
val newInboxMessagesCount = inboxMessageService.markInboxMessagesAsReadyForProcessingByInstance(batchSize)
log.debug("{} new inbox message(s) marked as ready for processing", newInboxMessagesCount)
val inboxMessagesToProcess = inboxMessageService.getBatchForProcessing(batchSize)
if (inboxMessagesToProcess.isNotEmpty()) {
log.debug("Start processing {} inbox message(s)", inboxMessagesToProcess.size)
val subtasks = inboxMessagesToProcess.map { inboxMessage ->
applicationTaskExecutor
.submitCompletable { inboxMessageService.process(inboxMessage) }
.orTimeout(subtaskTimeout, TimeUnit.SECONDS)
}
CompletableFuture.allOf(*subtasks.toTypedArray()).join()
}
log.debug("Inbox processing task completed")
}
}The method to mark inbox messages to be processed by the current instance receives batchSize — configuration parameter — which tells how
many new messages (ordered by created_at column’s value) in the inbox table should be marked. It looks like this:
@Transactional(propagation = Propagation.REQUIRES_NEW, noRollbackFor = [RuntimeException::class])
override fun markInboxMessagesAsReadyForProcessingByInstance(batchSize: Int): Int {
    fun saveReadyForProcessing(inboxMessage: InboxMessageEntity) {
        log.debug("Start saving a message ready for processing, id={}", inboxMessage.id)

        if (inboxMessage.status != InboxMessageEntity.Status.New) throw UserServiceException("Inbox message with id=${inboxMessage.id} is not in 'New' status")

        inboxMessage.status = InboxMessageEntity.Status.ReadyForProcessing
        inboxMessage.processedBy = applicationName

        inboxMessageRepository.save(inboxMessage)
    }

    val newInboxMessages = inboxMessageRepository.findAllByStatusOrderByCreatedAtAsc(InboxMessageEntity.Status.New, PageRequest.of(0, batchSize))

    return if (newInboxMessages.isNotEmpty()) {
        newInboxMessages.forEach { inboxMessage -> saveReadyForProcessing(inboxMessage) }
        newInboxMessages.size
    } else 0
}
Eventually, each message in the batch is updated (see saveReadyForProcessing method) with the new status (ReadyForProcessing) and the name
of the instance that should process the message. The method returns the number of messages that were marked.
The messages to process are retrieved using
InboxMessageRepository
with the aforementioned pessimistic write lock:
interface InboxMessageRepository : JpaRepository<InboxMessageEntity, UUID> {

    @Lock(LockModeType.PESSIMISTIC_WRITE)
    fun findAllByStatusOrderByCreatedAtAsc(status: InboxMessageEntity.Status, pageable: Pageable): List<InboxMessageEntity>

    ...
}
The lock is in effect within the transaction that wraps markInboxMessagesAsReadyForProcessingByInstance method.
Next, the algorithm retrieves messages that are intended to pe processed by the current instance using getBatchForProcessing method. The
messages are processed in parallel using the following approach:
val subtasks = inboxMessagesToProcess.map { inboxMessage ->
    applicationTaskExecutor
        .submitCompletable { inboxMessageService.process(inboxMessage) }
        .orTimeout(subtaskTimeout, TimeUnit.SECONDS)
}
CompletableFuture.allOf(*subtasks.toTypedArray()).join()
Usage of applicationTaskExecutor bean of AsyncTaskExecutor type allows to process each inbox message in a separate thread. The subtaskTimeout parameter
specifies how long to wait before completing a subtask exceptionally with a TimeoutException. The thread of the main task will wait until all subtasks finish,
successfully or exceptionally. The applicationTaskExecutor bean is constructed as follows:
applicationTaskExecutor bean@Bean(TaskExecutionAutoConfiguration.APPLICATION_TASK_EXECUTOR_BEAN_NAME)
fun asyncTaskExecutor(): AsyncTaskExecutor = TaskExecutorAdapter(Executors.newVirtualThreadPerTaskExecutor())This way we provide custom applicationTaskExecutor bean that overrides the default one; it uses JDK 21’s
Virtual Threads starting a new virtual Thread for
each task.
Each inbox message is processed as follows:
@Transactional(propagation = Propagation.REQUIRES_NEW, noRollbackFor = [RuntimeException::class])
override fun process(inboxMessage: InboxMessageEntity) {
    log.debug("Start processing an inbox message with id={}", inboxMessage.id)

    if (inboxMessage.status != InboxMessageEntity.Status.ReadyForProcessing)
        throw UserServiceException("Inbox message with id=${inboxMessage.id} is not in 'ReadyForProcessing' status")
    if (inboxMessage.processedBy == null)
        throw UserServiceException("'processedBy' field should be set for an inbox message with id=${inboxMessage.id}")

    try {
        incomingEventService.process(inboxMessage.type, inboxMessage.payload)
        inboxMessage.status = InboxMessageEntity.Status.Completed
    } catch (e: Exception) {
        log.error("Exception while processing an incoming event (type=${inboxMessage.type}, payload=${inboxMessage.payload})", e)
        inboxMessage.status = InboxMessageEntity.Status.Error
        inboxMessage.error = e.stackTraceToString()
    }

    inboxMessageRepository.save(inboxMessage)
}
The configuration of transaction management specifies that:
-
the method should be wrapped in a new transaction
-
RuntimeExceptionand its subclasses must not cause a transaction rollback
I wrapped incomingEventService.process method call in try/catch to prevent possibility of endless number of attempts to process an inbox message;
otherwise, in case of an exception in that method, the status of the inbox message would never change and always be ReadyForProcessing. The considered
implementation makes only one attempt to process a message.
Next, InboxMessageService delegates processing of a business event inside a message (inboxMessage.payload) to
IncomingEventService:
@Transactional(propagation = Propagation.NOT_SUPPORTED)
override fun process(eventType: EventType, payload: JsonNode) {
    log.debug("Start processing an incoming event: type={}, payload={}", eventType, payload)

    when (eventType) {
        BookCreated -> processBookCreatedEvent(getData(payload))
        BookChanged -> processBookChangedEvent(getData(payload))
        BookDeleted -> processBookDeletedEvent(getData(payload))
        BookLent -> processBookLentEvent(getData(payload))
        BookLoanCanceled -> processBookLoanCanceledEvent(getData(payload))
        BookReturned -> processBookReturnedEvent(getData(payload))
        AuthorChanged -> processAuthorChangedEvent(getData(payload))
        else -> throw UserServiceException("Event type $eventType can't be processed")
    }
}
The configuration of transaction management specifies that the original transaction started in InboxMessageService.process() method should be
suspended; thus, any downstream error won’t affect the original transaction.
In the considered scenario of a book update, the processing of the event looks like this:
BookChanged eventprivate fun processBookChangedEvent(currentAndPreviousState: CurrentAndPreviousState<Book>) {
val oldBook = currentAndPreviousState.previous
val newBook = currentAndPreviousState.current
val currentLoan = newBook.currentLoan
if (currentLoan != null) {
val bookDelta = deltaService.getDelta(newBook, oldBook)
val notification = notificationService.createNotification(
currentLoan.userId,
Notification.Channel.Email,
BaseNotificationMessageParams(BookChanged, newBook.name, bookDelta)
)
outboxMessageService.saveSendNotificationCommandMessage(notification, currentLoan.userId)
}
}If the book is borrowed by a user, IncomingEventService:
-
obtains a delta between current a previous states of the book
-
creates a notification for the user that includes the delta
-
stores an outbox message containing the notification command
It turns out that in the scenario under consideration, the Inbox pattern implementation is followed by the Transactional outbox pattern implementation.
Saving an outbox message is implemented in a separate transaction and looks like this:
@Service
class OutboxMessageServiceImpl(
    private val outboxMessageRepository: OutboxMessageRepository,
    private val objectMapper: ObjectMapper
) : OutboxMessageService {

    ...

    @Transactional(propagation = Propagation.REQUIRES_NEW, rollbackFor = [Exception::class])
    override fun saveSendNotificationCommandMessage(payload: Notification, aggregateId: Long) =
        save(createOutboxMessage(AggregateType.Notification, null, SendNotificationCommand, payload))

    private fun <T> createOutboxMessage(aggregateType: AggregateType, aggregateId: Long?, type: EventType, payload: T) = OutboxMessage(
        aggregateType = aggregateType,
        aggregateId = aggregateId,
        type = type,
        topic = outboxEventTypeToTopic[type] ?: throw UserServiceException("Can't determine topic for outbox event type `$type`"),
        payload = objectMapper.convertValue(payload, JsonNode::class.java)
    )

    private fun <T> save(outboxMessage: OutboxMessage<T>) {
        log.debug("Start saving an outbox message: {}", outboxMessage)
        outboxMessageRepository.writeOutboxMessageToWalInsideTransaction(outboxMessage)
    }
}
The considered implementation of the Transactional outbox pattern has two changes compared to the one considered in Book service section:
-
the transaction includes only one operation
In this scenario, only an outbox message is stored during the transaction, and it is not needed to store any "business" data (unlike
book-servicethat also stores data about books and authors). Of course, you can include any change of any business entity in the transaction if that is required by your use case. -
an outbox message (serialized to JSON) is stored directly in the WAL
Therefore, the outbox table is not needed. This is done using
pg_logical_emit_message()Postgres system function.
To send an outbox message directly to the WAL, I implemented the following repository:
@Repository
class OutboxMessageRepository(
    private val entityManager: EntityManager,
    private val objectMapper: ObjectMapper
) {
    fun <T> writeOutboxMessageToWalInsideTransaction(outboxMessage: OutboxMessage<T>) {
        val outboxMessageJson = objectMapper.writeValueAsString(outboxMessage)
        entityManager.createQuery("SELECT pg_logical_emit_message(true, 'outbox', :outboxMessage)")
            .setParameter("outboxMessage", outboxMessageJson)
            .singleResult
    }
}
This and other possible applications of pg_logical_emit_message() function are considered in this
blog post. We will discuss WAL and how it works in detail in the Persistence layer section.
Both approaches to implementing the Transactional outbox pattern result in a message appearing in the WAL, so both approaches can be used in conjunction with a Debezium source connector. Let’s look at the main differences between them:
-
the approach using the
outboxtable:-
allows you to control how long outgoing messages are stored in the table.
In this project, as shown in Book service section, the messages are deleted right after their creation, therefore, in both cases, you won’t find a message in the database. But I don’t rule out that you might need to store outgoing messages for some time, for example, for troubleshooting, monitoring, or distributed tracing purposes: this can help you to track a message path in the distributed system.
-
-
the approach using direct writes to the WAL:
-
avoids any housekeeping needs.
Specifically, there is no need for any maintenance of the
outboxtable and removal of the messages after they have been consumed from the WAL. -
emphasizes the nature of an outbox being an append-only medium: messages must never be modified after being added to the outbox, which might happen by accident with the table-based approach.
-
if you are using a database other than PostgreSQL, you should check if your database supports direct writes of messages to its write-ahead log as well as discover whether Debezium can process such messages.
-
If you use the latter approach, you need to define a common message format for all the emitted events, since there is no table schema that a message must
conform to. You can, for example, derive that format from a set of outbox table
columns. I implement OutboxMessage DTO to have a structure
similar to the outbox table considered in the previous section:
data class OutboxMessage<T>(
    val id: UUID = UUID.randomUUID(),
    val aggregateType: AggregateType,
    val aggregateId: Long?,
    val type: EventType,
    val topic: String,
    val payload: T
)
The DTO has an additional topic field that determines the last part of a topic name to which a message should be sent;
it
can be either notifications or rollback depending on a message type so a resulting topic name derived by the
appropriate connector will be either
library.notifications or library.rollback.
In this project, the order of inbox messages processing is not the main concern: it is supposed that the main library entities such as books and authors
are not changed very often. But if in your case it is important to process inbox message in the same order in which they were produced, you need to
do your own research and change the algorithm. While we assume that the order is preserved when the messages from outbox table of book database
are passed to inbox table of user database (Kafka guarantees the order within a partition, and it is supposed that both source and sink connectors
also do it), we need to ensure that the inbox messages are processed by user-service in the same order. For example, in the considered
scenario, how can we ensure that two notifications are created by user-service in the same order in which two updates of the same book occurred
in book-service (let’s suppose that the updates occurred almost simultaneously)? First, in this case, the processing of the inbox messages must
not be parallelized neither between multiple instances of the service nor between multiple threads inside an instance. For example, if we don’t
meet the first condition, and the contents of the inbox table looks like this:
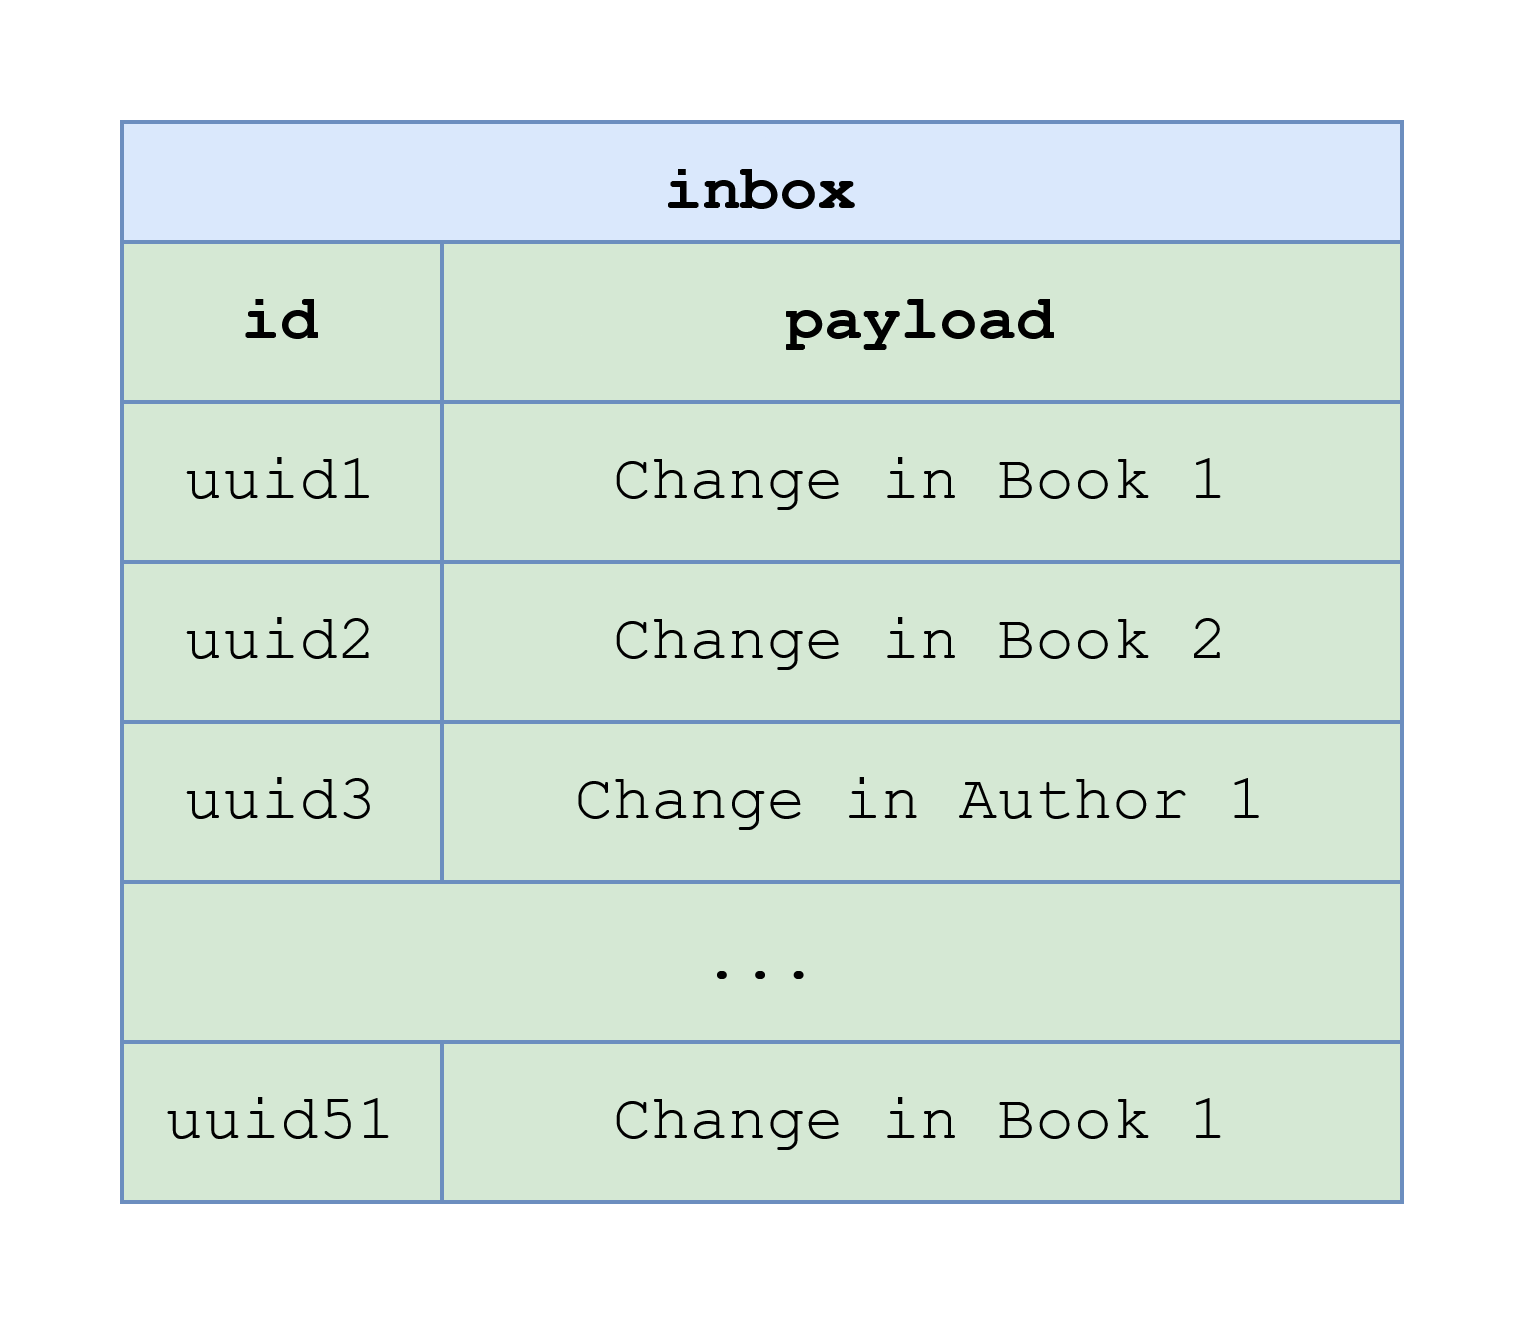
it is not guaranteed that uuid1 message will be processed by one instance before uuid51 message will be processed by another instance (considering
the batch size parameter is 50). Therefore, it is possible that notifications will be delivered to a user that borrowed Book 1 in a different order than
the original.
The same logic applies to the case when one instance processes inbox messages about changes in the same book in two threads.
Therefore, both updates of the same book should be processed by the same instance and sequentially. To do that, considering that we are using Kafka,
we should use the same mechanism by which it is guaranteed that messages within a Kafka partition are inserted into inbox table in the same order in
which they were inserted into outbox table. It is keys of Kafka messages. The produced Kafka messages about two updates should have the same key;
for that, I use id of the book by configuring Outbox Event Router
in book.source connector (see
transforms.outbox.table.field.event.key property) that will be discussed in detail in the Connectors configuration section. We can add event_key
column to inbox table and, use it in where clause when selecting messages to process by a service instance, and then process messages with the same
key sequentially.
If you understand that your service will not process a large number of messages, and one instance of the service is enough for that, you might consider processing all new messages (that is, from all Kafka partitions of a topic) sequentially by that instance.
Messages of other types are processed similarly, but it should be noted who is notified in different cases:
-
BookCreated,BookDeletedtypes — all users of the library -
BookLent— a user that borrowed the book -
BookLoanCanceled— a user that tried to borrow the book but that was canceled -
BookReturned— a user that returned the book -
AuthorChanged— users who borrowed books written by the author
Let’s talk about how to initiate a compensating transaction for the scenario discussed in the previous section. Remember, when the user-service
receives a message of BookLent type containing userId value that doesn’t exist in its library_user table it should publish a message of
RollbackBookLentCommand type that should initiate execution of a compensating transaction in book-service that is to rollback somehow the creation
of a BookLoan entity. There is nothing unusual in the implementation of this scenario: the service performs user check and if a user is not found, a
message of RollbackBookLentCommand type is stored in the outbox table (in the same way as is stored a command to send a notification):
private fun processBookLentEvent(book: Book) {
    ...
    val user = userService.getById(bookLoan.userId)
    // book can't be borrowed because the user doesn't exist
    if (user == null) {
        outboxMessageService.saveRollbackBookLentCommandMessage(book)
    }
    ...
}
I don’t remove the messages from inbox table immediately after the processing because I think, there are cases when you may need a message some time after
processing, for example, to repeat it or investigate an error. But definitely, after some time, you can delete the message; for that, you may need to
implement separate house-keeping process to stop the table from growing indefinitely.
In this project, formatting the user notification is done using kotlinx.html library. The library allows
to create
an HTML document along with custom CSS that further, in notification-service, can be sent to a user’s email or over WebSocket. We will see that
formatting in the Testing section.
Note: when considering book-service we have seen that there is an alternative to the connector to pass messages from outbox table of
book database to Kafka. Similarly, an alternative to pass messages from Kafka to inbox table of user database is to create a component
in user-service that listens an appropriate Kafka topic and puts messages from the topic to the inbox table.
Notification service
This section covers:
-
delivery of notifications to users, specifically, through WebSocket
-
implementation of the UI for receiving the notifications
This service receives commands to send notifications and delivers them to users through email or, for demo purposes, through
WebSocket. As well as book-service and user-service, notification-service is an example of implementation of
Inbox and Saga (as the final participant) patterns; but unlike those services, it doesn’t need Transactional outbox pattern. The implementation of these
and other event-driven architecture patterns is a key part of microservices implementation in this project and was considered in Book service and User
service sections. So in this section, we will focus on the message delivery, specifically, through WebSocket, because the
email delivery
is quite straightforward.
If you want to test the email delivery, you need to:
-
use
testprofileThe setting up of a Spring profile is discussed in the Build section; briefly, you need to:
-
configure
ProcessAotGradle task in the build script addingtestprofile -
specify the profile as environment variable for the service
-
-
provide SMTP properties for Gmail or other email provider in the testing environment config
Please note that email delivery implementation is only for testing purposes; it sends an email to the sender.
WebSocket is an application level protocol providing full-duplex communication channels over a single TCP connection that is using TCP as transport layer. STOMP is a simple text-based messaging protocol that can be used on top of the lower-level WebSocket.
To implement WebSocket server, first, we need to add the org.springframework.boot:spring-boot-starter-websocket dependency to
the build script.
In this project, WebSocket is only used to notify users about some changes in the books in the library, and we don’t need to receive messages from users that is the messaging is unidirectional. The application is configured to enable WebSocket and STOMP messaging as follows:
@Configuration
@EnableWebSocketMessageBroker
class WebSocketConfig : WebSocketMessageBrokerConfigurer {

    override fun registerStompEndpoints(registry: StompEndpointRegistry) {
        registry.addEndpoint("/ws-notifications").setAllowedOriginPatterns("*").withSockJS()
    }

    override fun configureMessageBroker(config: MessageBrokerRegistry) {
        config.enableSimpleBroker("/topic")
    }
}
WebSocketConfig is annotated with @Configuration to indicate that it is a Spring configuration class and with @EnableWebSocketMessageBroker
that enables WebSocket message handling, backed by a message broker. The registerStompEndpoints method registers the /ws-notifications endpoint,
enabling SockJS fallback options so that alternate transports can be used if WebSocket is not available. The
SockJS client will attempt to connect to /ws-notifications and use the best available transport (WebSocket, XHR streaming, XHR polling, and so
on). The configureMessageBroker method implements the default method in WebSocketMessageBrokerConfigurer to configure the message broker. It
starts by calling enableSimpleBroker to enable a simple memory-based message broker to carry the messages on destinations prefixed with /topic.
A command to send notification from the inbox table is processed as follows:
private fun processSendNotificationCommand(notification: Notification) {
    when (notification.channel) {
        Notification.Channel.Email -> {
            emailService.send(notification.recipient, notification.subject, notification.message)
        }

        else -> throw NotificationServiceException("Channel is not supported: {${notification.channel.name}}")
    }
}
At any environment except
test,
the emailService is an instance of
EmailServiceWebSocketStub:
SimpMessagingTemplate@Service
class EmailServiceWebSocketStub(
private val simpMessagingTemplate: SimpMessagingTemplate
) : EmailService {
private val log = LoggerFactory.getLogger(this.javaClass)
override fun send(to: String, subject: String, text: String) {
// convert back to Notification
val notification = Notification(Notification.Channel.Email, to, subject, text, LocalDateTime.now())
simpMessagingTemplate.convertAndSend("/topic/library", notification)
log.debug("A message over WebSocket has been sent")
}
}The WebSocket client is a part of the user interface that was developed within the notification-service for demo purposes. The client
receives messages the sending of which was shown in the previous section; the messages are displayed in the UI.
The following dependencies are used to create the UI:
implementation("org.webjars:webjars-locator-lite")
implementation("org.webjars:sockjs-client:$sockjsClientVersion")
implementation("org.webjars:stomp-websocket:$stompWebsocketVersion")
implementation("org.webjars:bootstrap:$bootstrapVersion")
implementation("org.webjars:jquery:$jqueryVersion")
By default, any resources with a path in /webjars/** are served from JAR files if they are packaged in the WebJars format. The
org.webjars:webjars-locator-lite dependency is used to specify
version agnostic URLs for WebJars.
The /resources/static
folder of the service contains the resources for the frontend application: app.js, index.html, and main.css. The most interesting is
app.js:
var stompClient = null;

function setConnected(connected) {
    $("#connect").prop("disabled", connected);
    $("#disconnect").prop("disabled", !connected);
    if (connected) {
        $("#notifications").show();
    }
    else {
        $("#notifications").hide();
    }
    $("#messages").html("");
}

function connect() {
    var socket = new SockJS('/ws-notifications');
    stompClient = Stomp.over(socket);
    stompClient.connect({}, function (frame) {
        setConnected(true);
        console.log('Connected: ' + frame);
        stompClient.subscribe('/topic/library', function (notification) {
            showNotification(JSON.parse(notification.body));
        });
    });
}

function disconnect() {
    if (stompClient !== null) {
        stompClient.disconnect();
    }
    setConnected(false);
    console.log("Disconnected");
}

function showNotification(notification) {
    let message = `
    <tr><td>
        <div><b>To: ${notification.recipient} | Subject: ${notification.subject} | Notification created at: ${parseTime(notification.createdAt)}</b></div>
        <br>
        <div>${notification.message}</div>
    </td></tr>`;

    $("#messages").append(message);
}

function parseTime(dateString) {
  return new Date(Date.parse(dateString)).toLocaleTimeString();
}

$(function () {
    $("form").on('submit', function (e) {
        e.preventDefault();
    });
    $("#connect").click(function() { connect(); });
    $("#disconnect").click(function() { disconnect(); });
});
The main pieces of this JavaScript file to understand are connect and showNotification functions.
The connect function uses SockJS and stomp.js (these libraries are imported in
index.html)
to open a connection to /ws-notifications (STOMP over WebSocket endpoint configured in the previous section). Upon a successful connection,
the client subscribes to the /topic/library destination, where the service publishes notifications to all users. When a notification is
received on that destination, it is appended to the DOM:
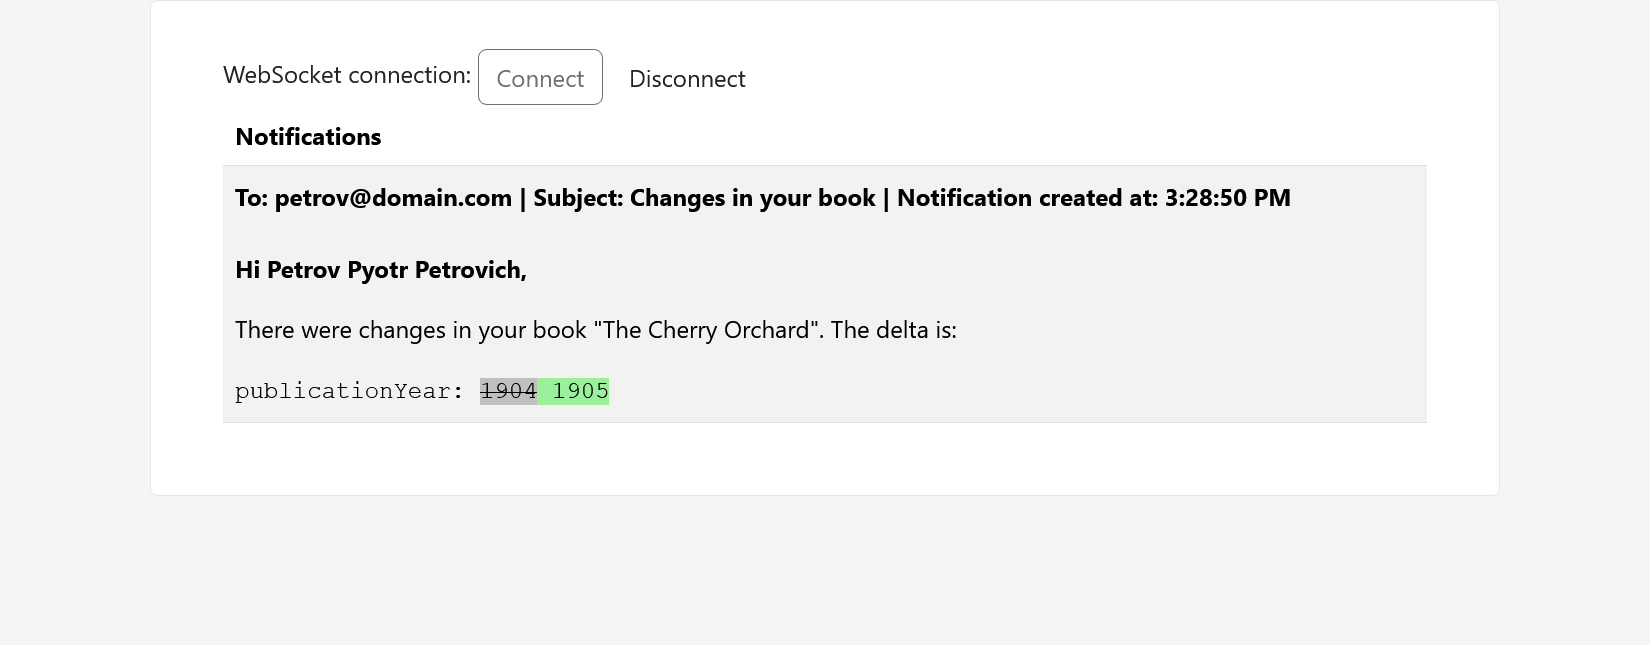
Notification delivery will be demonstrated in the Testing section.
It would be also possible to set up email streaming from the database to some email provider (in this project, it is Gmail). It could
be done, for example, by storing notifications in outbox table of the considered service and setting up two connectors: Debezium
PostgreSQL connector that would read messages containing the notifications from outbox table and send them to Kafka and some Email
sink connector that would put notification to the provider users' inboxes. I decided though that it would be over-engineering and
current implementation is enough for this project.
Build
This section covers how to set up the following:
-
building a native image of Spring Boot application and an appropriate Docker image containing the native image
-
reflection hints for the native image
-
a Spring profile for the native image
-
health checks for the Docker image
GraalVM native images are standalone executables that can be generated by processing compiled Java applications ahead-of-time. Native images generally have a smaller memory footprint and start faster than their JVM counterparts.
The Spring Boot Gradle plugin automatically configures
AOT tasks when the Gradle Plugin for GraalVM Native Image is
applied. In such case, bootBuildImage task will generate a native image rather than a JVM one.
While there are many benefits from using native images, please note:
-
GraalVM imposes a number of constraints and making your application (in particular, a Spring Boot microservice), a native executable might require a few tweaks.
Particularly, the Spring @Profile annotation and profile-specific configuration have limitations.
-
building a native image of a Spring Boot microservice takes much more time than a JVM one.
As an example, you can look at execution times of builds of three microservices using this GitHub Actions workflow. On my machine, it takes about 4 minutes to rebuild all three microservices in parallel with Gradle.
Building a standalone binary with the native-image tool takes place under a closed world assumption (see
Native Image docs). The native-image tool performs a static analysis to
see which classes, methods, and fields within your application are reachable and must be included in the native image. The analysis
cannot always exhaustively predict all uses of dynamic features of Java, specifically, it can only partially detect application
elements that are accessed using the Java Reflection API. So, you need to provide it with details about reflectively accessed classes,
methods, and fields. In this project, it is done by Spring AOT engine that generates hint files containing
reachability metadata — JSON data that describes how GraalVM
should deal with things that it can’t understand by directly inspecting the code.
To provide my own
hints, I register some classes and their public methods and constructors for reflection explicitly:
class CommonRuntimeHints : RuntimeHintsRegistrar {

    override fun registerHints(hints: RuntimeHints, classLoader: ClassLoader?) {
        hints.reflection()
            // required for JSON serialization/deserialization
            .registerType(Book::class.java, MemberCategory.INVOKE_PUBLIC_METHODS, MemberCategory.INVOKE_DECLARED_CONSTRUCTORS)
            .registerType(Author::class.java, MemberCategory.INVOKE_PUBLIC_METHODS, MemberCategory.INVOKE_DECLARED_CONSTRUCTORS)
            .registerType(BookLoan::class.java, MemberCategory.INVOKE_PUBLIC_METHODS, MemberCategory.INVOKE_DECLARED_CONSTRUCTORS)
            .registerType(CurrentAndPreviousState::class.java, MemberCategory.INVOKE_PUBLIC_METHODS, MemberCategory.INVOKE_DECLARED_CONSTRUCTORS)
            .registerType(Notification::class.java, MemberCategory.INVOKE_PUBLIC_METHODS, MemberCategory.INVOKE_DECLARED_CONSTRUCTORS)
            .registerType(OutboxMessage::class.java, MemberCategory.INVOKE_PUBLIC_METHODS, MemberCategory.INVOKE_DECLARED_CONSTRUCTORS)
            // required to persist entities
            // TODO: remove after https://hibernate.atlassian.net/browse/HHH-16809
            .registerType(Array<UUID>::class.java, MemberCategory.INVOKE_DECLARED_CONSTRUCTORS)
    }
}
In the future, that approach may change.
Then, CommonRuntimeHints is imported by all microservices, for example:
CommonRuntimeHints usage@SpringBootApplication
@ImportRuntimeHints(CommonRuntimeHints::class)
@EnableScheduling
class BookServiceApplicationIn this project, generated hint files can be found in <service-name>/build/generated/aotResources folder. You can see that besides
the custom reflection hints it also contains automatically generated hints, for example, for the resources that are needed for the
microservices such as configuration (application.yaml) and database migration (/db/migration/*) files.
To build a Docker image containing a native image of Spring Boot application, you need to execute ./gradlew :<service name>:bootBuildImage
in the root directory of the project. On Windows, you can use
this script to rebuild all three microservices and restart the
whole project. The script contains commands for parallel and sequential building of all microservices. Please note that using this approach you
don’t need Dockerfile for any microservice.
Let’s consider the build configuration on the example of book-service: the command is gradlew :book-service:bootBuildImage. bootBuildImage
is a task provided by Spring Boot Gradle Plugin (org.springframework.boot); under the hood it uses Gradle Plugin for GraalVM Native Image
(org.graalvm.buildtools.native) to generate the native image (rather than a JVM one) and packs it into
OCI image using Cloud Native Buildpacks (CNB).
The build config of the service looks like this:
book-service build configurationplugins {
id("org.springframework.boot")
...
id("org.graalvm.buildtools.native")
...
}
tasks.withType<ProcessAot> {
args = mutableListOf("--spring.profiles.active=test")
}
tasks.withType<BootBuildImage> {
buildpacks = setOf("paketobuildpacks/java-native-image", "paketobuildpacks/health-checker")
environment = mapOf("BP_HEALTH_CHECKER_ENABLED" to "true")
imageName = "$dockerRepository:${project.name}"
}In the config of BootBuildImage task, I set:
-
list of buildpacks
By default, the builder uses buildpacks included in the builder image and apply them in a pre-defined order. I need to provide
buildpacksexplicitly to enable health checker in the resulting image.java-native-imagebuildpack allows users to create an image containing a GraalVM native image application.health-checkerbuildpack allows users to enable health checker in the resulting image (usage of health checks will be shown later in this section). -
environment variables
-
BP_HEALTH_CHECKER_ENABLEDspecifies whether a Docker image should contain health checker binary.
-
-
image name
dockerRepositoryisdocker.io/kudryashovroman/event-driven-architectureso the result string isdocker.io/kudryashovroman/event-driven-architecture:book-service; it consists of:-
Docker Hub URL
-
my username on Docker Hub
-
name of the repository
-
tag of the service (images of all services are pushed to the same repository with different tags)
-
You can find more properties to customize an image in the docs.
Of course, you can still build a Docker image of a regular JVM-based application by applying an appropriate build configuration which can help you to reduce
build time of the services and thus speed up local development. A quick way to do that is to remove org.graalvm.buildtools.native from
the list of plugins and remove buildpacks and environment settings from bootBuildImage task configuration; that will allow you to get
JVM-based Docker images but without health check support; to build JVM-based Docker image with health check support, do your own research. To
speed up the local development, you can also start the microservices from your IDE.
If you want beans that are created based on a condition in the native image, you
have to set up the environment when
building the application. Spring profiles
are implemented through conditions, so I have to customize ProcessAot Gradle task as shown above. test profile
defines several beans
implementing some REST API limitations intended for testing environment. So if you deploy this project locally, don’t forget to remove
this customization.
book-service defines only profile-specific beans all of which are annotated @Primary so you don’t need to specify the profile at runtime.
Unlike book-service, notification-service defines not only profile-specific
beans
but also profile-specific
application properties;
to fully enable its test profile, you also need to specify the profile’s name as en environment variable as you do for a regular JVM-based Spring Boot application;
for example, you can do it by adding the environment variable to Docker Compose service definition as follows:
notification-service:
  ...
  environment:
    SPRING_PROFILES_ACTIVE: test
health-checker buildpack contributes a process called health-check. It is recommended that you use this abstract name because it won’t
change if for some reason the underlying health checker process — thc — will change. The thc
tool looks only at the HTTP status: a service is considered OK when it is >= 200 and < 300. The health-check command will be used by Docker
containers of the services as follows:
health-check processbook-service:
...
environment:
THC_PATH: "/actuator/health"
healthcheck:
test: [ "CMD", "/workspace/health-check" ]
interval: 1m
retries: 3
start_period: 10s
timeout: 3sTHC_PATH configures a path for health checks.
Infrastructure
In this section, we will consider the infrastructure of the project that is the tools for implementation of persistence layer, CDC, data streaming, schema registry, messaging, and reverse proxy.
The following is a part of Docker Compose file containing definitions of all the infrastructure tools in this project:
# base configuration
services:

  ...

  # DATABASES FOR MICROSERVICES
  book-db:
    image: postgres:17.0
    container_name: book-db
    restart: always
    environment:
      POSTGRES_DB: book
      POSTGRES_PASSWORD: ${BOOK_DB_PASSWORD}
    healthcheck:
      test: "pg_isready -U postgres"
      interval: 10s
      retries: 3
      start_period: 10s
      timeout: 3s
    command: >
      postgres -c wal_level=logical
               -c timezone=Europe/Moscow

  user-db:
    image: postgres:17.0
    container_name: user-db
    restart: always
    environment:
      POSTGRES_DB: user
      POSTGRES_PASSWORD: ${USER_DB_PASSWORD}
    healthcheck:
      test: "pg_isready -U postgres"
      interval: 10s
      retries: 3
      start_period: 10s
      timeout: 3s
    command: >
      postgres -c wal_level=logical
               -c timezone=Europe/Moscow

  notification-db:
    image: postgres:17.0
    container_name: notification-db
    restart: always
    environment:
      POSTGRES_DB: notification
      POSTGRES_PASSWORD: ${NOTIFICATION_DB_PASSWORD}
    healthcheck:
      test: "pg_isready -U postgres"
      interval: 10s
      retries: 3
      start_period: 10s
      timeout: 3s
    command: >
      postgres -c wal_level=logical
               -c timezone=Europe/Moscow

  # INFRASTRUCTURE
  # One Kafka Connect instance is for the purposes of simplicity. Do your own research to set up a cluster
  kafka-connect:
    image: quay.io/debezium/connect:3.0.1.Final
    container_name: kafka-connect
    restart: always
    depends_on: [ kafka, schema-registry, book-db, user-db, notification-db ]
    environment:
      BOOTSTRAP_SERVERS: kafka:9092
      GROUP_ID: kafka-connect-cluster
      CONFIG_STORAGE_TOPIC: kafka-connect.config
      OFFSET_STORAGE_TOPIC: kafka-connect.offset
      STATUS_STORAGE_TOPIC: kafka-connect.status
      ENABLE_APICURIO_CONVERTERS: true
      ENABLE_DEBEZIUM_SCRIPTING: true
      CONNECT_EXACTLY_ONCE_SOURCE_SUPPORT: enabled
      CONNECT_CONFIG_PROVIDERS: "file"
      CONNECT_CONFIG_PROVIDERS_FILE_CLASS: "org.apache.kafka.common.config.provider.FileConfigProvider"
      CONNECT_LOG4J_LOGGER_org.apache.kafka.clients: ERROR
    volumes:
      - ./kafka-connect/filtering/groovy:/kafka/connect/debezium-connector-postgres/filtering/groovy
      - ./kafka-connect/postgres.properties:/secrets/postgres.properties:ro
      - ./kafka-connect/logs/:/kafka/logs/

  connectors-loader:
    image: bash:5.2
    container_name: connectors-loader
    depends_on: [ kafka-connect ]
    volumes:
      - ./kafka-connect/connectors/:/usr/connectors:ro
      - ./kafka-connect/load-connectors.sh/:/usr/load-connectors.sh:ro
    command: bash /usr/load-connectors.sh

  schema-registry:
    image: apicurio/apicurio-registry:3.0.3
    container_name: schema-registry
    restart: always

  # One Kafka instance is for the purposes of simplicity. Do your own research to set up a cluster
  kafka:
    image: bitnami/kafka:3.8.0
    container_name: kafka
    restart: always
    environment:
      # KRaft settings
      KAFKA_CFG_NODE_ID: 0
      KAFKA_CFG_PROCESS_ROLES: controller,broker
      KAFKA_CFG_CONTROLLER_QUORUM_VOTERS: 0@kafka:9093
      # listeners
      KAFKA_CFG_LISTENERS: PLAINTEXT://:9092,CONTROLLER://:9093
      KAFKA_CFG_ADVERTISED_LISTENERS: PLAINTEXT://:9092
      KAFKA_CFG_LISTENER_SECURITY_PROTOCOL_MAP: CONTROLLER:PLAINTEXT,PLAINTEXT:PLAINTEXT
      KAFKA_CFG_CONTROLLER_LISTENER_NAMES: CONTROLLER
      KAFKA_CFG_INTER_BROKER_LISTENER_NAME: PLAINTEXT
      # other
      KAFKA_CFG_AUTO_CREATE_TOPICS_ENABLE: false
    volumes:
      - ./misc/kafka_data:/bitnami

  caddy:
    image: kudryashovroman/event-driven-architecture:caddy
    container_name: caddy
    restart: always
    depends_on: [ book-service, notification-service ]
    environment:
      DOMAIN: eda-demo.romankudryashov.com
    ports:
      - "80:80"
      - "443:443"
    volumes:
      - ./misc/caddy/Caddyfile:/etc/caddy/Caddyfile:ro
      - ./misc/caddy/data:/data
      - ./misc/caddy/config:/config
Next we will look at each of the tools.
Persistence layer
We start with the persistence layer because this is where all the data changes initially occur. In this project, I use the official Docker image.
As you can see from the listing above, Docker containers of databases of all three microservices are configured the same, for instance:
book databasebook-db:
image: postgres:17.0
container_name: book-db
restart: always
environment:
POSTGRES_DB: book
POSTGRES_PASSWORD: ${BOOK_DB_PASSWORD}
healthcheck:
test: "pg_isready -U postgres"
interval: 10s
retries: 3
start_period: 10s
timeout: 3s
command: >
postgres -c wal_level=logical
-c timezone=Europe/MoscowI think most readers are familiar with most of this listing that is with the Docker Compose service definition; let’s just focus on the database
configuration. You can find different options on how to configure PostgreSQL database running in a Docker container; I use the simplest
approach customizing postgres database server program through command option. The approach allows me to not create a full configuration
file, but only specify the properties that I want to override:
-
wal_levelis set tologicalwal_leveldetermines how much information is written to the write-ahead log;logicalvalue adds information necessary to support logical decoding -
timezoneis set toEurope/Moscow
You can find more Postgres configuration parameters, particularly for WAL and replication, in the docs.
It is not required to set wal_level for notification database because, unlike the other two databases, its appropriate microservice
(notification-service) doesn’t need to implement Transactional outbox pattern or other type of data streaming so there is no source
connector that reads WAL of notification database. I decided
to leave the setting for uniformity of databases configuration.
Write-ahead logging is a standard method for ensuring data integrity. A detailed description can be found in most (if not all) books about transaction processing. Briefly, WAL’s central concept is that changes to data files (where tables and indexes reside) must be written only after those changes have been logged, that is, after WAL records describing the changes have been flushed to permanent storage that. WAL files can be used for database backup, crash recovery, and data replication; the latter is the most interesting for us, as will be shown below.
The WAL (or transaction log) is written in a format your non-Postgres consumers won’t understand. Logical decoding is the way Postgres enables you to translate (decode) the WAL contents into a form that the consumers can use. When a row is changed in a Postgres table, that change is recorded in the WAL. If logical decoding is enabled, the record of that change is passed to the output plugin. The output plugin transforms that record from the WAL internal representation into the format a consumer of a replication slot desires (for example, SQL statement, JSON, or Protocol Buffers). In the context of logical replication, a slot represents a stream of changes that can be replayed to a client in the order they were made on the origin server. The consumer can be any application of your choice or other component such as an instance of Debezium PostgreSQL connector as in this project. Then the transformed data exits Postgres via the replication slot. Finally, the consumer connected to Postgres receives the logical decoding output.
In this project, I use native pgoutput plugin for the Debezium PostgreSQL connectors; if you want to use another plugin, you need to
install it. When using the pgoutput plugin, in addition to replication slot, a
publication should also be created to stream events. Similar
to replication slot, publication is at database level and is defined for a set of tables.
In Postgres, replication slots persist independently of the connection using them and know nothing about the state of their consumer(s). The replication
slots will prevent removal of WAL files and other resources even when there is no connection using them. If a consumer fails forever and cannot be
recovered (an orphaned replication slot) or when a replica cannot replay the WAL segments fast enough, the WAL files will just pile up and eventually
pg_wal directory may run out of space. So if a slot is no longer required it should be dropped.
Let’s try to put the knowledge we have gained into practice. First, open
pgAdmin (localhost:8102) or connect to
the database Docker container by doing the following:
-
docker exec -it book-db bash -
open PostgreSQL interactive terminal
psql -U postgres -d book
At first, we ensure that the settings specified above were applied. The pg_file_settings view provides a summary of the contents of the
server’s configuration file(s); select name, setting from pg_file_settings; query returns the following:
            name            |      setting
----------------------------+--------------------
 listen_addresses           | *
 max_connections            | 100
 shared_buffers             | 128MB
 dynamic_shared_memory_type | posix
 max_wal_size               | 1GB
 min_wal_size               | 80MB
 log_timezone               | Etc/UTC
 datestyle                  | iso, mdy
 timezone                   | Etc/UTC
 lc_messages                | en_US.utf8
 lc_monetary                | en_US.utf8
 lc_numeric                 | en_US.utf8
 lc_time                    | en_US.utf8
 default_text_search_config | pg_catalog.english
(14 rows)
timezone setting has the default value and there is no wal_level setting because passing command-line options, as specified above, have changed no configuration
file. We can found those settings using select name, setting, source from pg_settings where name like 'wal_%' or name ilike 'timezone'; query:
             name              |    setting    |    source
-------------------------------+---------------+--------------
 TimeZone                      | Europe/Moscow | command line
 wal_block_size                | 8192          | default
 wal_buffers                   | 512           | default
 wal_compression               | off           | default
 wal_consistency_checking      |               | default
 wal_decode_buffer_size        | 524288        | default
 wal_init_zero                 | on            | default
 wal_keep_size                 | 0             | default
 wal_level                     | logical       | command line
 wal_log_hints                 | off           | default
 wal_receiver_create_temp_slot | off           | default
 wal_receiver_status_interval  | 10            | default
 wal_receiver_timeout          | 60000         | default
 wal_recycle                   | on            | default
 wal_retrieve_retry_interval   | 5000          | default
 wal_segment_size              | 16777216      | default
 wal_sender_timeout            | 60000         | default
 wal_skip_threshold            | 2048          | default
 wal_sync_method               | fdatasync     | default
 wal_writer_delay              | 200           | default
 wal_writer_flush_after        | 128           | default
(21 rows)
Among WAL-related settings, we see two custom parameters provided through the command line.
Further, let’s look at WAL files and its contents. In Postgres, WAL files are stored in pg_wal directory under the data directory
(PGDATA). In the selected Docker image, it is /var/lib/postgresql/data/pg_wal directory. For examining its contents, you can use
file system or pg_ls_waldir() system function. select * from pg_ls_waldir(); query returns the following:
           name           |   size   |      modification
--------------------------+----------+------------------------
 000000010000000000000001 | 16777216 | 2024-04-11 15:01:50+03
(1 row)
To see the content of a WAL file, you need to exit from psql terminal and use pg_waldump command
that displays a human-readable rendering of a WAL file: pg_waldump -p /var/lib/postgresql/data/pg_wal 000000010000000000000001 (the file is too
large to list its contents here).
Let’s now see how we can query the existing publications and replication slots in the system. For more clarity, connect to user-db Docker container
and user database:
-
docker exec -it user-db bash -
psql -U postgres -d user
Now you can:
-
display all publications created in the database
select oid, pubname from pg_publication;Listing 43. The result of a query to get all database’s publicationsoid | pubname -------+--------------------------- 16436 | dbz_publication 16438 | dbz_publication_streaming (2 rows) -
display the mapping between publications and tables
table pg_publication_tables;Listing 44. The result of a query to get the mapping between publications and tablespubname | schemaname | tablename | attnames | rowfilter ---------------------------+------------+--------------+---------------------------------------------------------------------------+----------- dbz_publication | public | outbox | {id,aggregate_type,aggregate_id,type,topic,payload,created_at,updated_at} | dbz_publication_streaming | public | library_user | {id,last_name,first_name,middle_name,email,status,created_at,updated_at} | (2 rows) -
display a listing of all replication slots that currently exist on the database cluster, along with their current state
select slot_name, plugin, slot_type, database from pg_replication_slots;Listing 45. The result of a query to get a listing of all replication slotsslot_name | plugin | slot_type | database --------------------+----------+-----------+---------- debezium | pgoutput | logical | user debezium_streaming | pgoutput | logical | user (2 rows)
As you see above, there are two publications and two replications slots in the user-db. This is because two Debezium Postgres source
connectors are used in the project: the first
is needed for streaming messages from outbox table, the second
is needed to replicate data from library_user table. If you return to book-db Docker container and book database, you will see that
it contains one publication and one replication slot because there is only one
source connector to it.
Now, let’s use the book database to see in practice how logical decoding works and, accordingly, how a consumer (one of Debezium PostgreSQL
connectors) receives the logical decoding output that is events containing changes occurred in database tables. We’ll do it with
test_decoding that is an example of a logical decoding output plugin. It
receives WAL through the logical decoding mechanism and decodes it into text representations of the operations performed. A publication is not
needed, unlike pgoutput plugin. For testing, we will use pg_recvlogical
utility. In the bash terminal, do the following:
-
create a logical replication slot
pg_recvlogical -U postgres -h localhost -d book --slot test_slot --create-slotThe needed output plugin is not specified, so
test_decodingwill be used by default -
start streaming changes from the created logical replication slot to stdout
pg_recvlogical -U postgres -h localhost -d book --slot test_slot --start -f -
Now you can use REST API of book-service: for example, if you create and update a book, you will probably get something like the following:
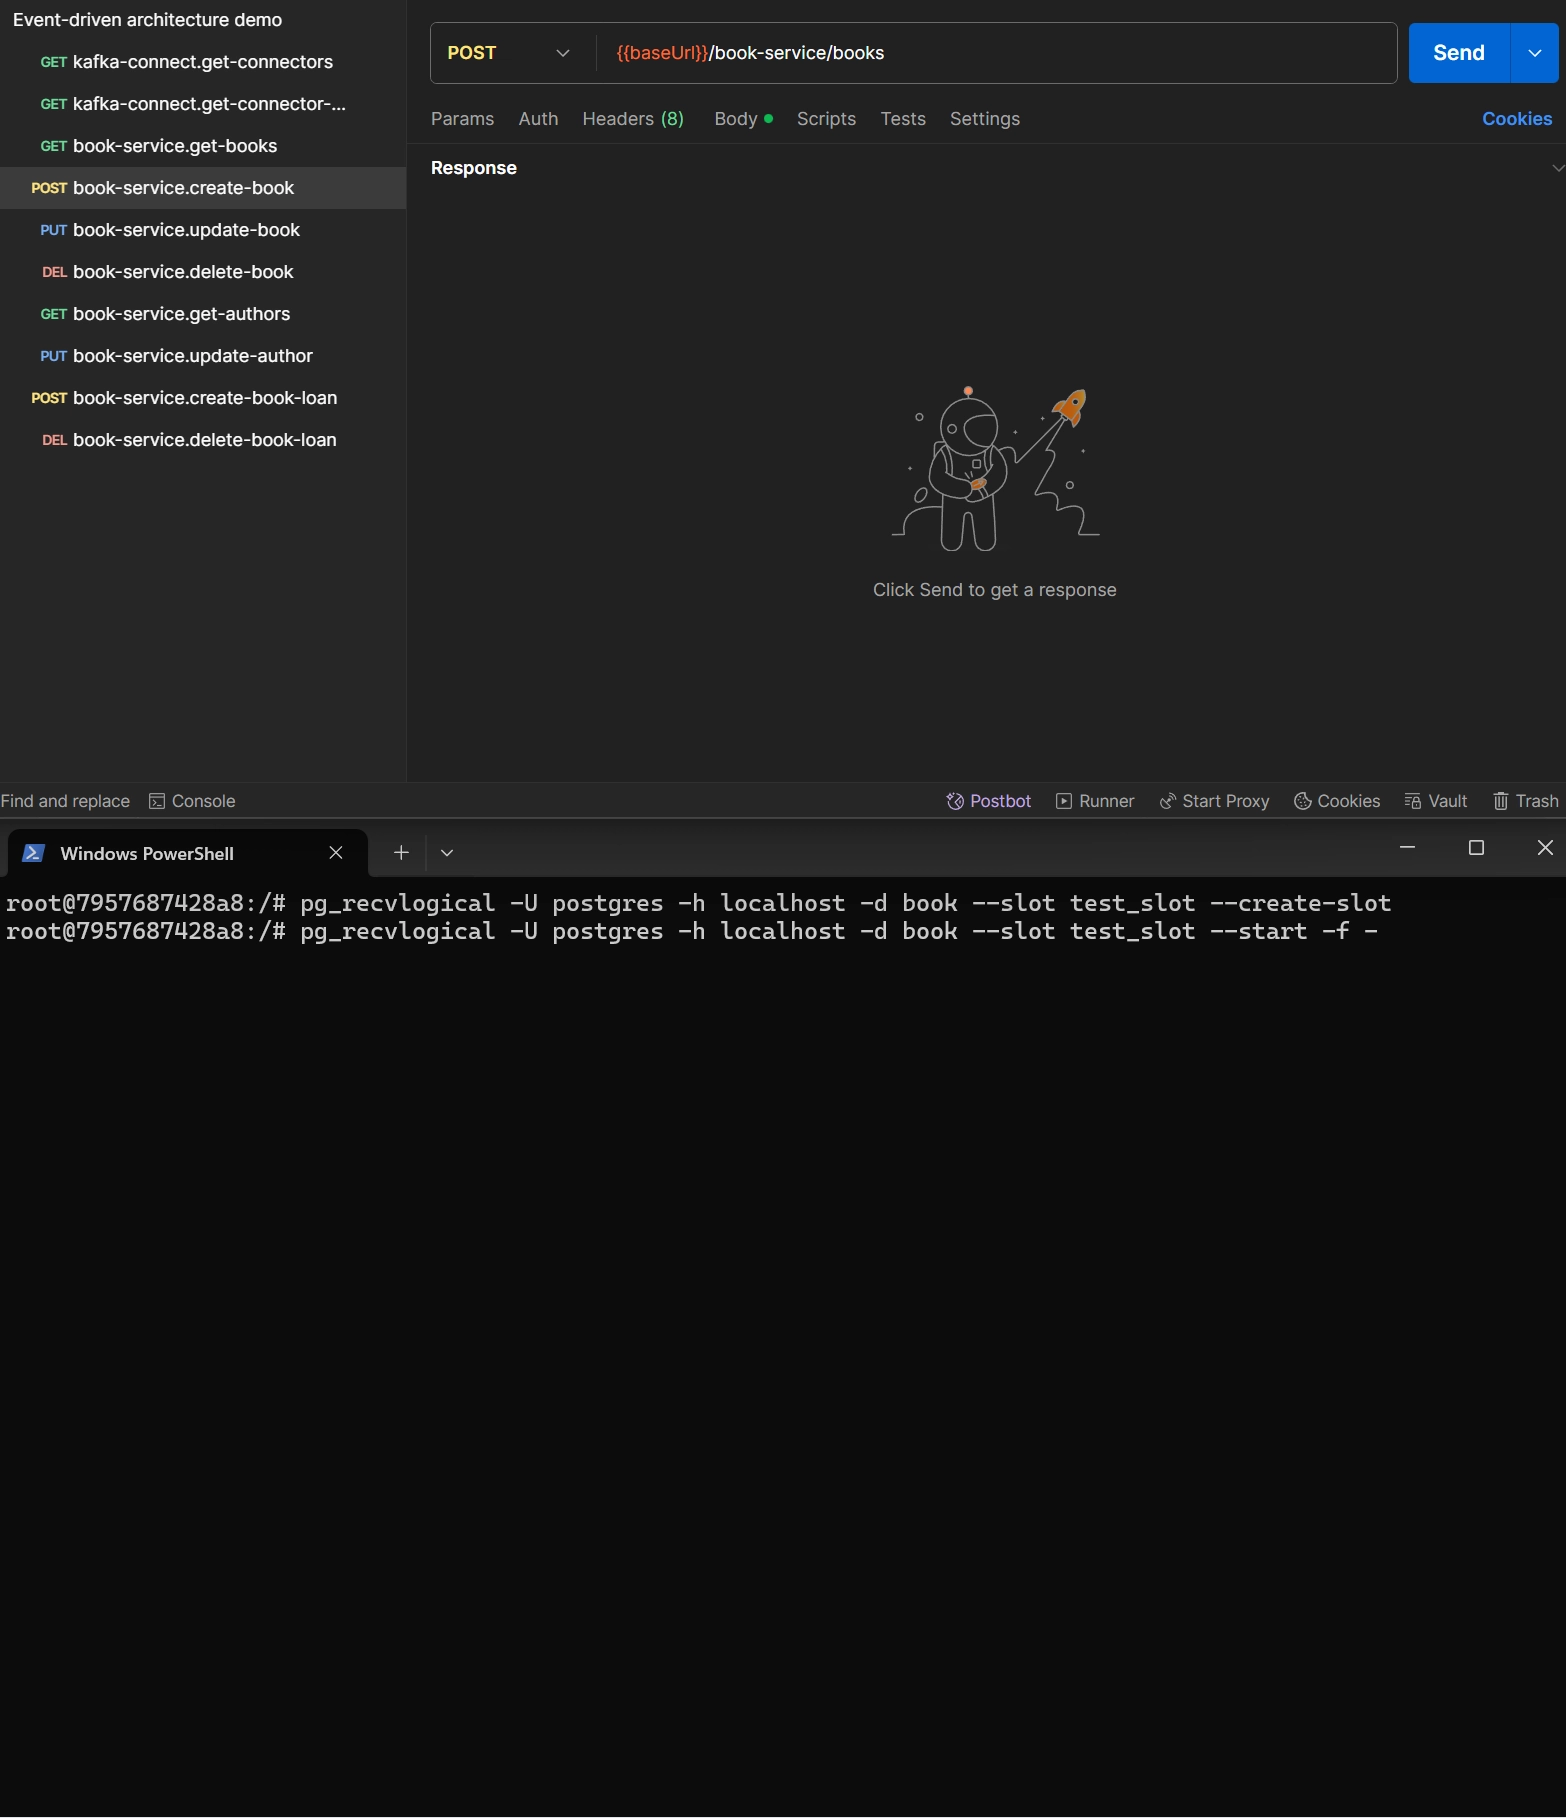
As you see, two REST requests initiated two database transactions, each of which contains two main parts:
-
"business" part
It includes two
INSERT(intobookandbook_authortables) when a book is created and oneUPDATE(inbooktable) when a book is updated. -
outbox part
It includes
INSERTinto andDELETEfromoutboxtable.
In this project, the consumer
is only interested in the second part, more precisely, only the INSERT into outbox table, so the connector is configured to ignore all
change events except those in the outbox table through table.include.list property. Additionally, as noted earlier, when using the pgoutput
plugin, there must be a publication for the replication slot. If the publication doesn’t exist, it can be created by the connector;
publication.autocreate.mode property defines change events in which tables should be emitted by the created publication. By default, it publishes all
changes from all tables: the property’s default value is all_tables; to make sure that it emits change events only from tables listed in the
table.include.list property, set publication.autocreate.mode property’s value to filtered, as in the
considered connector. Therefore,
filtering is done by the publication, that is, on the database side. The advantage of using the filtered publication with
pgoutput is that you avoid the network bandwidth costs of sending unnecessary WAL entries over the network to Kafka Connect and Debezium. To make
sure that the publication is configured as required, execute table pg_publication_tables; query for book database:
     pubname     | schemaname | tablename |                              attnames                               | rowfilter
-----------------+------------+-----------+---------------------------------------------------------------------+-----------
 dbz_publication | public     | outbox    | {id,aggregate_type,aggregate_id,type,payload,created_at,updated_at} |
(1 row)
Do not forget to delete the replication slot for the reasons stated above in this section; you can do it using
pg_recvlogical -U postgres -h localhost -d book --slot test_slot --drop-slot.
Kafka Connect and Debezium connectors
This section covers:
-
how to set up Kafka Connect with Docker and Docker Compose
-
Kafka Connect terms and key concepts
-
automatic deployment of a Kafka Connect connector using Kafka Connect REST API
-
automatic topic creation for a Kafka Connect connector
-
setting up a Debezium source connector as a part of Transactional outbox pattern implementation
-
setting up a Debezium sink connector as a part of Inbox pattern implementation
-
setting up Debezium source and sink connectors for data streaming between two microservices
-
setting up messages filtering in a Debezium connector
-
setting up a Debezium sink connector for consuming messages from a dead letter queue
Kafka Connect is a tool for scalable and reliable data streaming between Apache Kafka and other systems, such as databases, key-value stores, search indexes, and file systems, using connectors.
In this project, I use Kafka Connect Docker image maintained by Debezium community. There is also Confluent’s Docker image.
Kafka Connect Docker container runs as follows:
kafka-connect:
  image: quay.io/debezium/connect:3.0.1.Final
  container_name: kafka-connect
  restart: always
  depends_on: [ kafka, schema-registry, book-db, user-db, notification-db ]
  environment:
    BOOTSTRAP_SERVERS: kafka:9092
    GROUP_ID: kafka-connect-cluster
    CONFIG_STORAGE_TOPIC: kafka-connect.config
    OFFSET_STORAGE_TOPIC: kafka-connect.offset
    STATUS_STORAGE_TOPIC: kafka-connect.status
    ENABLE_APICURIO_CONVERTERS: true
    ENABLE_DEBEZIUM_SCRIPTING: true
    CONNECT_EXACTLY_ONCE_SOURCE_SUPPORT: enabled
    CONNECT_CONFIG_PROVIDERS: "file"
    CONNECT_CONFIG_PROVIDERS_FILE_CLASS: "org.apache.kafka.common.config.provider.FileConfigProvider"
    CONNECT_LOG4J_LOGGER_org.apache.kafka.clients: ERROR
  volumes:
    - ./kafka-connect/filtering/groovy:/kafka/connect/debezium-connector-postgres/filtering/groovy
    - ./kafka-connect/postgres.properties:/secrets/postgres.properties:ro
- ./kafka-connect/logs/:/kafka/logs/-
CONFIG_STORAGE_TOPICis the name of the Kafka topic to store configurations of connectors. -
OFFSET_STORAGE_TOPICis the name of the Kafka topic to store offsets of connectors. -
STATUS_STORAGE_TOPICis the name of the Kafka topic to store statuses of connectors. -
ENABLE_APICURIO_CONVERTERSallows to enable Apicurio converters with Apicurio Registry. -
CONNECT_EXACTLY_ONCE_SOURCE_SUPPORTenables exactly-once delivery. Additionally, you need to configure all source connectors that require exactly-once delivery (we will consider that later). -
CONNECT_CONFIG_PROVIDERSandCONNECT_CONFIG_PROVIDERS_FILE_CLASSallows to prevent secrets from appearing in cleartext in connector configurations. Instead, in your connector configurations, you use variables that are dynamically resolved when the connector is (re)started. -
CONNECT_LOG4J_LOGGER_org.apache.kafka.clientsI use it to prevent redundant logging.
More information about these and other environment variables can be found here.
Terms and key concepts
Before considering the configuration of the connectors used in the project, I’ll briefly describe some important Kafka Connect terms and key concepts.
Connectors
-
A connector instance is a logical job that is responsible for managing the copying of data between Kafka and an external system
-
A connector plugin contains all the classes that are used by a connector instance
Both connector instances and connector plugins may be referred to as "connectors", but it should always be clear from the context which is being referred to.
There are two types of connectors:
-
source connectors collect data from an external systems and stream it to Kafka topics
-
sink connectors deliver data from Kafka topics to external systems
An external system means a database (relational or NoSQL), queue, and many more. In this project, it is required to support moving data from Postgres database to a Kafka topic and vice versa; for that, Debezium connector for PostgreSQL and Debezium connector for JDBC are used. List of available Debezium connectors is here. Additionally, here you can find out whether there is a connector for your particular technology.
Tasks
Each connector instance coordinates a set of tasks that actually copy the data. By allowing the connector to break a single job into many tasks, Kafka Connect
provides built-in support for parallelism and scalable data copying with very little configuration. These tasks have no state stored within them. Task state is
stored in Kafka in special topics config.storage.topic and status.storage.topic and managed by the associated connector.
Workers
Connectors and tasks are logical units of work and must be scheduled to execute in a process. Kafka Connect calls these processes workers and has two types of
workers: standalone and distributed. Standalone mode is the simplest mode, where a single process is responsible for executing all connectors and tasks.
Distributed mode provides scalability and automatic fault tolerance for Kafka Connect. In distributed mode, you start many worker processes using the same
group.id and they coordinate to schedule execution of connectors and tasks across all available workers. In this project, Kafka Connect runs in distributed
mode; for simplicity, I launch only one Kafka Connect instance. Do your own research to set up a cluster.
Converters
Converters are necessary to have a Kafka Connect deployment support a particular data format when writing to or reading from Kafka. Tasks use converters to change the format of data from bytes to a Connect internal data format and vice versa.
Some converters can be used independently, while others (such as AvroConverter, ProtobufConverter, JsonSchemaConverter) should be used with a
schema registry.
Transformations
Connectors can be configured with transformations to make simple and lightweight modifications to individual messages. This can be convenient for minor data adjustments and event routing, and multiple transformations can be chained together in the connector configuration. A transformation (aka Single Message Transform (SMT)) is a simple function that accepts one record as an input and outputs a modified record. Available Debezium transformations are listed here.
Dead letter queue
Dead letter queues (DLQs) are only applicable for sink connectors. An invalid record may occur for a number of reasons. One example is when a record arrives at the sink connector serialized in JSON format, but the sink connector configuration is expecting Avro format. When an invalid record cannot be processed by a sink connector, one of the available error handling options is to route messages to a dead letter queue, a common technique in building data pipelines. In this project, dead letter queues are Kafka topics.
Automatic deployment of a Kafka Connect connector using Kafka Connect REST API
In this project, the only Kafka Connect instance runs in distributed mode, so connectors should be deployed using REST API.
You can do it using manually POST http://localhost:8083/connectors method, but it is not very convenient to repeat that after each restart of the project.
Contrary to expectations, automating the loading of connectors turned out to be not the easiest task. I implemented it based on an appropriate tip in
this guide. All connectors are loaded by a separate Docker container:
connectors-loader:
  image: bash:5.2
  container_name: connectors-loader
  depends_on: [ kafka-connect ]
  volumes:
    - ./kafka-connect/connectors/:/usr/connectors:ro
    - ./kafka-connect/load-connectors.sh/:/usr/load-connectors.sh:ro
  command: bash /usr/load-connectors.sh
The only function of the container is to run the following script:
#!/bin/bash

apk --no-cache add curl

KAFKA_CONNECT_URL='http://kafka-connect:8083/connectors'

echo -e "\nWaiting for Kafka Connect to start listening on kafka-connect ⏳"
while [ $(curl -s -o /dev/null -w %{http_code} $KAFKA_CONNECT_URL) -eq 000 ] ; do
  echo -e $(date) " Kafka Connect HTTP listener state: "$(curl -s -o /dev/null -w %{http_code} $KAFKA_CONNECT_URL)" (waiting for 200)"
  sleep 5
done
nc -vz kafka-connect 8083

echo -e "\nStart connectors loading"

CONNECTORS=(
  'book.sink.json'
  'book.sink.streaming.json'
  'book.source.json'
  'notification.sink.json'
  'user.sink.dlq-ce-json.json'
  'user.sink.dlq-unprocessed.json'
  'user.sink.json'
  'user.source.json'
  'user.source.streaming.json'
)

for connector in "${CONNECTORS[@]}"
do
  echo -e "\n\nCreating a connector: $connector..."
  while [ $(curl -s -o /dev/null -w %{http_code} -v -H 'Content-Type: application/json' -X POST --data @/usr/connectors/$connector $KAFKA_CONNECT_URL) -ne 201 ] ; do
    echo -e $(date) " repeat loading '$connector'"
    sleep 5
  done
  echo "Connector '$connector' loaded"
done

echo -e "\nAll connectors loaded"
The script waits until Kafka Connect is started and then sequentially loads the connectors, repeating the loading in case of an error.
You can check whether connectors are actually loaded using GET http://localhost:8083/connectors request (you can find the request in
this Postman collection):
[
    "user.source.streaming",
    "book.sink",
    "user.source",
    "user.sink.dlq-ce-json",
    "user.sink.dlq-unprocessed",
    "book.source",
    "notification.sink",
    "book.sink.streaming",
    "user.sink"
]
Below are a couple of other REST API endpoints:
-
{
    "version": "3.8.0",
    "commit": "771b9576b00ecf5b",
    "kafka_cluster_id": "KoDI2lvdTJCr-PAk-g_oMw"
}
Returns the version of the Kafka Connect worker that serves the REST request, the git commit ID of the source code, and the Kafka cluster ID that the worker is connected to.
-
GET http://localhost:8083/connector-plugins[ { "class": "io.debezium.connector.jdbc.JdbcSinkConnector", "type": "sink", "version": "3.0.1.Final" }, ... { "class": "io.debezium.connector.postgresql.PostgresConnector", "type": "source", "version": "3.0.1.Final" }, ... ]Returns a list of connector plugins installed in the Kafka Connect cluster. Among others, the list contains the plugins needed for this project.
Automatic topic creation for a Kafka Connect connector
There are two approaches for automatic topic creation: it can be done by Kafka broker and, beginning with Kafka 2.6, you can also configure Kafka Connect to create topics. To use the
latter, I need to disable automatic topic creation by Kafka broker (KAFKA_CFG_AUTO_CREATE_TOPICS_ENABLE: false if you use Kafka image by Bitnami; see
Docker Compose file); topic.creation.enable property of Kafka Connect by default is
true.
Unlike the broker, Kafka Connect can apply unique configurations to different topics or sets of topics. The properties that control topic creation can be specified in the
configuration of Debezium source connectors (book.source,
user.source,
user.source.streaming); I specify
topic.creation.default.replication.factor and topic.creation.default.partitions but you can apply other topic-specific settings.
When automatic topic creation is enabled, if a Debezium source connector produces a message for which no target topic already exists, the topic is created at runtime as the
message is ingested into Kafka. This may cause that the sink connectors will flood the log with warning messages about non-existing topics; to prevent this, you can specify
CONNECT_LOG4J_LOGGER_org.apache.kafka.clients as shown above.
For more information on automatic topic creation with Kafka Connect, see the Debezium documentation.
Topics that represent dead letter queues are configured in different way: the properties (errors.deadletterqueue.topic.*) are specified in sink connectors (for example,
user.sink);
you can only specify name and replication factor for a topic. Unlike
the topics used by source connectors, DLQ topics are created by Kafka Connect at the launch of the project (that is, right after the sink connector is loaded to Kafka Connect).
Connectors configuration
In this project, nine connectors are used. Connectors can be grouped by their purpose as follows:
-
part of Transactional outbox pattern implementation (that is, to import messages from Postgres databases to Kafka topics):
-
part of Inbox pattern implementation (that is, to move messages from Kafka topics to Postgres databases):
-
for processing messages from dead letter queues:
-
for streaming data from one database to another:
The connector naming convention I use in this project is <database name to connect to>.<source or sink>[.specific function]. By specific function, I mean
a function that differs from streaming "business" events from one microservice to another.
Some of them are configured similarly, so there is no need to consider each of them.
Connectors for Transactional outbox pattern implementation
Let’s start considering this group of connectors on the example of book.source connector; its configuration looks like this:
book.source connector{
"name": "book.source",
"config": {
"connector.class": "io.debezium.connector.postgresql.PostgresConnector",
"plugin.name": "pgoutput",
"database.hostname": "book-db",
"database.port": "5432",
"database.user": "${file:/secrets/postgres.properties:username}",
"database.password": "${file:/secrets/postgres.properties:password}",
"database.dbname": "book",
"exactly.once.support": "required",
"topic.prefix": "book.source",
"topic.creation.default.replication.factor": 1,
"topic.creation.default.partitions": 6,
"table.include.list": "public.outbox",
"heartbeat.interval.ms": "5000",
"tombstones.on.delete": false,
"publication.autocreate.mode": "filtered",
"transforms": "addMetadataHeaders,outbox",
"transforms.addMetadataHeaders.type": "org.apache.kafka.connect.transforms.HeaderFrom$Value",
"transforms.addMetadataHeaders.fields": "source,op,transaction",
"transforms.addMetadataHeaders.headers": "source,op,transaction",
"transforms.addMetadataHeaders.operation": "copy",
"transforms.addMetadataHeaders.predicate": "isHeartbeat",
"transforms.addMetadataHeaders.negate": true,
"transforms.outbox.type": "io.debezium.transforms.outbox.EventRouter",
"transforms.outbox.table.field.event.key": "aggregate_id",
"transforms.outbox.table.expand.json.payload": true,
"transforms.outbox.table.fields.additional.placement": "type:header,aggregate_type:header:dataSchemaName",
"transforms.outbox.route.by.field": "aggregate_type",
"transforms.outbox.route.topic.replacement": "library.events",
"predicates": "isHeartbeat",
"predicates.isHeartbeat.type": "org.apache.kafka.connect.transforms.predicates.TopicNameMatches",
"predicates.isHeartbeat.pattern": "__debezium-heartbeat.*",
"key.converter": "org.apache.kafka.connect.json.JsonConverter",
"key.converter.schemas.enable": false,
"value.converter": "io.debezium.converters.CloudEventsConverter",
"value.converter.serializer.type": "avro",
"value.converter.data.serializer.type": "avro",
"value.converter.avro.apicurio.registry.url": "http://schema-registry:8080",
"value.converter.avro.apicurio.registry.auto-register": true,
"value.converter.avro.apicurio.registry.find-latest": true,
"value.converter.avro.apicurio.registry.artifact-resolver-strategy": "io.apicurio.registry.serde.avro.strategy.RecordIdStrategy",
"value.converter.metadata.source": "header",
"value.converter.schema.cloudevents.name": "CloudEvents",
"value.converter.schema.data.name.source.header.enable": true,
"value.converter.extension.attributes.enable": false,
"header.converter": "org.apache.kafka.connect.json.JsonConverter",
"header.converter.schemas.enable": true
}
}This configuration tells the connector to do the following:
-
Connect to
bookdatabase (database.dbnamesetting) hosted onbook-dbDocker container (database.hostname) usingPostgresConnector(connector.class). The credentials for the database are obtained frompostgres.propertiesfile (database.useranddatabase.password). The connector is only interested in receiving changes from theoutboxtable (table.include.list).heartbeat.interval.mscontrols how frequently the connector sends heartbeat messages (see the docs) to a Kafka topic.You can find out description of these and other configuration parameters in the docs.
-
If needed, create a topic with the specified replication factor (
topic.creation.default.replication.factor) and partitions number (topic.creation.default.partitions). The specifiedtopic.prefixsetting won’t be applied to the topic name as it will be replaced by the value oftransforms.outbox.route.topic.replacementsetting. Exactly-once delivery is enabled (exactly.once.support). -
Apply the following transformations (
transforms):-
addMetadataHeadersof typeHeaderFromThis is needed because the next transformation (
outbox) dropssource,op, andtransactionfields from a Debezium raw message, but that data is required if we want to export messages in CloudEvents format usingCloudEventsConverter. The transformation adds these fields to headers of a record for later use by the converter.transforms.addMetadataHeaders.predicateandtransforms.addMetadataHeaders.negatetell that the transformation should not be applied to heartbeat messages. Whether a message is a heartbeat is determined using the following predicate:Listing 52. Predicate determining whether a message is a heartbeat... "predicates": "isHeartbeat", "predicates.isHeartbeat.type": "org.apache.kafka.connect.transforms.predicates.TopicNameMatches", "predicates.isHeartbeat.pattern": "__debezium-heartbeat.*", ...For more information on applying transformations selectively, see the docs.
-
outboxof typeEventRouterThe transformation converts Debezium raw messages containing changes occurred in
outboxtable to the structure that is more suitable to consumers. We will see the structure a little later. As said before, only inserts and deletions are performed on theoutboxtable; the SMT automatically filters outDELETEoperations on the table.The config of the transformation specifies that:
-
the key of the emitted Kafka message will be a value from
aggregate_idcolumn. As shown in the Book service section, for book entity, its id is used as the key. Therefore, all messages about the same book are routed to the same partition of a Kafka topic. -
JSON expansion of a String payload should be done (
transforms.outbox.table.expand.json.payloadistrue). -
typeanddataSchemaNameheaders will be added to a Kafka message (transforms.outbox.table.fields.additional.placement) in addition tosource,op, andtransactionheaders added by the previous transformation for later use byCloudEventsConverter. Moreover,idheader is added by the considered transformation by default. -
transforms.outbox.route.by.fieldisaggregate_type(name of the column inoutboxtable). By default, the value in a specified column becomes a part of the name of the topic to which the connector emits an outbox message, but this won’t be used because of the next point. -
transforms.outbox.route.topic.replacementis hardcoded tolibrary.eventsthat is all records fromoutboxtable ofbookdatabases will eventually end up in the topiclibrary.eventsKafka topic.It is possible to route different events or aggregates, for example, authors and books, to different topics. But using one topic allows you to preserve a fixed order of events; for that, the events must also use the same partitioning key. For example, in this project, the partitioning key could be id of an author; in this case, when there would be two events containing updates of an author and one of his books, a consumer (
user-service) could process them in the same order in which they were produced.
For more details, see the docs.
-
-
-
Convert key, value, and headers of a Kafka message as follows:
-
key is converted to JSON without schema.
-
value is converted to CloudEvents format.
CloudEventsConverter(value.convertersetting) is a Kafka Connect message converter that enables you to configure Postgres connector (and connectors to other databases) to emit change event records that conform to the CloudEvents specification. This spec allows you to describe event data in common formats to provide interoperability across services, platforms and systems. Then both the CloudEvents envelope itself and itsdataattribute are converted to Avro format (value.converter.serializer.typeandvalue.converter.data.serializer.type).Kafka represents all data as bytes, so it’s common to use an external schema and serialize and deserialize into bytes according to that schema. Rather than supply a copy of that schema with each message, which would be an expensive overhead, it’s also common to keep the schema in a registry and supply just an id with each message. In this project, I use Apicurio Registry that is accessible at
value.converter.avro.apicurio.registry.url(value.converter.avro.apicurio.registry.url).value.converter.metadata.sourcehasheaderglobal value which tells that all metadata should be obtained from a record’s headers. The metadata includes fields from a raw Debezium message (that is,source,op, andtransaction) as well as values foridandtypefields of an emitted CloudEvent and value fordataSchemaName— a name under which the schema of the content of the CloudEvent’sdatafield is registered in a schema registry. Also, I explicitly enable obtainingdataSchemaNamefrom the header usingvalue.converter.schema.data.name.source.header.enable; this setting is needed to preserve backward compatibility for Debezium users. Headers containing all of the above fields are added by the previously considered transformations. Such a configuration of the transformations and the converter leads to the fact that theidandtypefields of the emitted CloudEvent contain values fromid(ofuuidPostgres type) andtypecolumns ofoutboxtable for a message inserted bybook-serviceand the schema of thedatafield is registered under a name obtained fromaggregate_typecolumn of theoutboxtable.The default value of
value.converter.metadata.sourceproperty isvalue,id:generate,type:generate,dataSchemaName:generatewhich tells that:-
the global setting is
value.That means that the converter should retrieve values of
source,op, andtransactionfields from a record’s value (as in a raw Debezium message). -
idandtypefields of a CloudEvent anddataSchemaNameshould be generated by Debezium.
Schema name of CloudEvents envelope is hardcoded to
CloudEvents(value.converter.schema.cloudevents.name).See the docs for details on how to configure exporting to CloudEvents.
-
-
headers are converted to JSON but, unlike the key, with a schema.
-
Exporting messages to CloudEvents format allows not only internal but also external consumers to receive messages in a standardized format.
user.source connector is configured similarly
to book.source connector:
user.source connector{
"name": "user.source",
"config": {
"connector.class": "io.debezium.connector.postgresql.PostgresConnector",
"plugin.name": "pgoutput",
"database.hostname": "user-db",
"database.port": "5432",
"database.user": "${file:/secrets/postgres.properties:username}",
"database.password": "${file:/secrets/postgres.properties:password}",
"database.dbname": "user",
"exactly.once.support": "required",
"topic.prefix": "user.source",
"topic.creation.default.replication.factor": 1,
"topic.creation.default.partitions": 6,
"schema.exclude.list": "public",
"heartbeat.interval.ms": "5000",
"tombstones.on.delete": false,
"publication.autocreate.mode": "no_tables",
"transforms": "addMetadataHeaders,decode,outbox",
"transforms.addMetadataHeaders.type": "org.apache.kafka.connect.transforms.HeaderFrom$Value",
"transforms.addMetadataHeaders.fields": "source,op,transaction",
"transforms.addMetadataHeaders.headers": "source,op,transaction",
"transforms.addMetadataHeaders.operation": "copy",
"transforms.addMetadataHeaders.predicate": "isHeartbeat",
"transforms.addMetadataHeaders.negate": true,
"transforms.decode.type": "io.debezium.connector.postgresql.transforms.DecodeLogicalDecodingMessageContent",
"transforms.decode.fields.null.include": true,
"transforms.outbox.type": "io.debezium.transforms.outbox.EventRouter",
"transforms.outbox.table.field.event.key": "aggregateId",
"transforms.outbox.table.expand.json.payload": true,
"transforms.outbox.table.fields.additional.placement": "type:header,aggregateType:header:dataSchemaName",
"transforms.outbox.route.by.field": "topic",
"transforms.outbox.route.topic.replacement": "library.${routedByValue}",
"predicates": "isHeartbeat",
"predicates.isHeartbeat.type": "org.apache.kafka.connect.transforms.predicates.TopicNameMatches",
"predicates.isHeartbeat.pattern": "__debezium-heartbeat.*",
"key.converter": "org.apache.kafka.connect.json.JsonConverter",
"key.converter.schemas.enable": false,
"value.converter": "io.debezium.converters.CloudEventsConverter",
"value.converter.serializer.type": "avro",
"value.converter.data.serializer.type": "avro",
"value.converter.avro.apicurio.registry.url": "http://schema-registry:8080",
"value.converter.avro.apicurio.registry.auto-register": true,
"value.converter.avro.apicurio.registry.find-latest": true,
"value.converter.avro.apicurio.registry.artifact-resolver-strategy": "io.apicurio.registry.serde.avro.strategy.RecordIdStrategy",
"value.converter.metadata.source": "header",
"value.converter.schema.cloudevents.name": "CloudEvents",
"value.converter.schema.data.name.source.header.enable": true,
"value.converter.extension.attributes.enable": false,
"header.converter": "org.apache.kafka.connect.json.JsonConverter",
"header.converter.schemas.enable": true
}
}The main differences are due to the fact that the connector should capture change events of only logical decoding messages (published
using pg_logical_emit_message() Postgres function), and not capture any other change events, such as those caused by inserts into any table:
-
schema.exclude.listspecifies that the connector is not interested in any change events from any table inpublicschema.This is because logical decoding messages doesn’t belong to any table or schema.
-
publication.autocreate.modeisno_tableswhich means that Postgres publication will be automatically created with an empty set of tables (because the connector is not interested in any of them). -
a new SMT,
DecodeLogicalDecodingMessageContent, is added to thetransformsconfiguration parameter.It converts the binary content of a PostgreSQL logical decoding message to a structured form making thus the message processable by Outbox Event Router SMT applied further.
-
some field names are changed (
aggregate_id→aggregateId,aggregate_type→aggregateType) because of different naming convention in SQL column names and field names in Java objects.
The other difference from book.source connector is how transforms.outbox.route.by.field and transforms.outbox.route.topic.replacement properties are configured:
user.source connector...
"transforms.outbox.route.by.field": "topic",
"transforms.outbox.route.topic.replacement": "library.${routedByValue}",
...While the value of the former parameter is ignored by book.source connector and the latter has hardcoded value in its configuration as shown above,
user.source is configured by these properties to obtain the last part of a Kafka topic name from topic field of
OutboxMessage DTO;
this was also discussed in the User service section. Thus messages of different types can be routed to different topics (in this case, library.notifications or
library.rollback). By default, route.by.field is configured to use a message’s aggregate type
(aggregatetype).
Connectors for Inbox pattern implementation
Let’s consider this group of connectors on the example of user.sink connector; its configuration looks like this:
user.sink connector{
"name": "user.sink",
"config": {
"connector.class": "io.debezium.connector.jdbc.JdbcSinkConnector",
"tasks.max": "1",
"topics": "library.events",
"connection.url": "jdbc:postgresql://user-db:5432/user",
"connection.username": "${file:/secrets/postgres.properties:username}",
"connection.password": "${file:/secrets/postgres.properties:password}",
"insert.mode": "upsert",
"primary.key.mode": "record_value",
"primary.key.fields": "id",
"table.name.format": "inbox",
"max.retries": 1,
"transforms": "convertCloudEvent",
"transforms.convertCloudEvent.type": "io.debezium.connector.jdbc.transforms.ConvertCloudEventToSaveableForm",
"transforms.convertCloudEvent.fields.mapping": "id,source,type,data:payload",
"transforms.convertCloudEvent.serializer.type": "avro",
"transforms.convertCloudEvent.schema.cloudevents.name": "CloudEvents",
"key.converter": "org.apache.kafka.connect.json.JsonConverter",
"key.converter.schemas.enable": false,
"value.converter": "io.debezium.converters.CloudEventsConverter",
"value.converter.serializer.type": "avro",
"value.converter.data.serializer.type": "avro",
"value.converter.avro.apicurio.registry.url": "http://schema-registry:8080",
"value.converter.schema.cloudevents.name": "CloudEvents",
"errors.tolerance": "all",
"errors.log.enable": true,
"errors.deadletterqueue.topic.name": "library.events.dlq.ce-json",
"errors.deadletterqueue.topic.replication.factor": 1
}
}This configuration tells the connector to do the following:
-
Connect to
userdatabase hosted onuser-dbDocker container (connection.url) usingJdbcSinkConnector(connector.class). The credentials for the database are obtained frompostgres.propertiesfile (connection.usernameandconnection.password). -
Receive messages from
library.eventsKafka topic (to whichbook.sourceconnector puts messages fromoutboxtable) and puts them toinboxtable (table.name.format). -
To enable the connector to perform idempotent writes, I set the
insert.modefor the connector toupsert.The idempotent writes means that if the primary key does not exist, the connector performs an
INSERToperation, and if the key does exist, the connector performs anUPDATEoperation. The primary key of a message is obtained from CloudEvents'idfield (primary.key.fields) in a Kafka record’s value (primary.key.mode). Theidis ofUUIDtype and is generated automatically bybookPostgres database (seeoutboxtable definition. -
Convert key and value of a Kafka message as specified.
The conversion settings are similar to the source connector configuration considered above. But in this case, the connector first deserializes a message from Avro format and then from CloudEvents format to Kafka Connect internal representation.
-
Apply
convertCloudEventtransformation ofConvertCloudEventToSaveableFormtype that converts a record to the form suitable forINSERTintoinboxtable byJdbcSinkConnector.The transformation is configured as follows:
-
fields.mappingprovides the mapping between field in CloudEvents envelope and columns of a target table. As said above, it is not necessary for theinboxtable to have the same structure as the CloudEvents message. -
serializer.typespecifies serializer type that is used to serialize and deserialize CloudEvents. -
schema.cloudevents.namespecifies CloudEvents schema name under which the schema is registered in a schema registry (because as shown in the previous section, it can be customized in source connector’s configuration).
-
-
Handle errors in a way that bad messages should be:
-
ignored (
errors.toleranceisall)This means that such messages won’t result in an immediate connector task failure.
-
written to a log file (
errors.log.enableistrue) -
sent to a dead letter queue, that is, to a separate Kafka topic,
library.events.dlq.ce-jsonIf you’re running on a single-node Kafka cluster, you will also need to set
errors.deadletterqueue.topic.replication.factorto 1 — by default it’s three.
-
You can find out description of these and other configuration parameters of JdbcSinkConnector in the
docs.
book.sink and
notification.sink are configured similarly.
An alternative approach to using sink connector is to create Kafka listener in the user-service that listens to the library.events topic and puts all the
messages into the inbox table.
Connectors for dead letter queues
As said before, in this project, dead letter queues are Kafka topics. A message ends up in a deal letter queue if a connector can’t process it for some reason. Then another connector tries to do it reading the message from a dead letter queue. In this way, you can form a data pipeline for handling potentially erroneous messages. In this project, the pipeline includes three connectors operating as follows:
-
user.sinkprocesses a message fromlibrary.eventstopic expecting it to be in CloudEvents format serialized to Avro:-
if it succeeds, it stores the message in
inboxtable. -
if it fails, it prints the message to the log and publishes it to
library.events.dlq.ce-jsontopic.
-
-
user.sink.dlq-ce-jsonprocesses a message fromlibrary.events.dlq.ce-jsontopic expecting it to be in CloudEvents format serialized to JSON:-
if it succeeds, it stores the message in
inboxtable. -
if it fails, it prints the message to the log and publishes it to
library.events.dlq.unprocessedtopic.
-
-
user.sink.dlq-unprocessedprocesses a message fromlibrary.events.dlq.unprocessedtopic expecting it to be in any arbitrary format serialized to JSON:-
if it succeeds, it stores the message in
inbox_unprocessedtable. -
if it fails, it prints the message to the log.
-
You can define a pipeline consisting of as many dead letter queues and connectors as you need to handle all potential errors.
Let’s consider this group of connectors on the example of user.sink.dlq-ce-json connector; its configuration looks like this:
user.sink.dlq-ce-json connector{
"name": "user.sink.dlq-ce-json",
"config": {
"connector.class": "io.debezium.connector.jdbc.JdbcSinkConnector",
"tasks.max": "1",
"topics": "library.events.dlq.ce-json",
"connection.url": "jdbc:postgresql://user-db:5432/user",
"connection.username": "${file:/secrets/postgres.properties:username}",
"connection.password": "${file:/secrets/postgres.properties:password}",
"insert.mode": "upsert",
"primary.key.mode": "record_value",
"primary.key.fields": "id",
"table.name.format": "inbox",
"max.retries": 1,
"transforms": "convertCloudEvent",
"transforms.convertCloudEvent.type": "io.debezium.connector.jdbc.transforms.ConvertCloudEventToSaveableForm",
"transforms.convertCloudEvent.fields.mapping": "id,source,type,data:payload",
"transforms.convertCloudEvent.serializer.type": "json",
"key.converter": "org.apache.kafka.connect.json.JsonConverter",
"key.converter.schemas.enable": false,
"value.converter": "io.debezium.converters.CloudEventsConverter",
"value.converter.serializer.type": "json",
"value.converter.data.serializer.type": "json",
"errors.tolerance": "all",
"errors.log.enable": true,
"errors.deadletterqueue.topic.name": "library.events.dlq.unprocessed",
"errors.deadletterqueue.topic.replication.factor": 1,
"errors.deadletterqueue.context.headers.enable": true
}
}The connector processes messages from library.events.dlq.ce-json Kafka topic (to which user.sink connector puts bad messages). The configuration of the
connector is almost the same as user.sink. But unlike user.sink that expects CloudEvents to be in Avro format, user.sink.dlq-ce-json tries to deserialize
messages from plain JSON (value.converter.serializer.type is json) and store them in inbox table. If this succeeds, user-service processes such
messages as usual. If an error occurs again, the connector puts the message to next dead letter queue — library.events.dlq.unprocessed topic. By using
errors.deadletterqueue.context.headers.enable, Kafka Connect adds headers containing information about the reason for a message’s rejection.
Messages from the second dead latter queue are processed by
user.sink.dlq-unprocessed connector that
converts key, value, and headers of a Kafka message to plain strings. Then it adds the error reason from __connect.errors.exception.stacktrace header to the value and
stores it in inbox_unprocessed table; the messages from the table are intended for manual processing.
Of course, you can store invalid messages not only to Postgres database but to any storage you choose, for example, to file, other database, or even send them to some messenger.
Connectors for streaming data from one database to another
In this project, this group of connectors is responsible for streaming user data from user database to book database. This data is needed
for the scenario when a user takes a book from the library, that is, book-service can check (see
lendBook
method) whether a user with a specified id exists and is active.
To implement the streaming, you need both source and sink connectors. The configuration of the source connector looks as follows:
user.source.streaming connector{
"name": "user.source.streaming",
"config": {
"connector.class": "io.debezium.connector.postgresql.PostgresConnector",
"plugin.name": "pgoutput",
"database.hostname": "user-db",
"database.port": "5432",
"database.user": "${file:/secrets/postgres.properties:username}",
"database.password": "${file:/secrets/postgres.properties:password}",
"database.dbname": "user",
"exactly.once.support": "required",
"slot.name": "debezium_streaming",
"publication.name": "dbz_publication_streaming",
"topic.prefix": "streaming",
"topic.creation.default.replication.factor": 1,
"topic.creation.default.partitions": 6,
"table.include.list": "public.library_user",
"column.exclude.list": "public.library_user.created_at,public.library_user.updated_at",
"heartbeat.interval.ms": "5000",
"publication.autocreate.mode": "filtered",
"transforms": "filter,renameTopic",
"transforms.filter.type": "io.debezium.transforms.Filter",
"transforms.filter.language": "jsr223.groovy",
"transforms.filter.condition": "valueSchema.field('op') != null && value.op != 'm'",
"transforms.renameTopic.type": "io.debezium.transforms.ByLogicalTableRouter",
"transforms.renameTopic.topic.regex": "(.*)public.(.*)",
"transforms.renameTopic.topic.replacement": "$1users",
"key.converter": "org.apache.kafka.connect.json.JsonConverter",
"value.converter": "org.apache.kafka.connect.json.JsonConverter"
}
}The configuration tells that the connector should connect to user database in which the only table it is interested in is library_user from public
schema. Also, technical fields, such as created_at and updated_at should not be included to messages (column.exclude.list). Custom slot.name
and publication.name are specified explicitly because there is another source connector to user database (user.source) and I left the default
names — debezium and dbz_publication — for it.
To prevent capturing of logical decoding messages (their publishing is a part of Transactional outbox pattern implementation; the messages should only be
captured by user.source connector), I use message filtering. In short,
to set up the filtering using JSR 223 Groovy implementation, you need to do the following:
-
download these JARs from Apache Groovy site and put them to the project
-
mount the JARs as a Docker volume of
kafka-connectservice -
specify
ENABLE_DEBEZIUM_SCRIPTINGenvironment variable withtruevalue -
specify an expression that should be used to filter out unneeded messages
In this case, to filter out change events of logical decoding messages, I use the following expression:
valueSchema.field('op') != null && value.op != 'm'; it checks thatopfield exists in a change event and its value is notm("message").
If you use another Kafka Connect Docker image, the steps to enable message filtering might differ.
The messages are published to streaming.users topic; the approach to form the topic name is quite sophisticated: it uses topic.prefix setting
and renameTopic transformation. The streaming data is not intended for external consumers, so there is no need to publish the messages in CloudEvents
format. Therefore, unlike previously considered connectors for Transactional outbox pattern implementation that publish messages in
CloudEvents format, the structure of Kafka messages published by user.source.streaming connector is a raw Debezium message. You can see it, for
example, using Kafka UI. There will be two messages as there are
two users of the
library.
The configuration of the sink connector looks like this:
book.sink.streaming connector{
"name": "book.sink.streaming",
"config": {
"connector.class": "io.debezium.connector.jdbc.JdbcSinkConnector",
"tasks.max": "1",
"topics": "streaming.users",
"connection.url": "jdbc:postgresql://book-db:5432/book",
"connection.username": "${file:/secrets/postgres.properties:username}",
"connection.password": "${file:/secrets/postgres.properties:password}",
"insert.mode": "upsert",
"primary.key.mode": "record_value",
"primary.key.fields": "id",
"table.name.format": "public.user_replica",
"field.include.list": "streaming.users:id,streaming.users:status",
"max.retries": 1,
"key.converter": "org.apache.kafka.connect.json.JsonConverter",
"value.converter": "org.apache.kafka.connect.json.JsonConverter"
}
}The configuration tells that the connector should put messages from streaming.users topic to user_replica in book database. The connector is only
interested in two fields from the message, id and status because user_replica table
contains only
these two columns.
Kafka
In this project, I use Kafka image maintained by Bitnami. It runs in KRaft mode, that is, without ZooKeeper. It is configured like this:
kafka:
  image: bitnami/kafka:3.8.0
  container_name: kafka
  restart: always
  environment:
    # KRaft settings
    KAFKA_CFG_NODE_ID: 0
    KAFKA_CFG_PROCESS_ROLES: controller,broker
    KAFKA_CFG_CONTROLLER_QUORUM_VOTERS: 0@kafka:9093
    # listeners
    KAFKA_CFG_LISTENERS: PLAINTEXT://:9092,CONTROLLER://:9093
    KAFKA_CFG_ADVERTISED_LISTENERS: PLAINTEXT://:9092
    KAFKA_CFG_LISTENER_SECURITY_PROTOCOL_MAP: CONTROLLER:PLAINTEXT,PLAINTEXT:PLAINTEXT
    KAFKA_CFG_CONTROLLER_LISTENER_NAMES: CONTROLLER
    KAFKA_CFG_INTER_BROKER_LISTENER_NAME: PLAINTEXT
    # other
    KAFKA_CFG_AUTO_CREATE_TOPICS_ENABLE: false
  volumes:
    - ./misc/kafka_data:/bitnami
As mentioned earlier, I disable automatic topic creation, as it is done by Kafka Connect.
Schema registry
Kafka, at its core, only transfers data in byte format. There is no data verification that’s being done at the Kafka cluster level. But consumers of events/messages
emitted by Debezium (for example, from outbox tables like in this project) should be aware of their structure and data types. This problem can be solved with the help of
schemas. As a result, we have the following options:
-
a message is passed to the consumer as-is that is without additional metadata; it is supposed that the consumer (a Debezium connector as in this project) is able to process the data stored in it.
Connector configuration example:
... "value.converter": "org.apache.kafka.connect.json.JsonConverter", "value.converter.schemas.enable": "false" ... -
a message is passed with a schema representing the structure of the message and data types within it.
Here, the following options are possible:
-
the schema is embedded within the message.
Connector configuration example:
... "value.converter": "org.apache.kafka.connect.json.JsonConverter" ...value.converter.schemas.enableis not specified, that is, when usingJsonConverter, schemas are enabled by default. The project contains an example of such a connector configuration: this is the previously discussed connector for streaming user data. The structure of a produced message looks as follows:{ "schema": { "type": "struct", "fields": [ { ... "field": "before" }, { ... "field": "after" }, { ... "field": "source" }, ... ], "optional": false, "name": "streaming.users.Envelope", "version": 2 }, "payload": { "before": null, "after": { ... }, "source": { ... }, ... } }You can see that a JSON message consists of two parts —
schemaandpayload. -
the message contains a reference to a schema registry which contains the associated schema.
In this project, most connectors are configured to use this approach: source connectors emit messages that do not contain the schema information, only the schema ID; sink connectors can properly fetch a message schema from Apicurio Registry by its ID.
-
In the context of an event-driven architecture using Kafka, schema registry is a component of your infrastructure that provides a centralized repository for managing and validating schemas for topic message data, and for serialization and deserialization of the data over the network. Producers and consumers to Kafka topics can use schemas to ensure data consistency and compatibility as schemas evolve. Schema registry is a key component for data governance, helping to ensure data quality, adherence to standards, etc. Kafka Connect can use a schema registry to store schemas representing structure of messages. By using a schema registry in combination with Apache Avro data serialization format, it is possible to significantly decrease the overall message size.
A producer (a source connector as in this project), before sending the data to Kafka, talks to the schema registry first and checks if the schema is available. If it doesn’t find the schema, it registers and stores the schema in the schema registry. Further, the producer serializes the data with the schema and sends it to Kafka in binary format; a unique schema ID is included in the message (in its payload or headers depending on the configuration of the producer). When the consumer (a sink connector) processes this message, it will communicate with the schema registry using the schema ID it received from the producer and deserialize it using the same schema.
In this project, I use Apicurio Registry; an alternative is Confluent Schema Registry. Both platforms support JSON, Google Protobuf, and Apache Avro schema formats, while Apicurio Registry supports much more, such as OpenAPI, AsyncAPI, GraphQL, Kafka Connect, and other schemas. The items stored in Apicurio Registry are known as artifacts.
schema-registry:
  image: apicurio/apicurio-registry:3.0.3
  container_name: schema-registry
  restart: always
Apicurio Registry provides several options for the underlying storage of registry data: in-memory, PostgreSQL, and Apache Kafka; by default, in-memory storage is used. Note that this storage option is suitable for a development environment only because all data is lost when restarting Apicurio Registry.
Let’s consider properties of a source connector configuration considered earlier that are related to Apicurio Registry:
book.source connector configuration that are related to Apicurio Registry{
"name": "book.source",
"config": {
"connector.class": "io.debezium.connector.postgresql.PostgresConnector",
...
"value.converter": "io.debezium.converters.CloudEventsConverter",
"value.converter.serializer.type": "avro",
"value.converter.data.serializer.type": "avro",
"value.converter.avro.apicurio.registry.url": "http://schema-registry:8080",
"value.converter.avro.apicurio.registry.auto-register": true,
"value.converter.avro.apicurio.registry.find-latest": true,
"value.converter.avro.apicurio.registry.artifact-resolver-strategy": "io.apicurio.registry.serde.avro.strategy.RecordIdStrategy",
...
"value.converter.schema.cloudevents.name": "CloudEvents",
...
}
}First, the configuration tells that an emitted message should be in CloudEvents format and serialized using Avro as well as its data field. Next, Apicurio-specific
properties follow:
-
value.converter.avro.apicurio.registry.urlspecifies URL at which Apicurio Registry is accessible. -
value.converter.avro.apicurio.registry.auto-registerSpecifies whether the serializer tries to create an artifact in the registry. -
value.converter.avro.apicurio.registry.find-latestspecifies whether the serializer tries to find the latest artifact in the registry for the corresponding group ID and artifact ID. -
value.converter.avro.apicurio.registry.artifact-resolver-strategyspecifies a fully-qualified Java class name that implementsArtifactReferenceResolverStrategyand maps each Kafka message to anArtifactReference. It will be clearer below.
In this project, Apicurio Registry is accessible at http://localhost:8080 in your browser; to explore artifacts, you can use Apicurio Registry UI accessible at
http://localhost:8103. If you initiate several domain events through REST API of book-service, the page with the list of existing artifacts will look like this
(the screenshots below are from Apicurio Registry 2.x version; currently, Apicurio Registry 3.x version and its UI are used in the project):
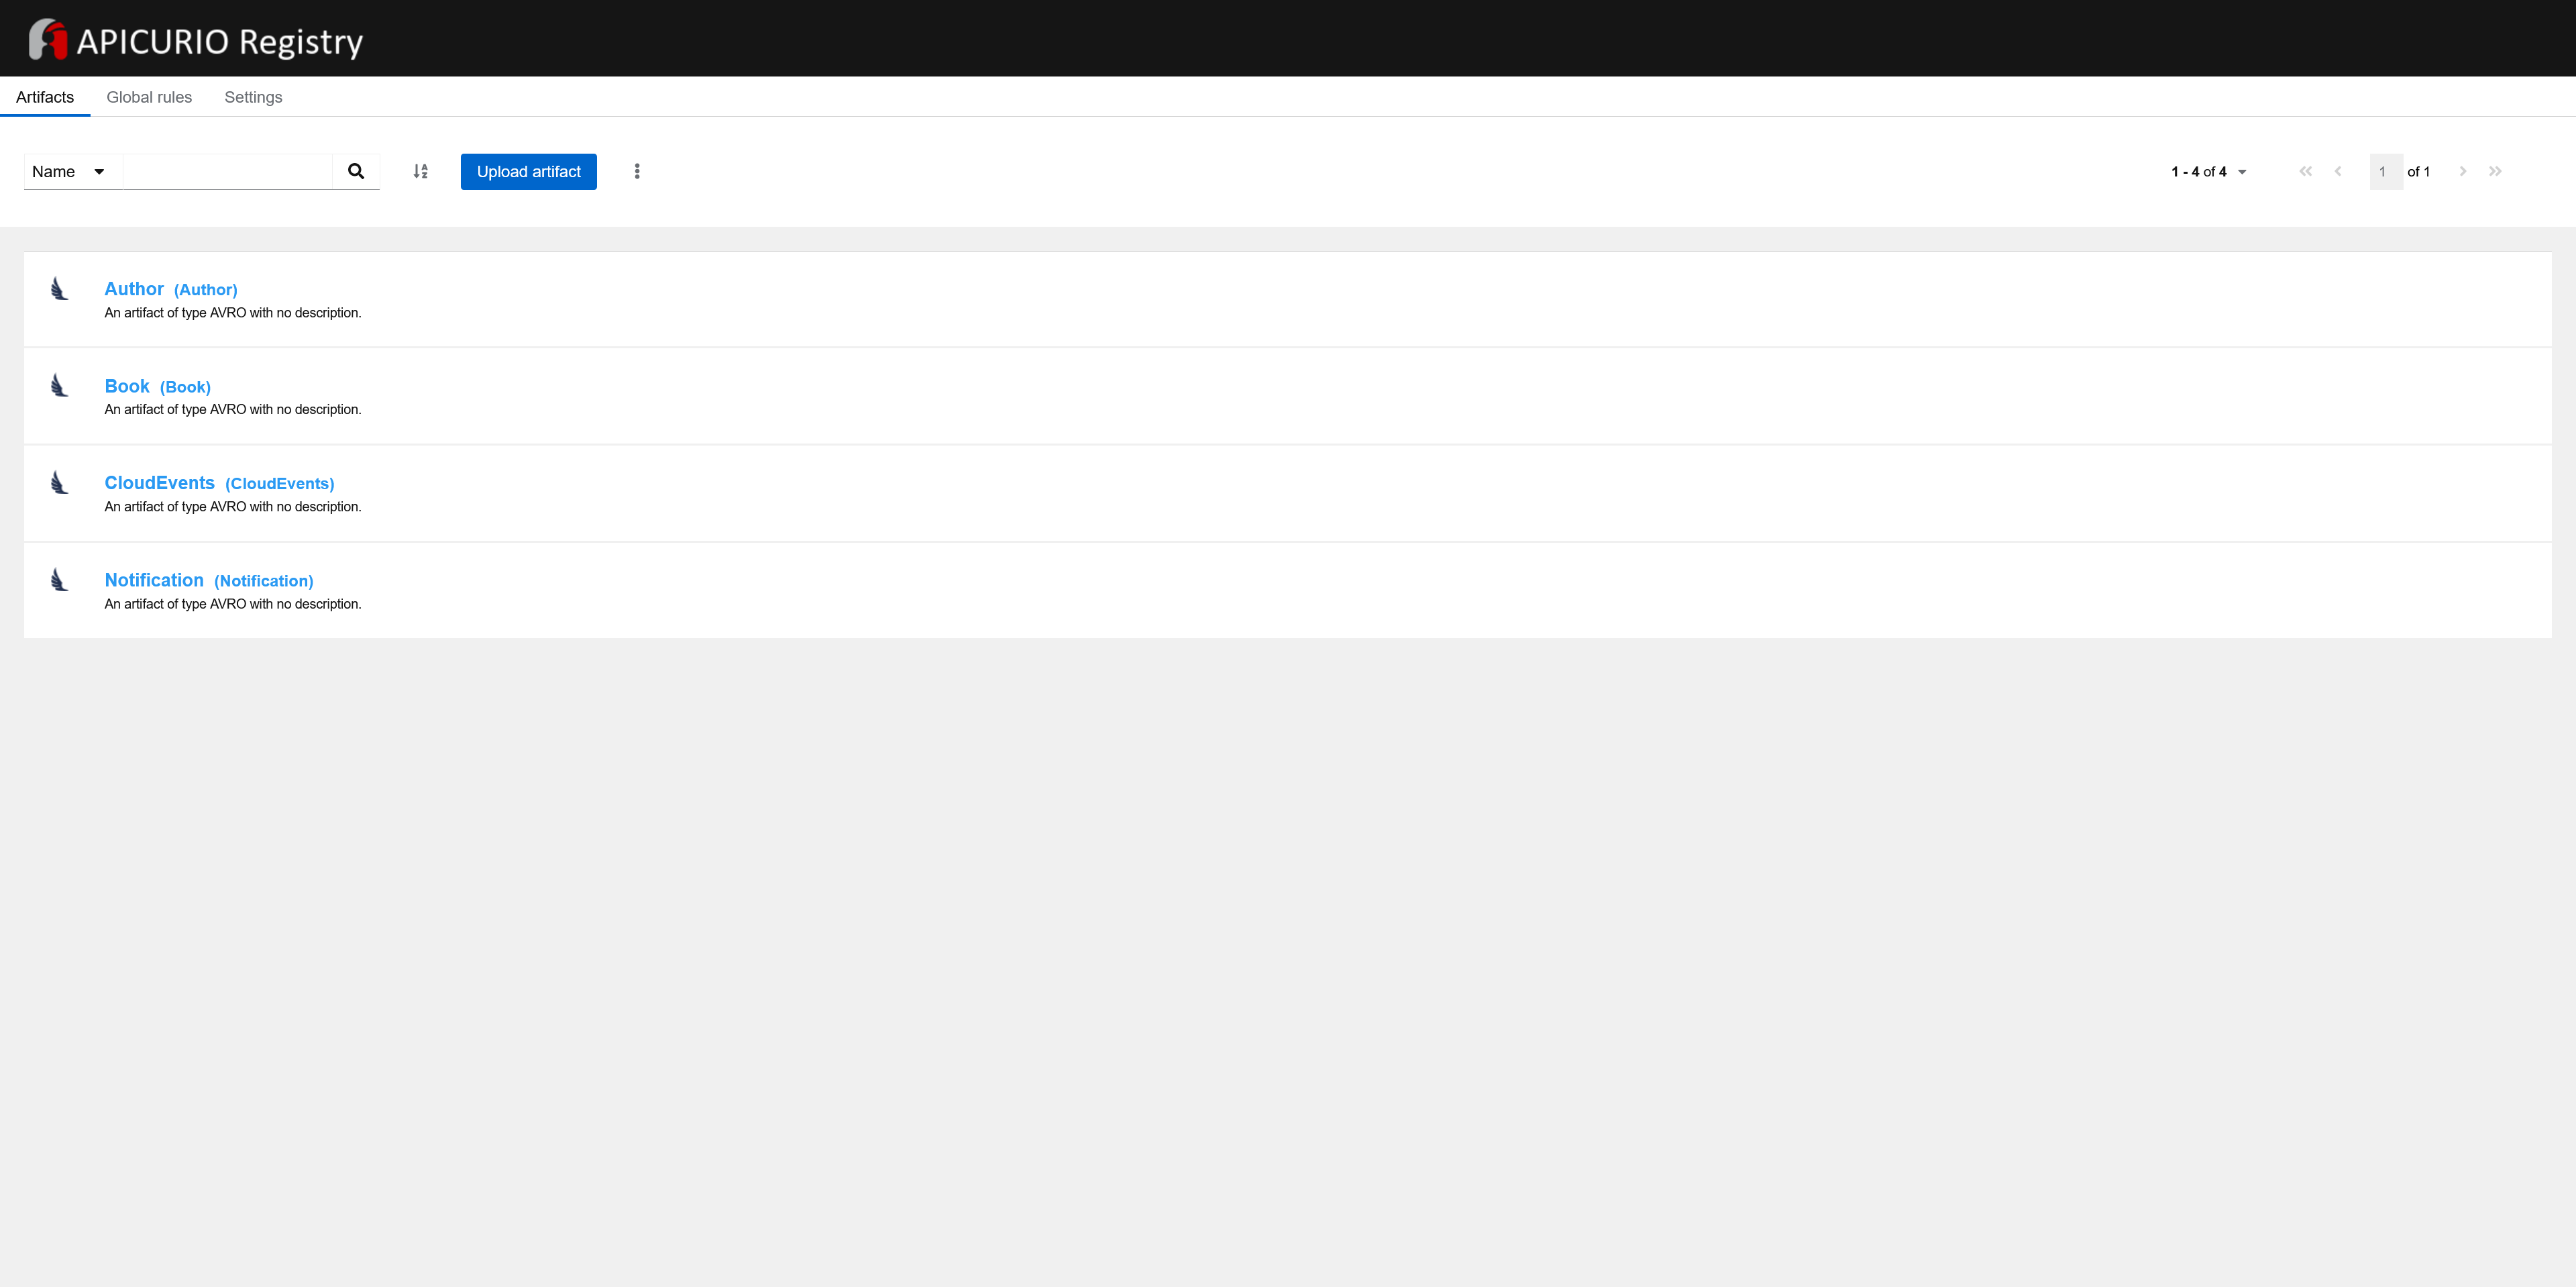
Here are a single CloudEvents schema and three schemas of data models, that is, of a content in CloudEvents' data field. We have discussed how their names are derived
in the Connectors configuration section.
Page of an artifact looks like this:
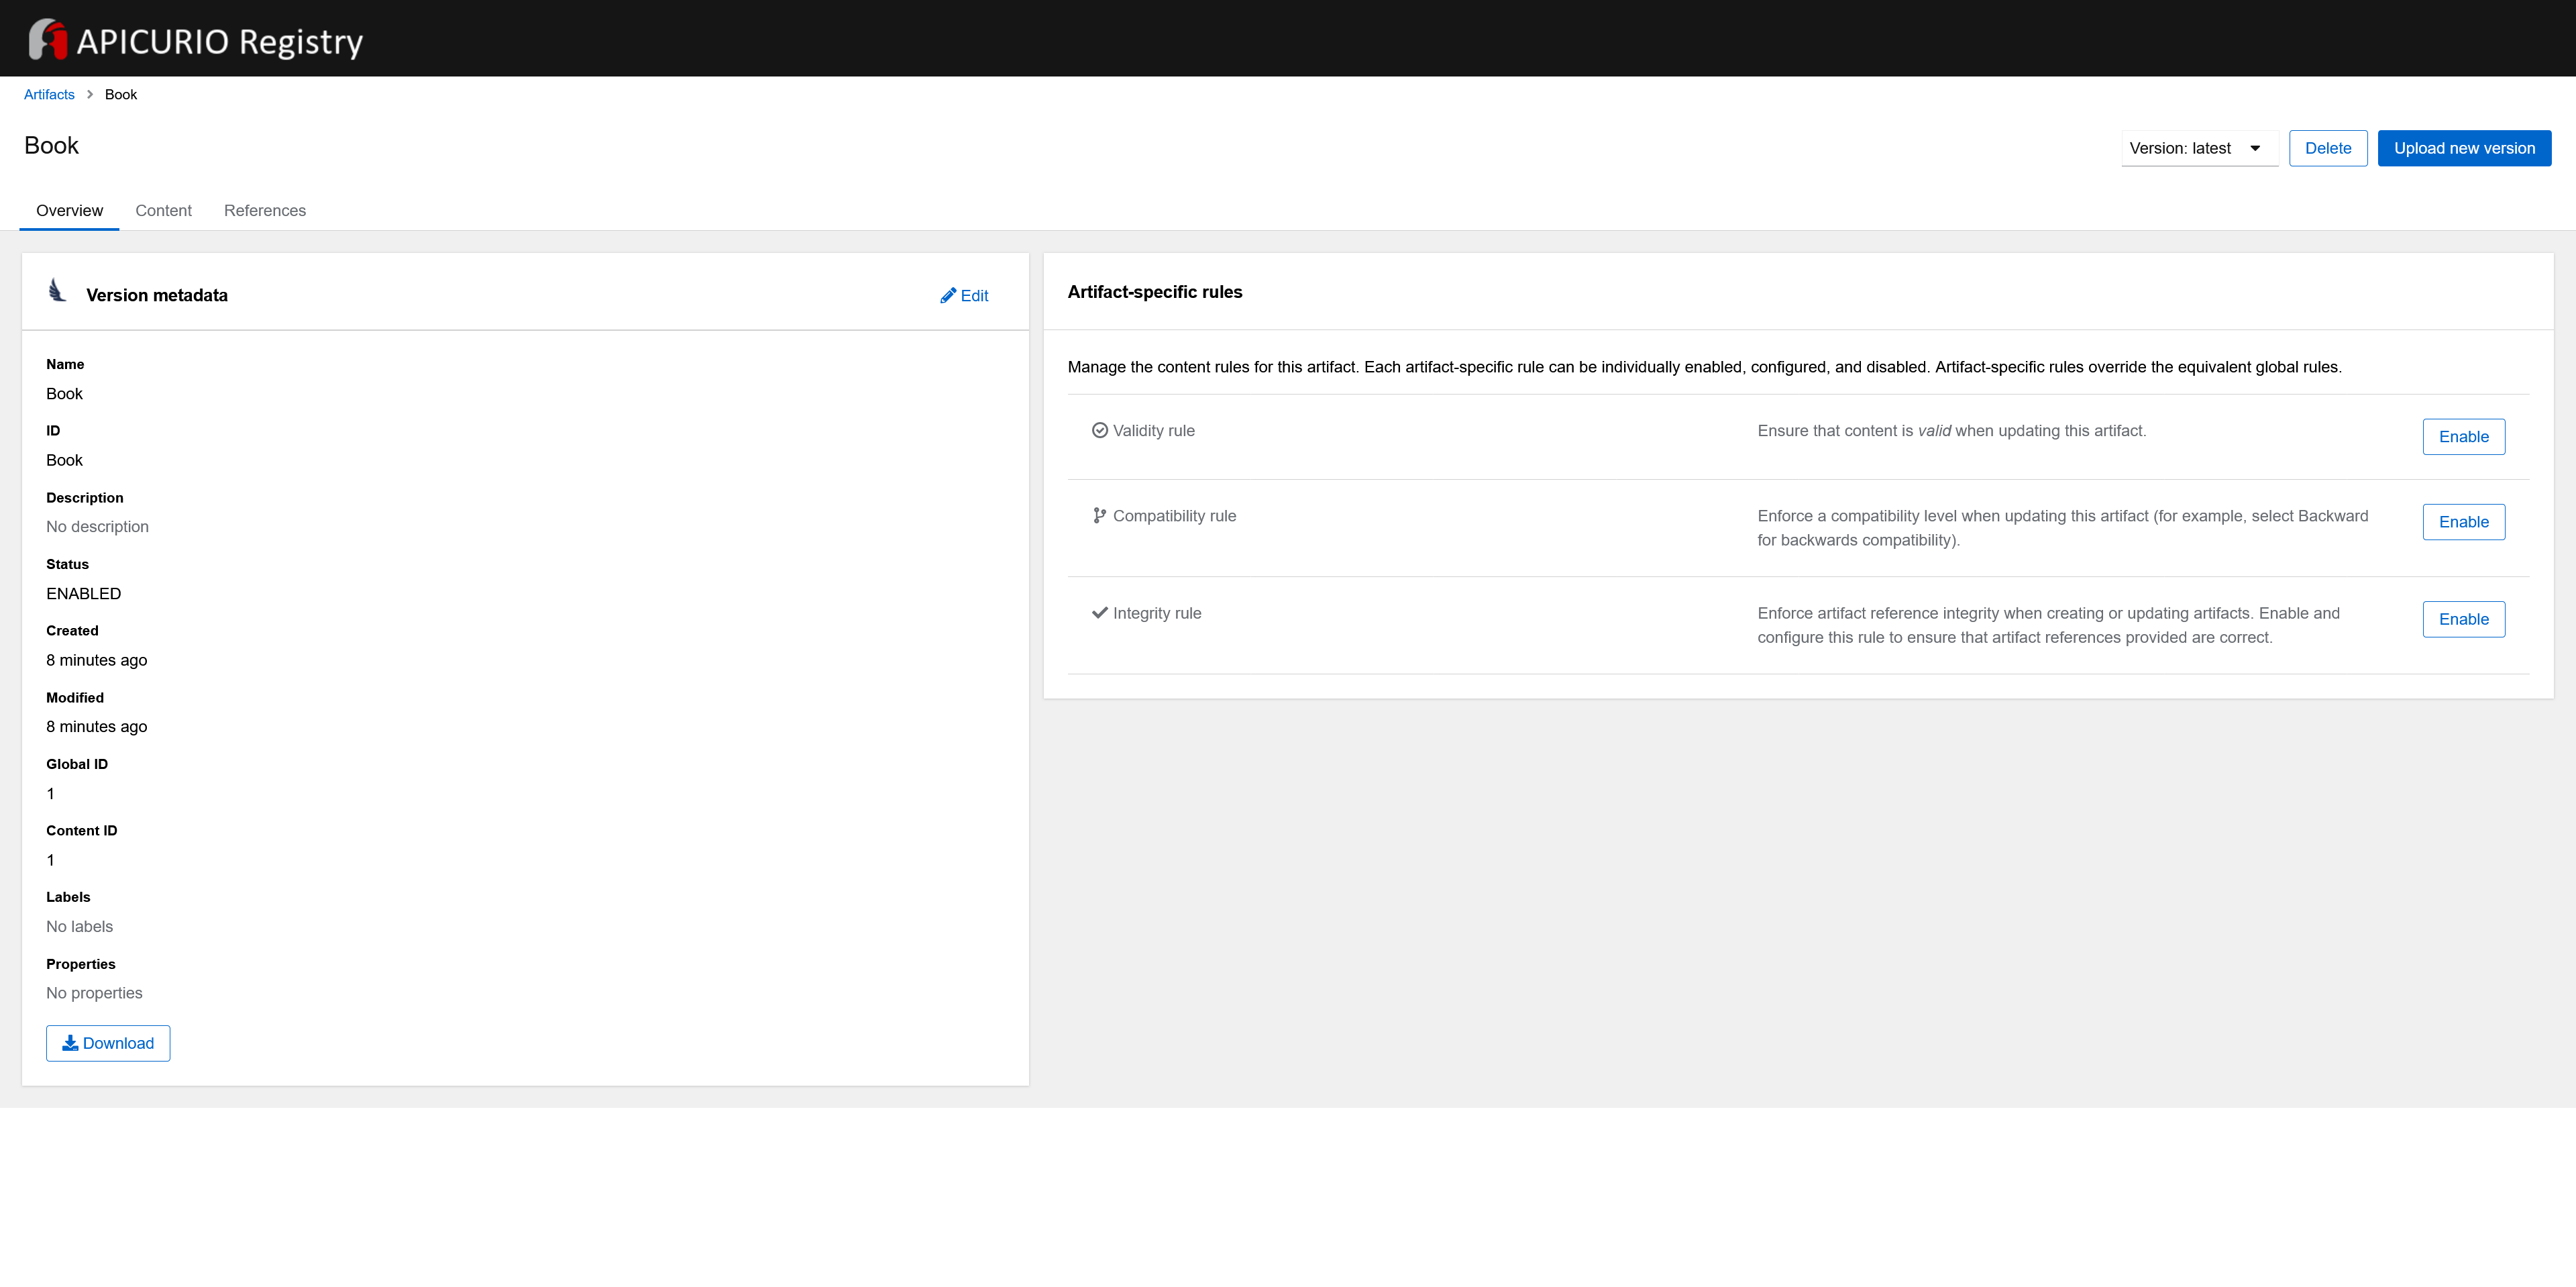
Every version of every artifact has a single globally unique identifier that can be used to retrieve the content of that artifact. The artifact ID and other
parameters under which a message schema is registered in Apicurio Registry are determined with lookup strategies. The strategies are used by the Kafka
producer serializer and implement ArtifactReferenceResolverStrategy. There are
several lookup strategies
to use with Avro; if you change value.converter.avro.apicurio.registry.artifact-resolver-strategy from RecordIdStrategy to TopicRecordIdStrategy, the
IDs of the artifacts will also include a topic name, so there will be a schema of a CloudEvents envelope per each topic:
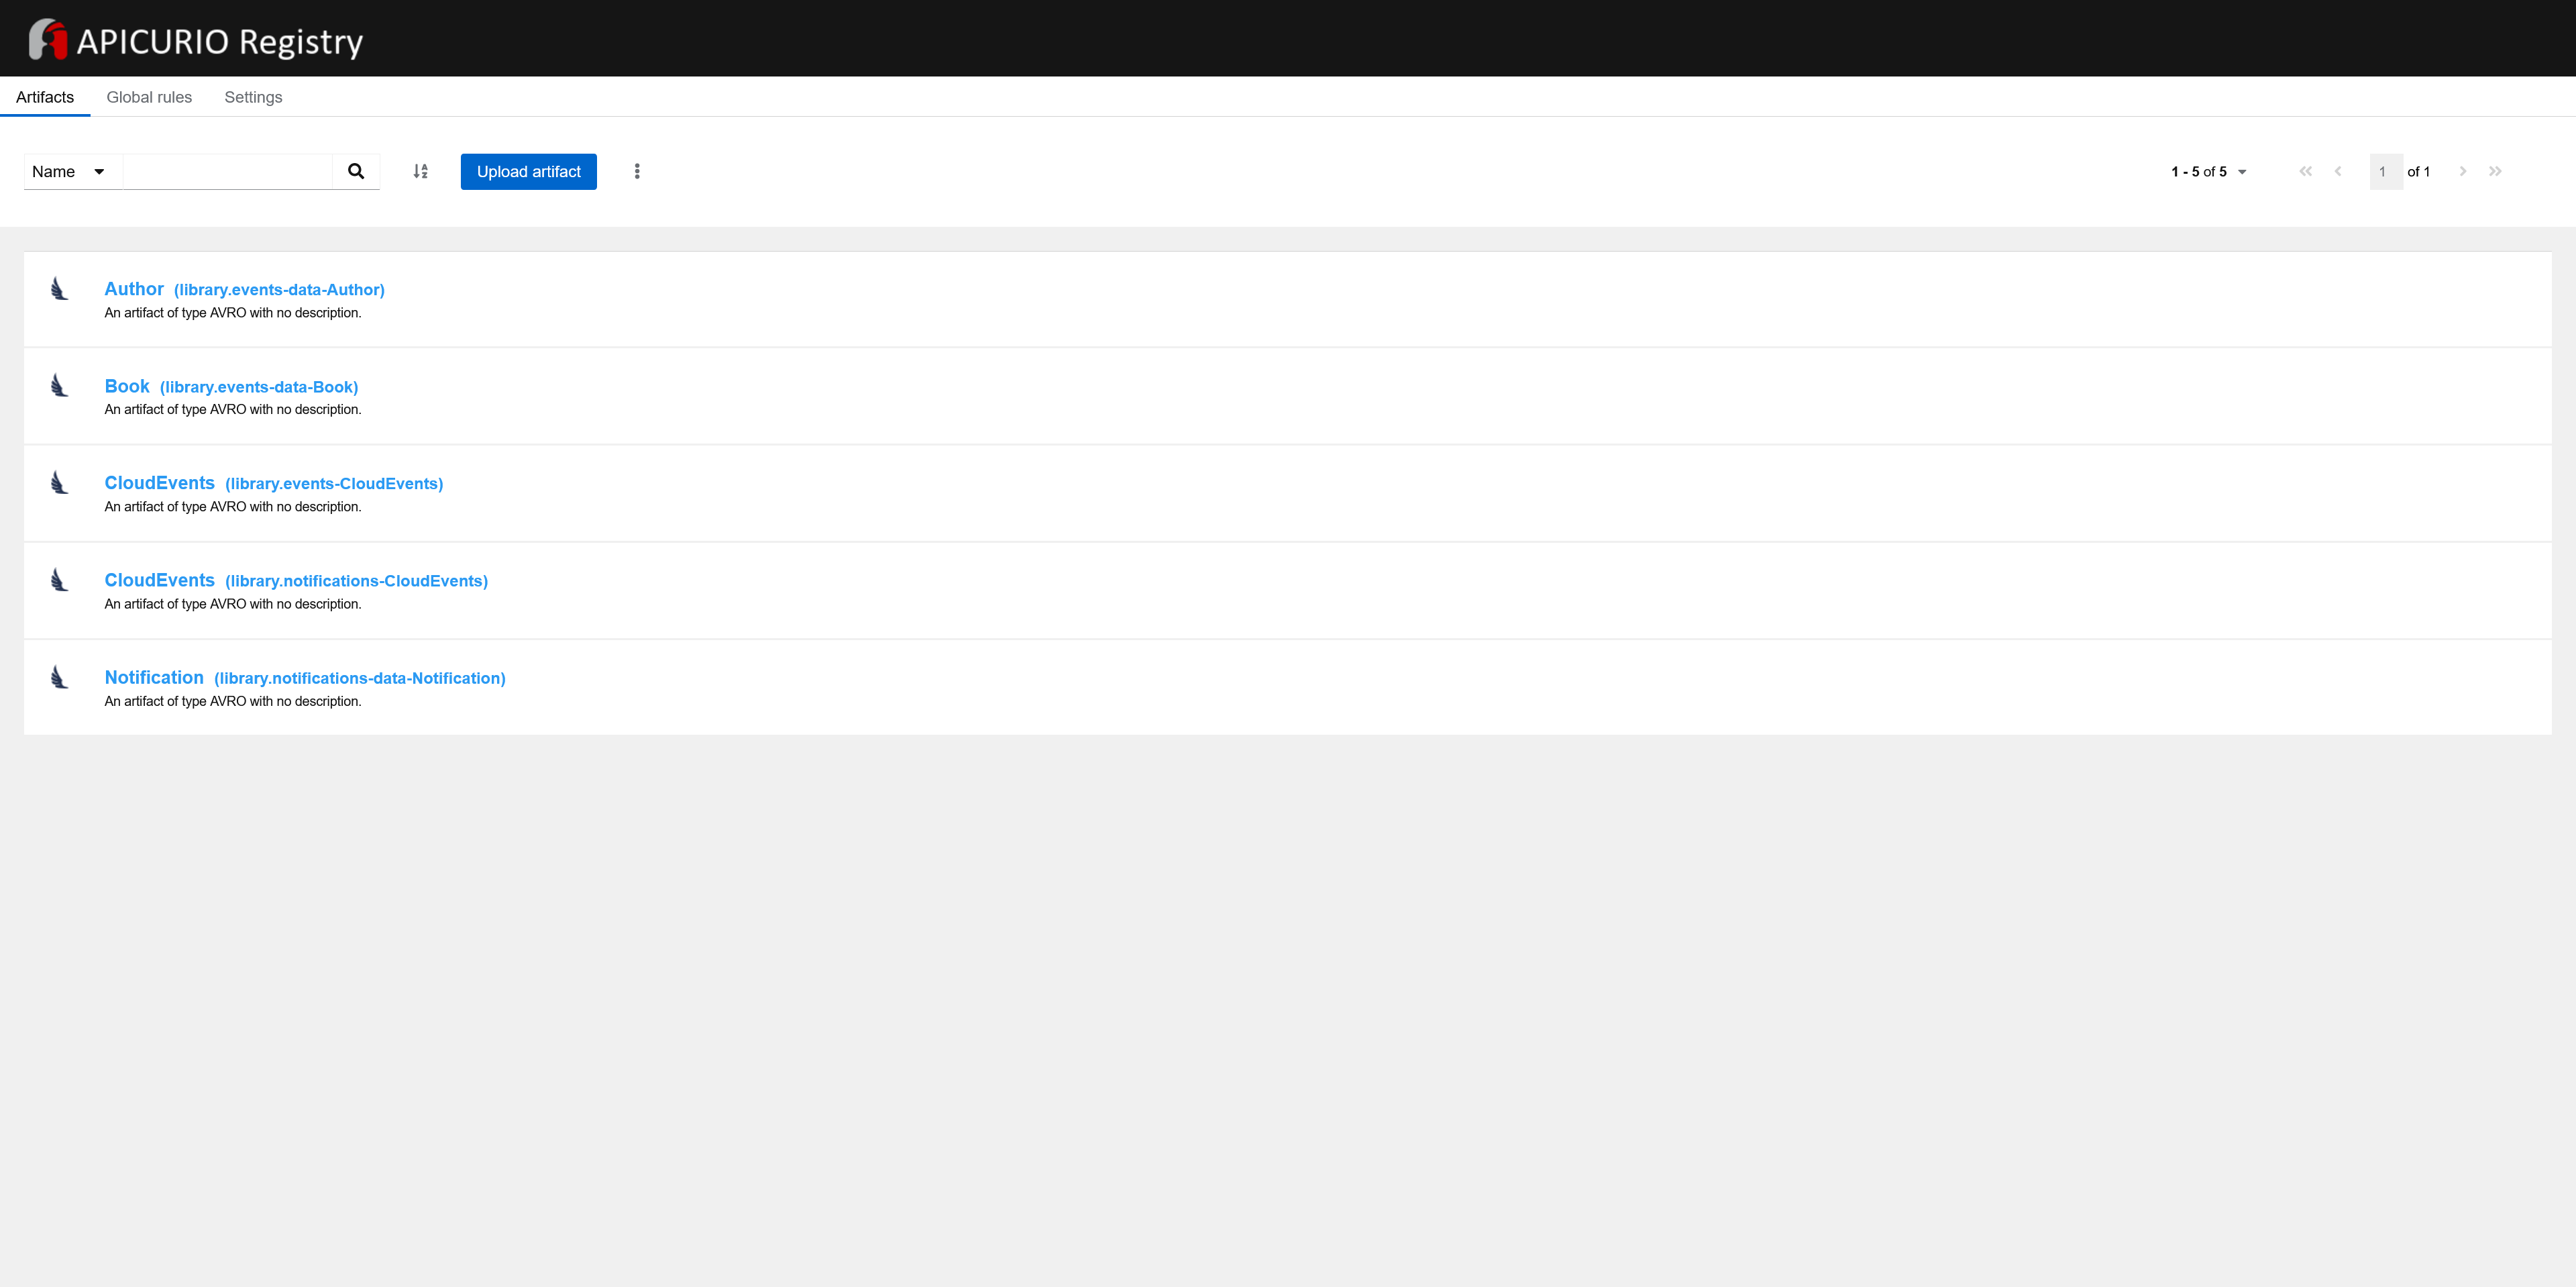
Returning to the page of an artifact, you can see that Book artifact has two versions, and they are very different from each other. This is because when
you create a book, a single book model is published, and when you update a book, a model contains current and previous states (see Book service for the
reasons). You can change that behavior by setting a different name of the aggregate for the case of a book update, for example, CurrentAndPreviousBookStates
so there will be two different artifacts for cases of a book creation and update. But even if models for both cases would contain a single book, there could
be multiple versions of the book model because they could change in optional fields: for example, a created book has empty value for its currentLoan
field or doesn’t include the field at all so Kafka Connect/Debezium can’t define a type of the property or doesn’t include it to the schema; at the same time,
an updated book can be previously borrowed by a user so its currentLoan field is not empty and has a certain type. Addressing this question, I created
this issue. Notification artifact has a single version as expected.
If in your project it is possible that multiple services can publish different schemas with the same name you probably need to do one of the following:
-
use a qualifier in a schema name
-
use a lookup strategy different from
RecordIdStrategy
As for CloudEvents schema in a schema registry, I think it is worth to at least consider a possibility to provide the predefined schema as in my opinion there should be a single version of the schema in a schema registry, and it should be the same in any project. That follows from CloudEvents concept.
Reverse proxy
In this project, the reverse proxy is needed to route requests from a user to book-service (that is, to its REST API) and notification-service
(index.html with CSS
and JS resources and WebSocket endpoint). Initially, I used Nginx for that. During the implementation of the project, I formulated
the following requirements for the reverse proxy module in addition to HTTP and WebSocket proxying:
-
rate limiting support
-
simplicity of HTTPS & TLS setup
-
simplicity of the module building
It turned out that making project accessible through HTTPS is much easier using Caddy web server, that is, you don’t have to
do anything special because HTTPS is used automatically and by default on any environment including
localhost. But let’s start with the proxying:
{
	order rate_limit before basicauth
}

{$DOMAIN} {
	handle_path /book-service* {
		rate_limit {
			zone book_srv {
				key {remote_host}
				events 6
				window 1m
			}
		}

		reverse_proxy book-service:8080
	}

	handle_path /* {
		rate_limit {
			zone notification_srv {
				key {remote_host}
				events 30
				window 1m
			}
		}

		reverse_proxy notification-service:8080
	}
}
DOMAIN environment variable can be eda-demo.romankudryashov.com or
localhost depending on the environment.
As you can see, configuration for reverse proxying using reverse_proxy directive
is equally simple for both HTTP/HTTPS and WebSocket protocols.
The only non-obvious thing for me was that rate limiting functionality is not included to the web server by default; for that, if you run Caddy in a
Docker container, you need to create a custom Dockerfile
where you add HTTP Rate Limit Module, and build Docker image from it. Then you can
order rate_limit before basicauth in the Caddyfile.
If you try to access UI to receive user notifications, you may see a warning screen from a browser:
You can proceed with that but if you want to access the UI locally through plain HTTP, add localhost:80 (or use other port) by editing the list of
addresses of a site in Caddyfile.
Caddy Docker container is defined like this:
caddy:
  image: kudryashovroman/event-driven-architecture:caddy
  container_name: caddy
  restart: always
  depends_on: [ book-service, notification-service ]
  environment:
    DOMAIN: eda-demo.romankudryashov.com
  ports:
    - "80:80"
    - "443:443"
  volumes:
    - ./misc/caddy/Caddyfile:/etc/caddy/Caddyfile:ro
    - ./misc/caddy/data:/data
    - ./misc/caddy/config:/config
It is very important to persist the data directory because, in particular, TLS certificates are stored in that
directory. If you run Caddy in a Docker container, as in this project, use a volume for persisting data generated by and used by the container.
Otherwise, after each restart of a project, and therefore recreating the container, Caddy won’t find a certificate locally and thus will try to obtain
it; if you are actively developing, testing, or deploying your project, you may exceed Let’s Encrypt’s rate
limits. In this project, certificates are persisted on a virtual machine’s storage; the VM is recreated quite rarely, so the rate limits won’t be exceeded.
Also, during the aforementioned phases of your project, it is recommended to use Let’s Encrypt’s staging environment. You can do that by adding ACME URL for the staging environment to Caddyfile as follows:
{
	acme_ca https://acme-staging-v02.api.letsencrypt.org/directory
	order rate_limit before basicauth
}
...
You can find the Nginx configuration for the project in the commit history. It does the same things as Caddy config does except HTTPS support. If you want to set up Nginx to make a project accessible through HTTPS, it is worth noting mkcert (for local development) and Certbot (for deployment to other environments) tools.
Locally, it is not mandatory to use the reverse proxy: you can also use http://localhost:8091 for book-service and http://localhost:8093 for notification-service.
Monitoring tools
For the monitoring, I use Kafka UI and pgAdmin running as Docker
containers that are accessible at http://localhost:8101 and http://localhost:8102 respectively.
Using Kafka UI, you can manage your Kafka cluster, specifically, observe existing consumers, structure of messages, and existing topics:

Using pgAdmin, you can monitor what is happening in your databases, in particular, the contents of tables:
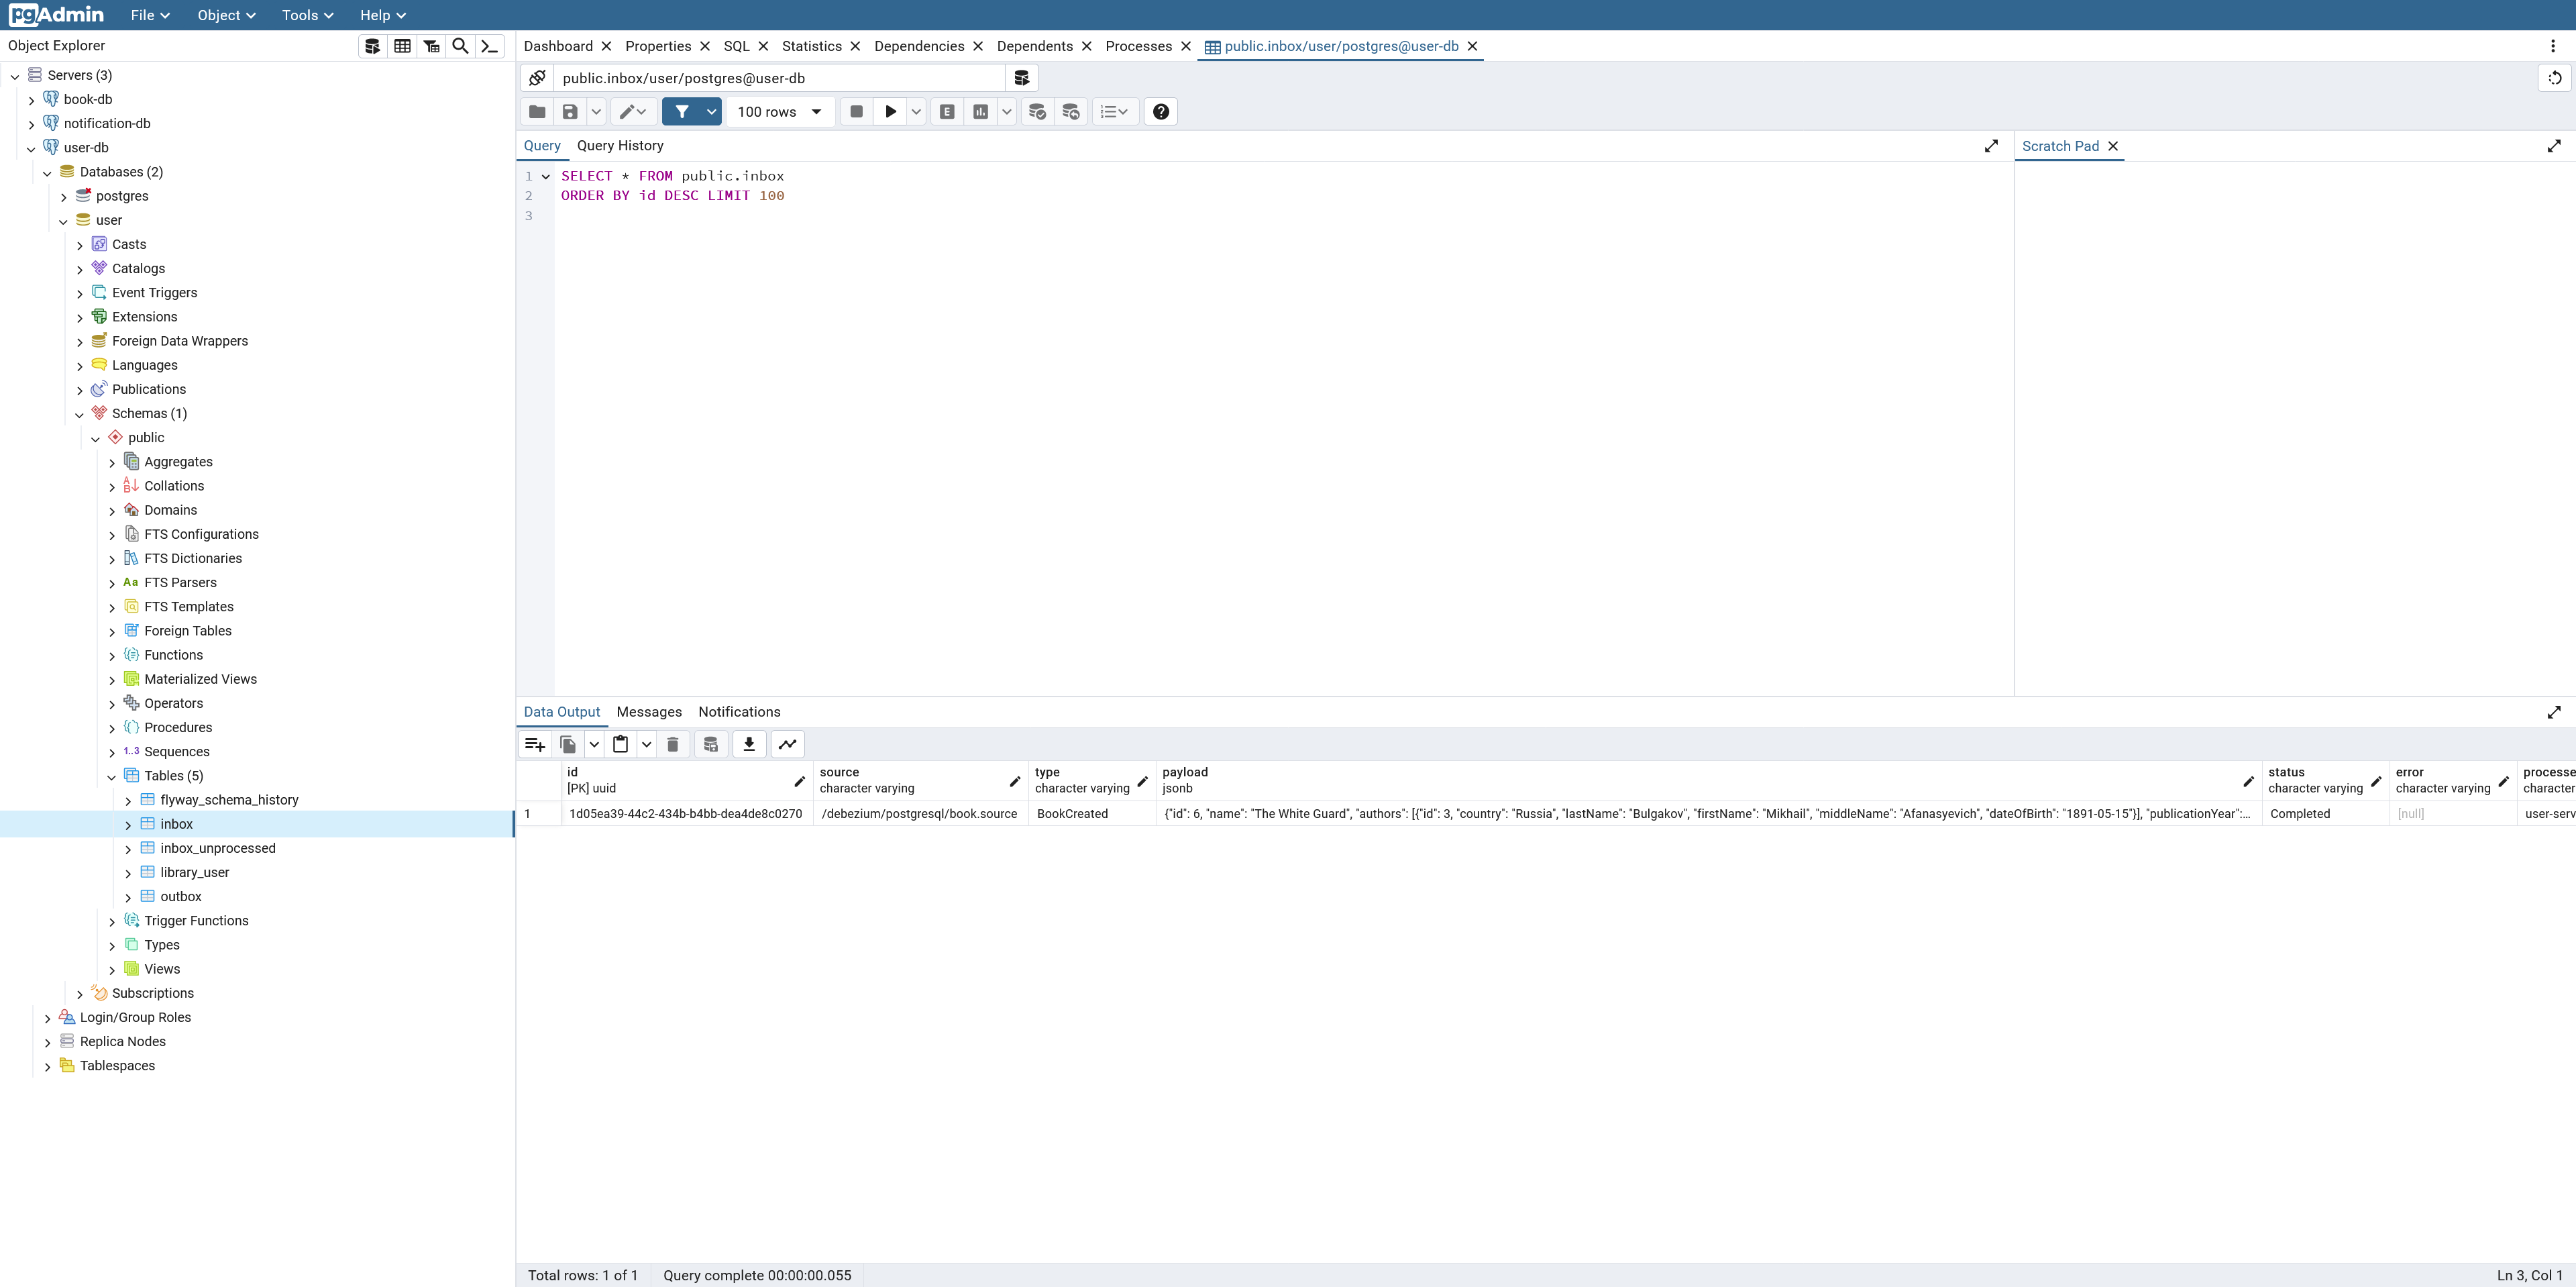
To save myself the trouble of entering master password, configuring three database connections, and entering passwords for them, I do the following:
-
PGADMIN_CONFIG_MASTER_PASSWORD_REQUIRED: "False" -
use file with credentials for the databases
Make sure you do not use this approach in your production environment as it is not secure.
Don’t forget to use docker logs <container-name> -f to see what’s going on inside a Docker container.
Local launch and CI/CD
To launch the project locally, you need to have Docker installed. Next, execute docker compose up in the root folder. This will apply
a merged combination of:
-
compose.yaml— base/testing configuration -
compose.override.yaml— overrides base configuration making it convenient for development
The microservices, in turn, can be launched in Docker containers or on a host machine, for example, from your IDE. Let’s discuss both options:
-
the microservices are launched using Docker.
All Docker images of the microservices should exist locally before the launch. You can apply only
compose.yamlin which case the images from Docker Hub will be used (the images are built through GitHub Actions workflow). But if you want to play around with the project, you need to build the images locally (see the Build section).In this case, it is convenient to restart the project (
docker compose down/up) and rebuild the microservices using a single command; the following is an example of the script for Windows:Listing 65. Script to restart the project and rebuild the microservicesdocker compose down --volumes rmdir /s /q misc\kafka_data @REM build all Docker images in parallel call gradlew :book-service:bootBuildImage :user-service:bootBuildImage :notification-service:bootBuildImage || exit /b @REM build all Docker images sequentially @REM call gradlew :book-service:bootBuildImage || exit /b @REM call gradlew :user-service:bootBuildImage || exit /b @REM call gradlew :notification-service:bootBuildImage || exit /b docker compose up -
the microservices are launched on a host machine.
For example, start the services from your IDE; if needed, specify required Spring profiles for a service through an environment variable, for example:
spring.profiles.active=local,test.
To build Caddy image locally instead of pulling it
from Docker Hub, use docker compose up --build.
CI/CD is implemented using GitHub Actions. The workflow builds Docker images of the services, pushes them to Docker Hub, and deploys the project to a virtual machine in the cloud. The deployment script does the following:
-
Initialization of a virtual machine if needed; it does the following:
-
installs Docker.
-
configures the VM to manage Docker as a non-root user.
-
creates a custom Docker’s
daemon.jsonto configure log rotation to prevent containers' logs from growing indefinitely.
-
-
The deployment (
docker compose down/docker compose up).
Additionally, the script adds a cron job to redeploy the project periodically in order to clean up storage space.
The UI is accessible at eda-demo.romankudryashov.com and, respectively, base URL for executing requests against REST API is
https://eda-demo.romankudryashov.com.
Testing
All the subsections below describe different scenarios that in one form or another mean usage of Transactional outbox and/or Inbox patterns. Moreover, the scenario of sending user notifications considered in the first subsection implies Saga pattern usage, that is, a change initiated by a REST API method through a chain of several microservices, databases, connectors, and Kafka will eventually be delivered to a user.
REST API and user notifications testing
There are some limitations to functionality when deploying a project to a test environment (see the Book service section), so we start with a local environment.
For the testing, you need a utility that allows to perform requests to REST API. For that, I use Postman and a
Postman collection containing examples of
requests to REST API of book-service
exposed by Caddy. The collection also contains a couple of requests
to Kafka Connect REST API described earlier). URLs in the Postman collection use baseUrl environment variable, for example, {{baseUrl}}/book-service/books;
by default, it is set to https://localhost.
After you have launched the project, you can execute requests against REST API of book-service exposed by Caddy and see their results that is notifications
displayed in the UI. Let’s start by getting a list of all the books in the library; for that, execute GET {{baseUrl}}/book-service/books:
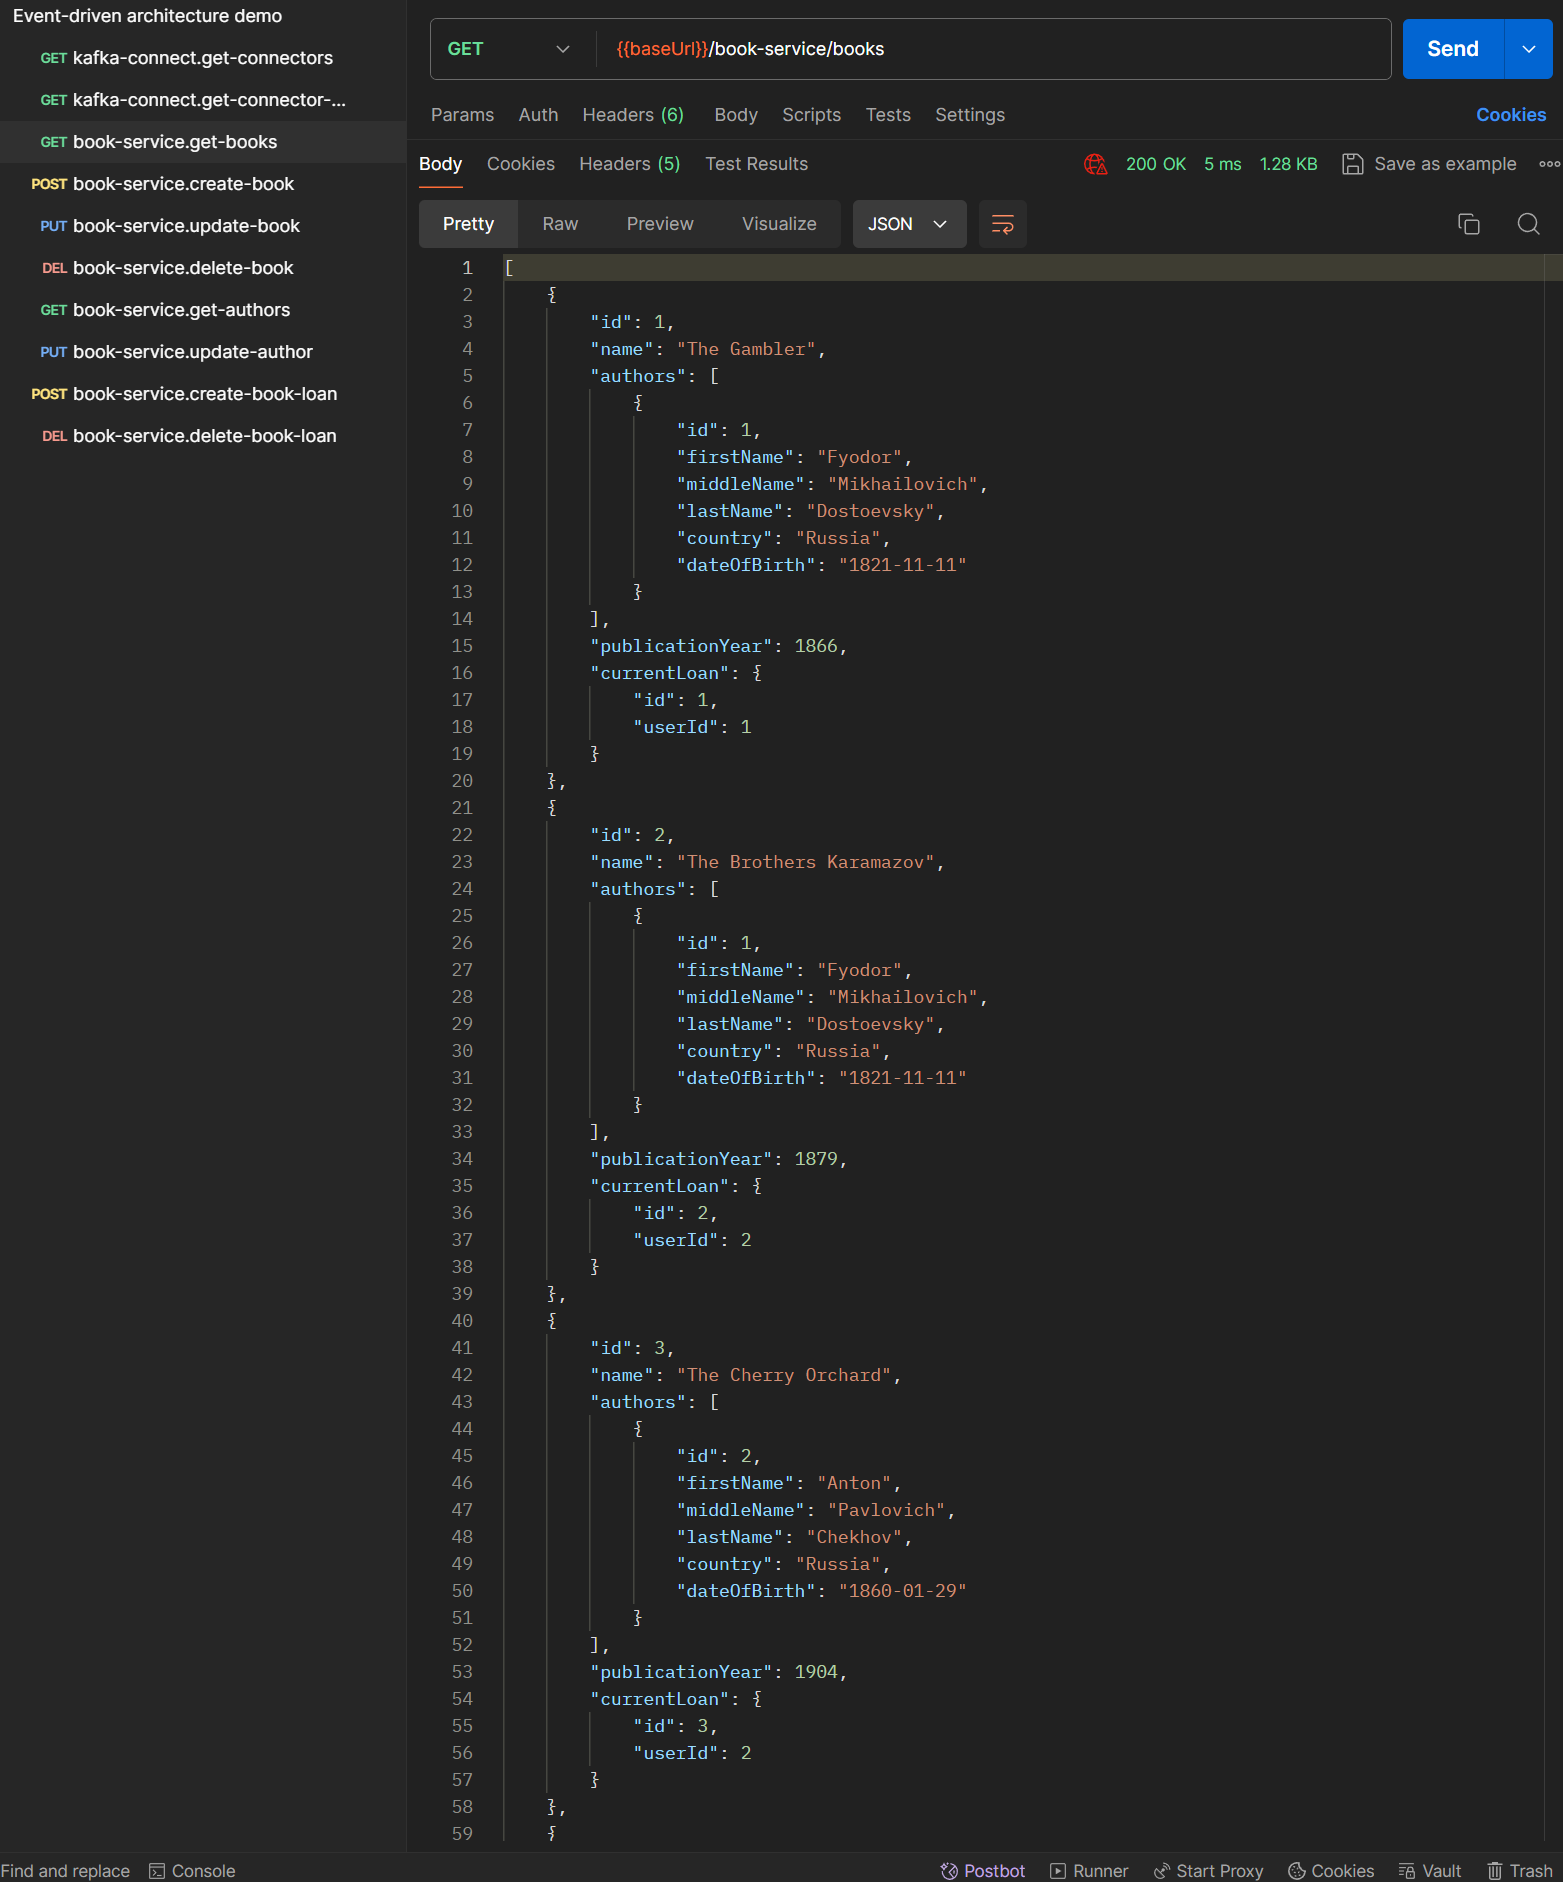
Similarly, you can get a list of all the authors using GET {{baseUrl}}/book-service/authors:
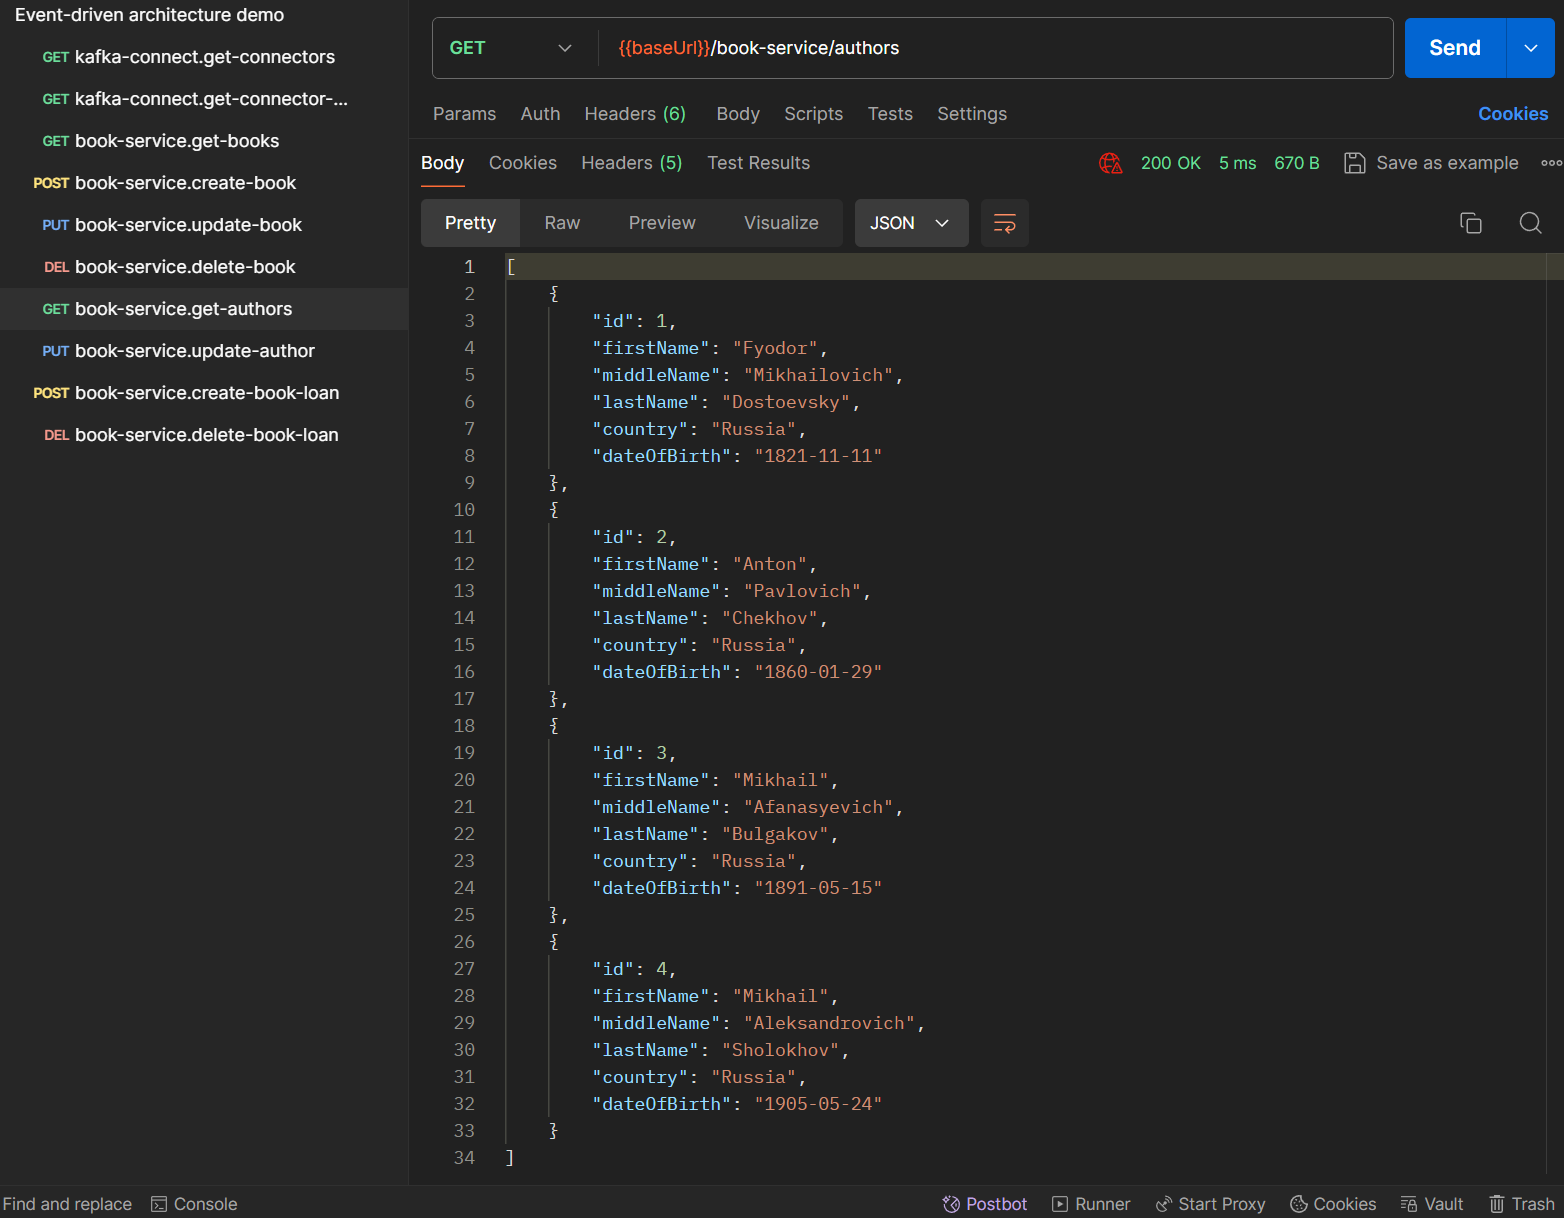
Let’s see how user notifications delivery works. For demo purposes, I’ll show the delivery through WebSocket. In your browser, navigate to https://localhost which
is served by Caddy and routes to the
page served by
notification-service; press the "Connect" button:

That initiates a connection to our WebSocket/SockJS server.
Now you can add a book to the library by executing POST {{baseUrl}}/book-service/books:
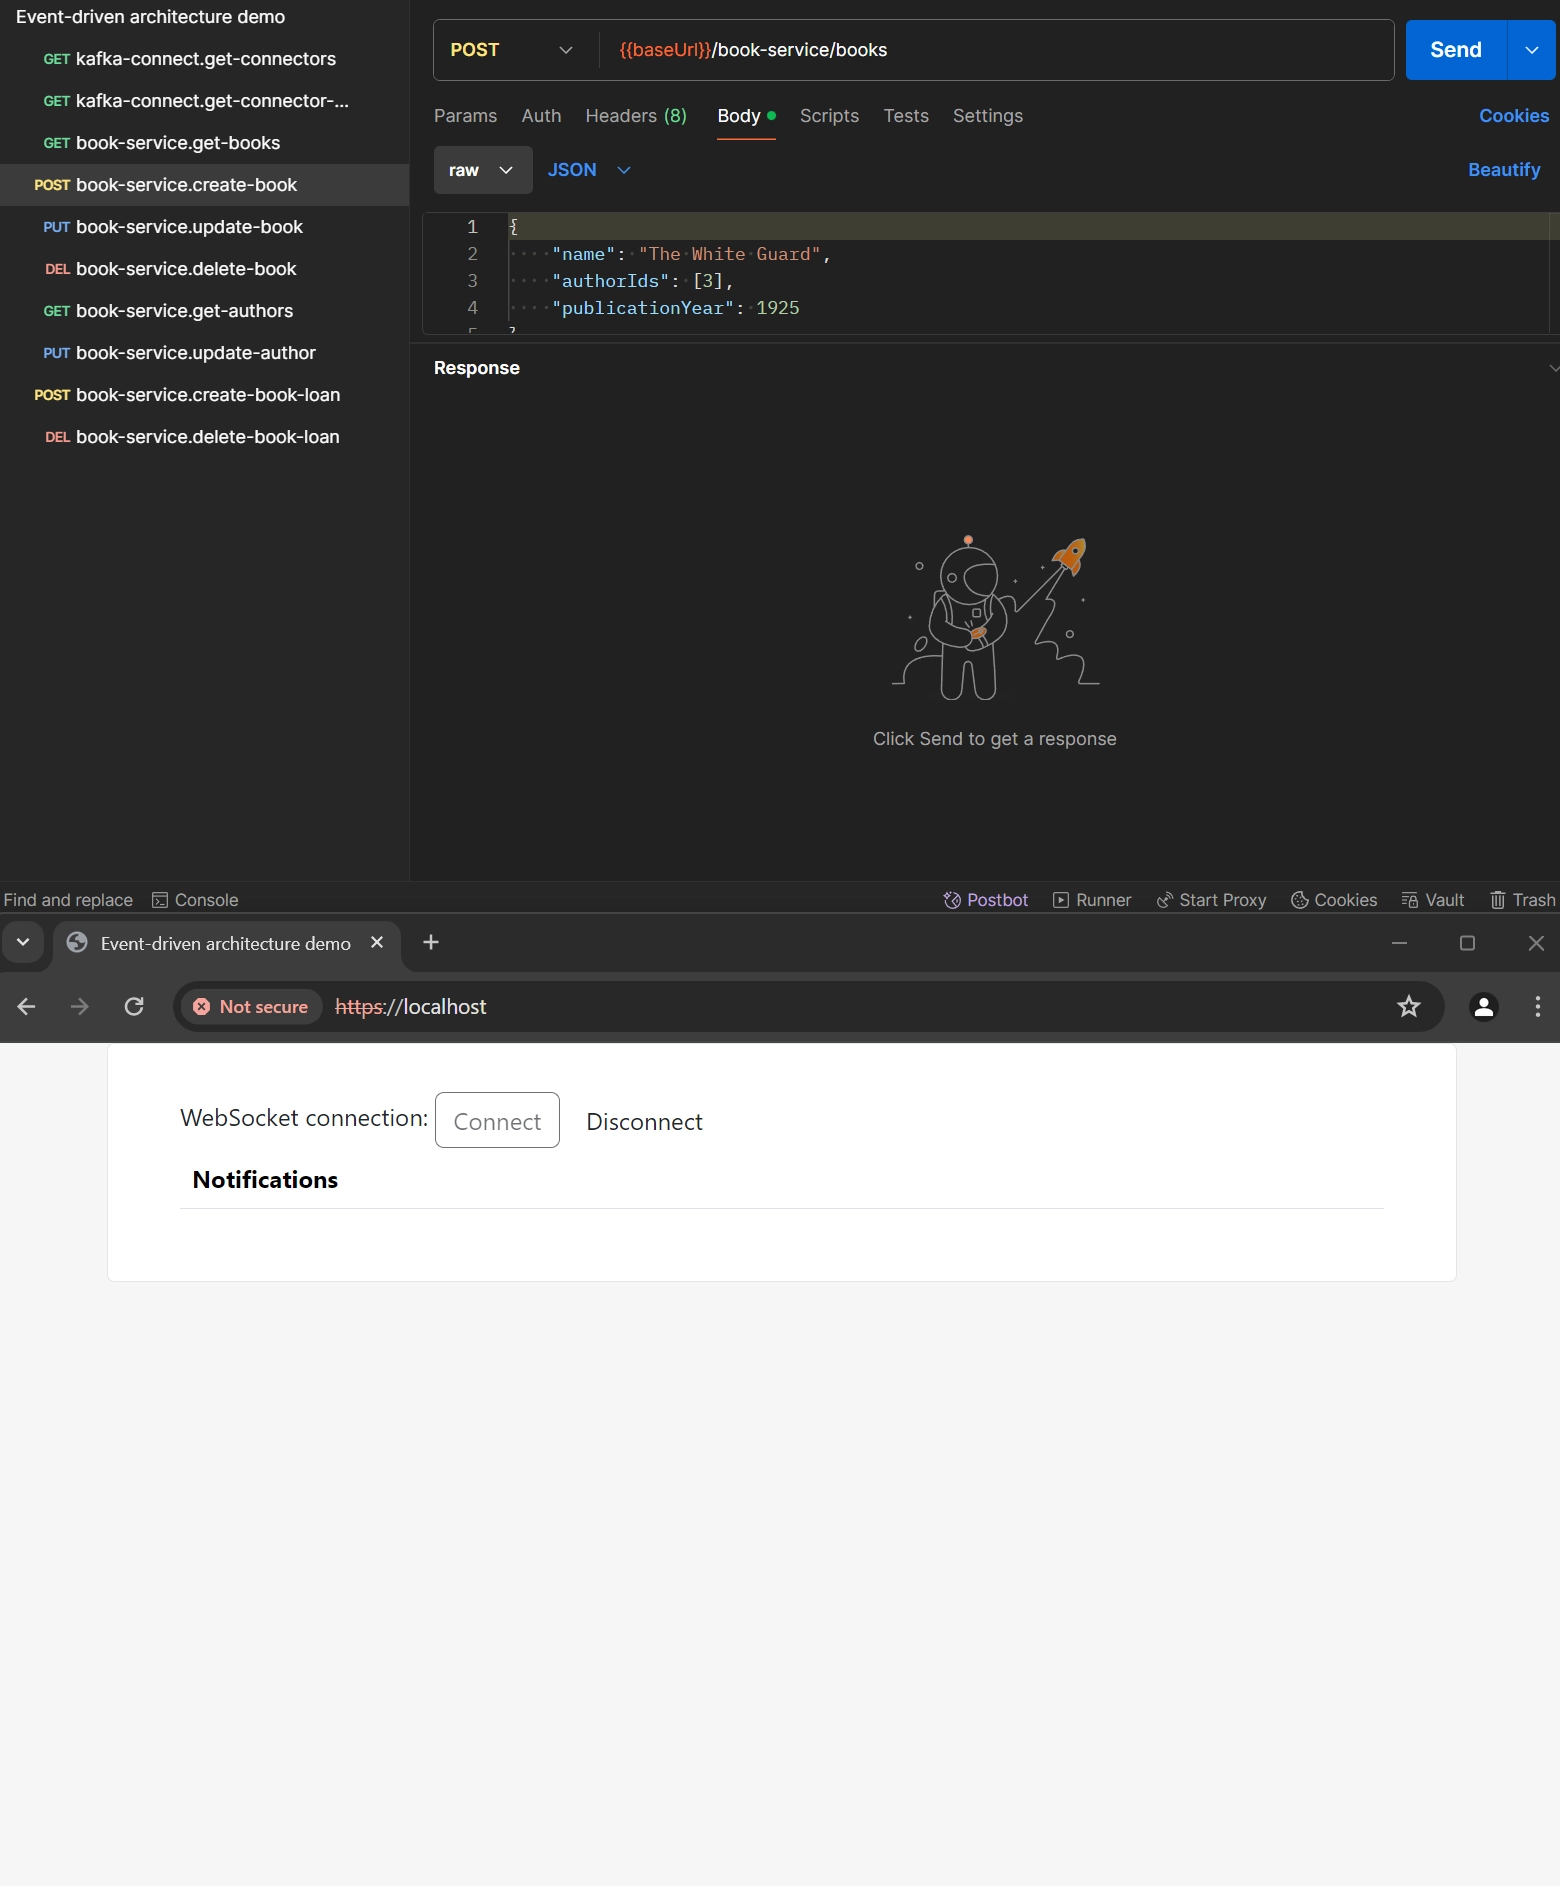
The changes caused by the initial call to the REST API have passed through the chain of several microservices, databases, connectors, and Kafka, and have been
eventually delivered to users. Two notifications arrived because there are
two users in user-db and by
business logic, an event of book creation is "broadcasted" to all users.
You can delete the book by using DELETE {{baseUrl}}/book-service/books/{id}:
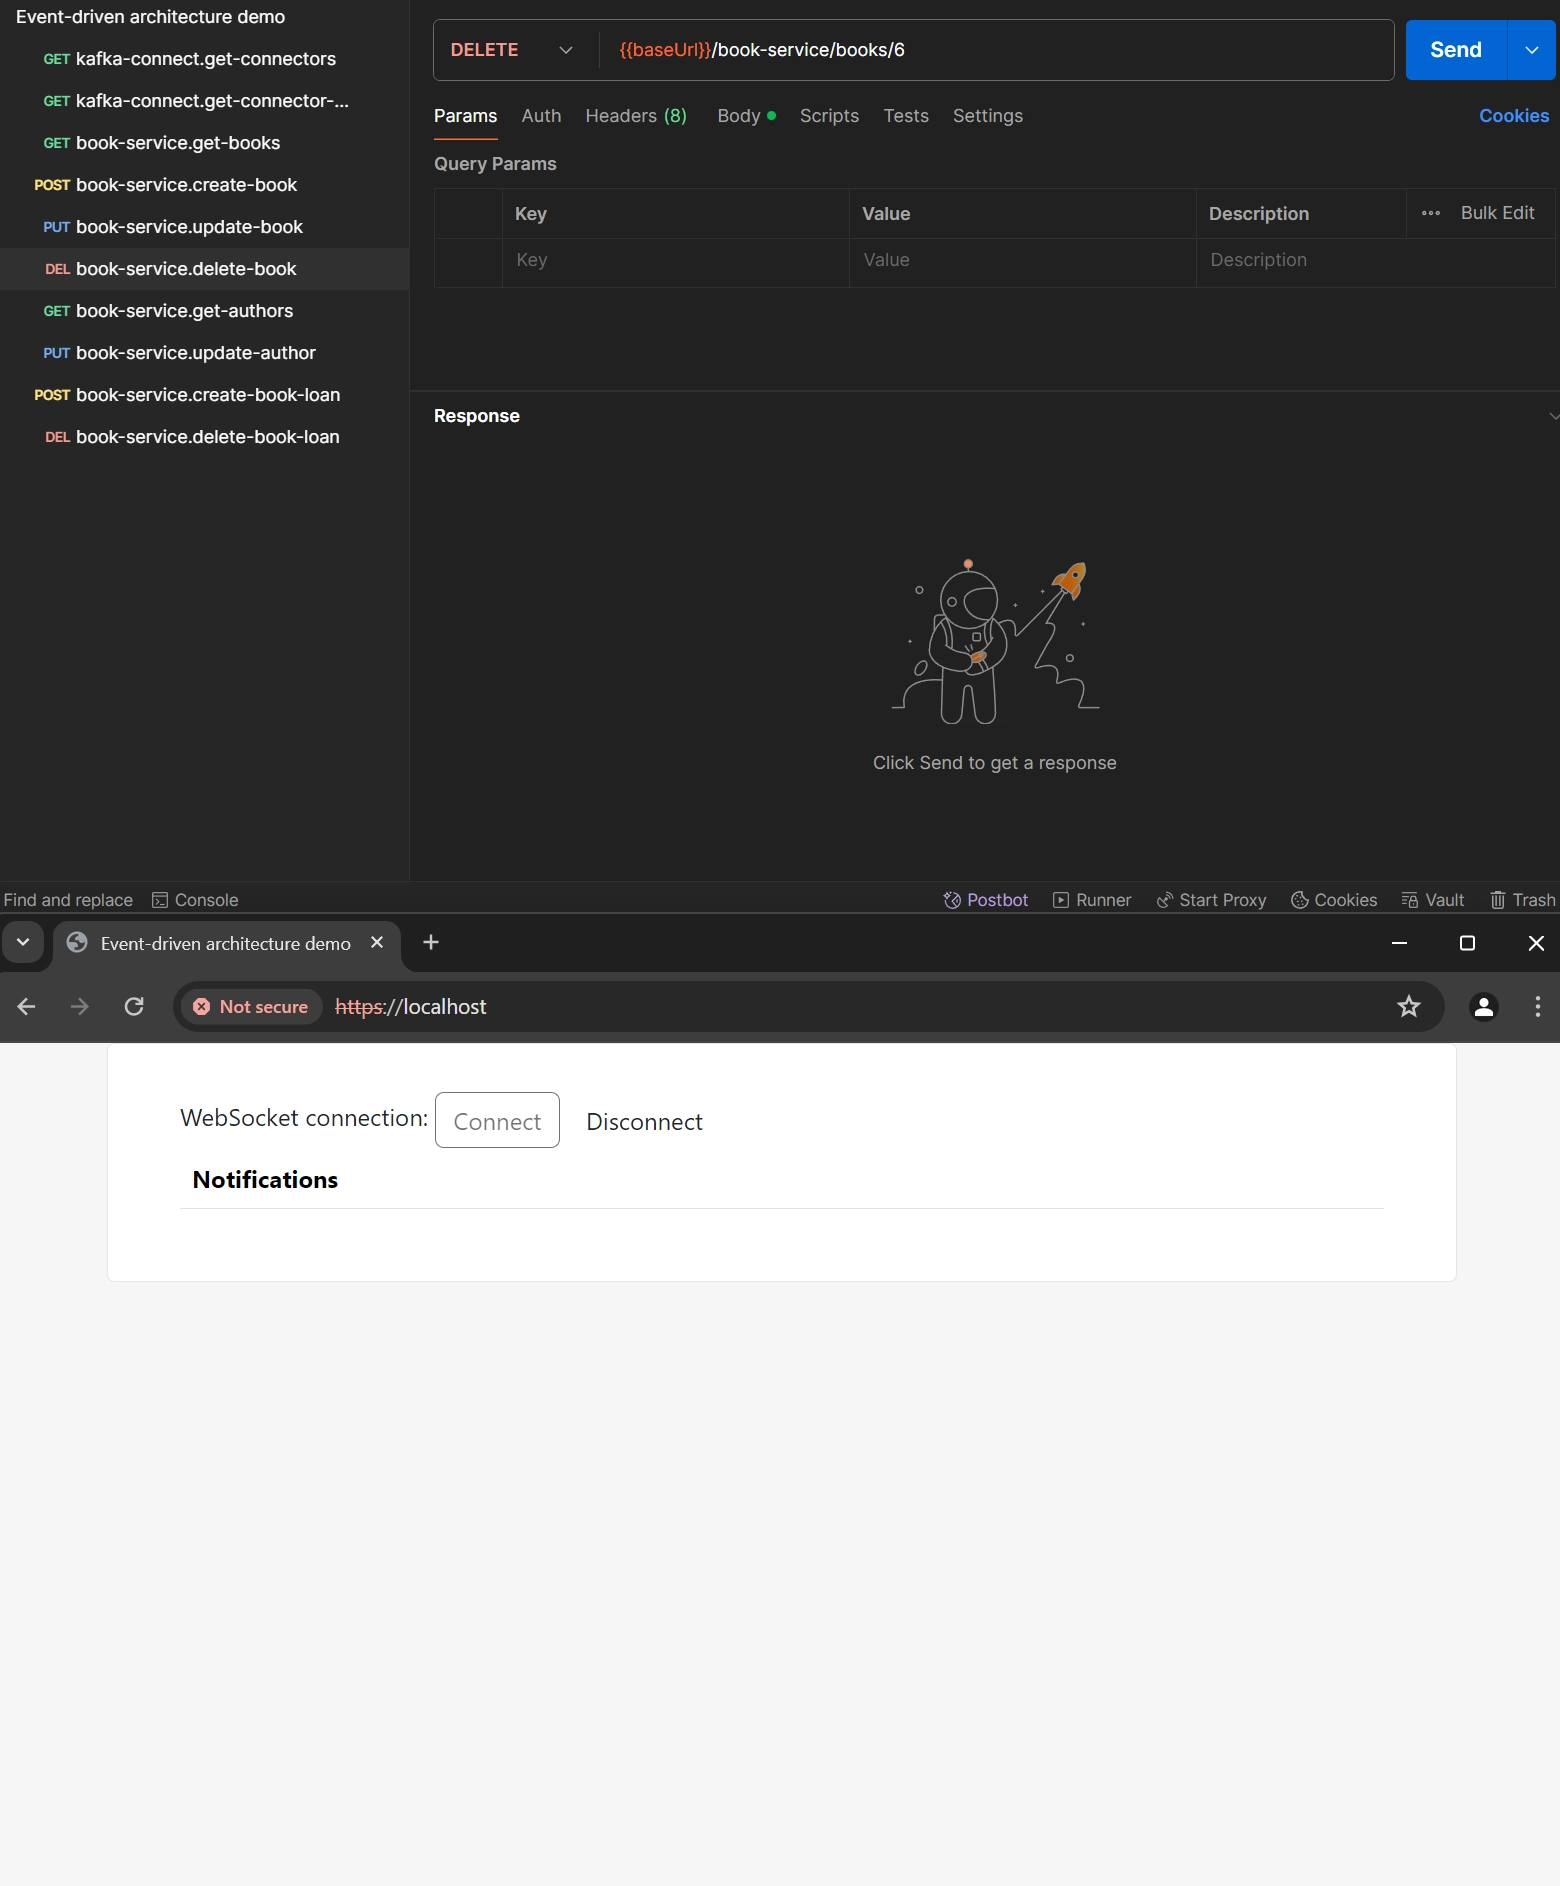
This event is also delivered to all users.
When a user borrows a book, POST {{baseUrl}}/book-service/books/{id}/loans should be executed. As said earlier, in book-service, there is a configurable parameter
whether to use streaming data of users of the library (see user.check.use-streaming-data parameter in the
config). By default, the data are not used, so
if a book is lent by a user who obviously does not exist in the database, at first the book loan entity will be successfully created by book-service but eventually
the created book loan will be canceled:
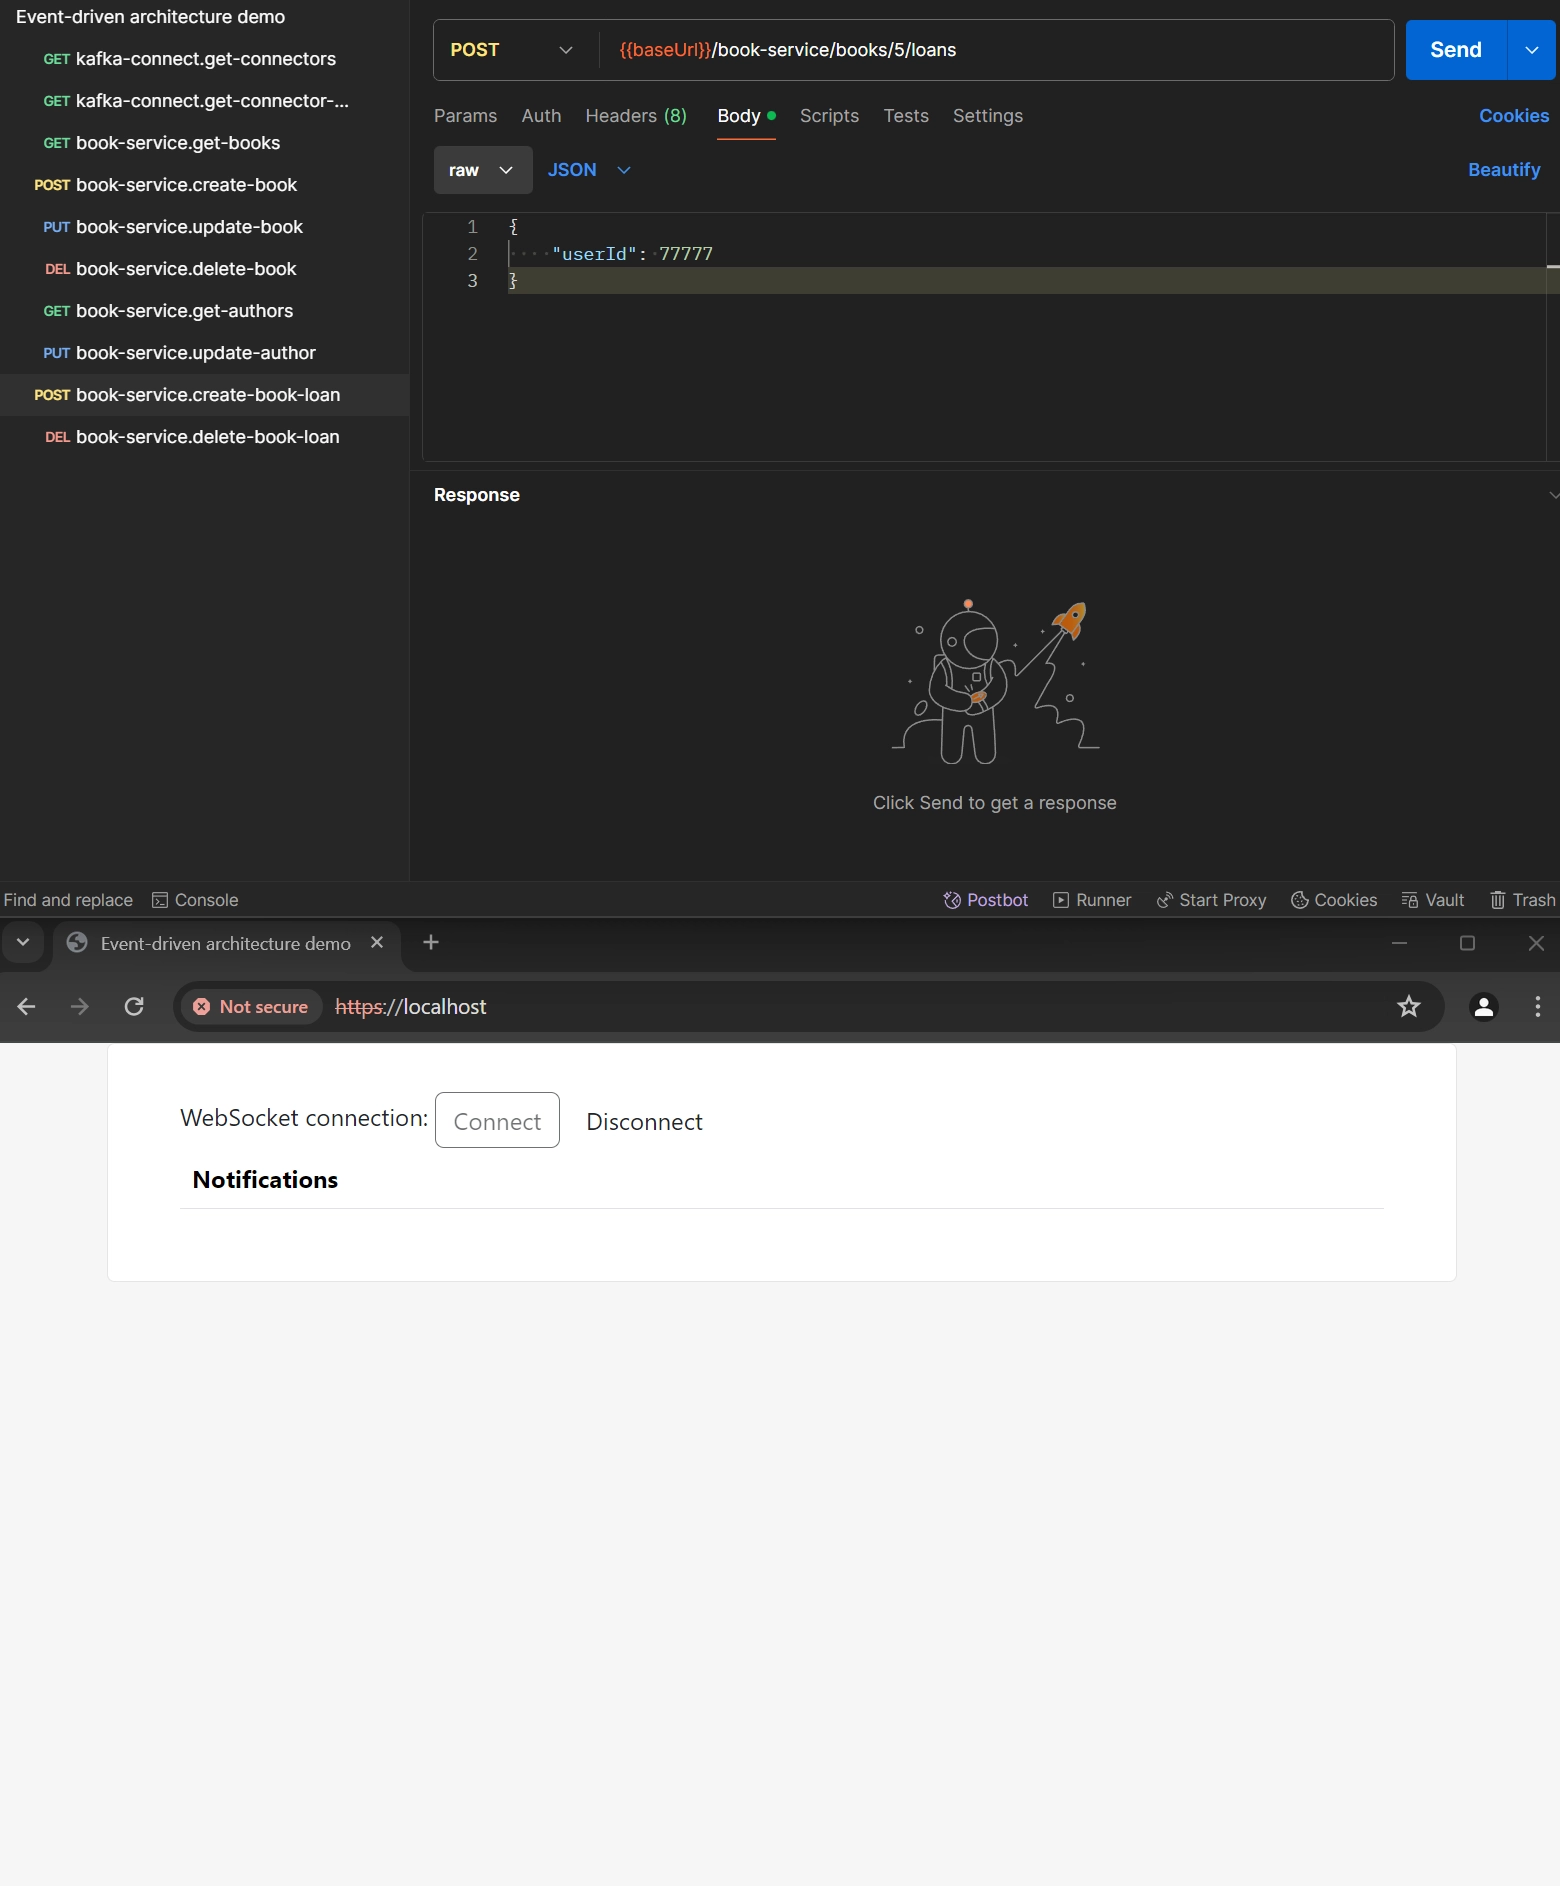
This case is explained in the Book service and User service sections: such setting of book-service results in user check being performed by user-service;
if it determines that a message of type BookLent contains non-existing user id, it will publish RollbackBookLentCommand, and book-service will cancel
the book loan. Therefore, the executed request will eventually lead to two events in the inbox table processed by user-service — BookLent and
BookLoanCanceled:
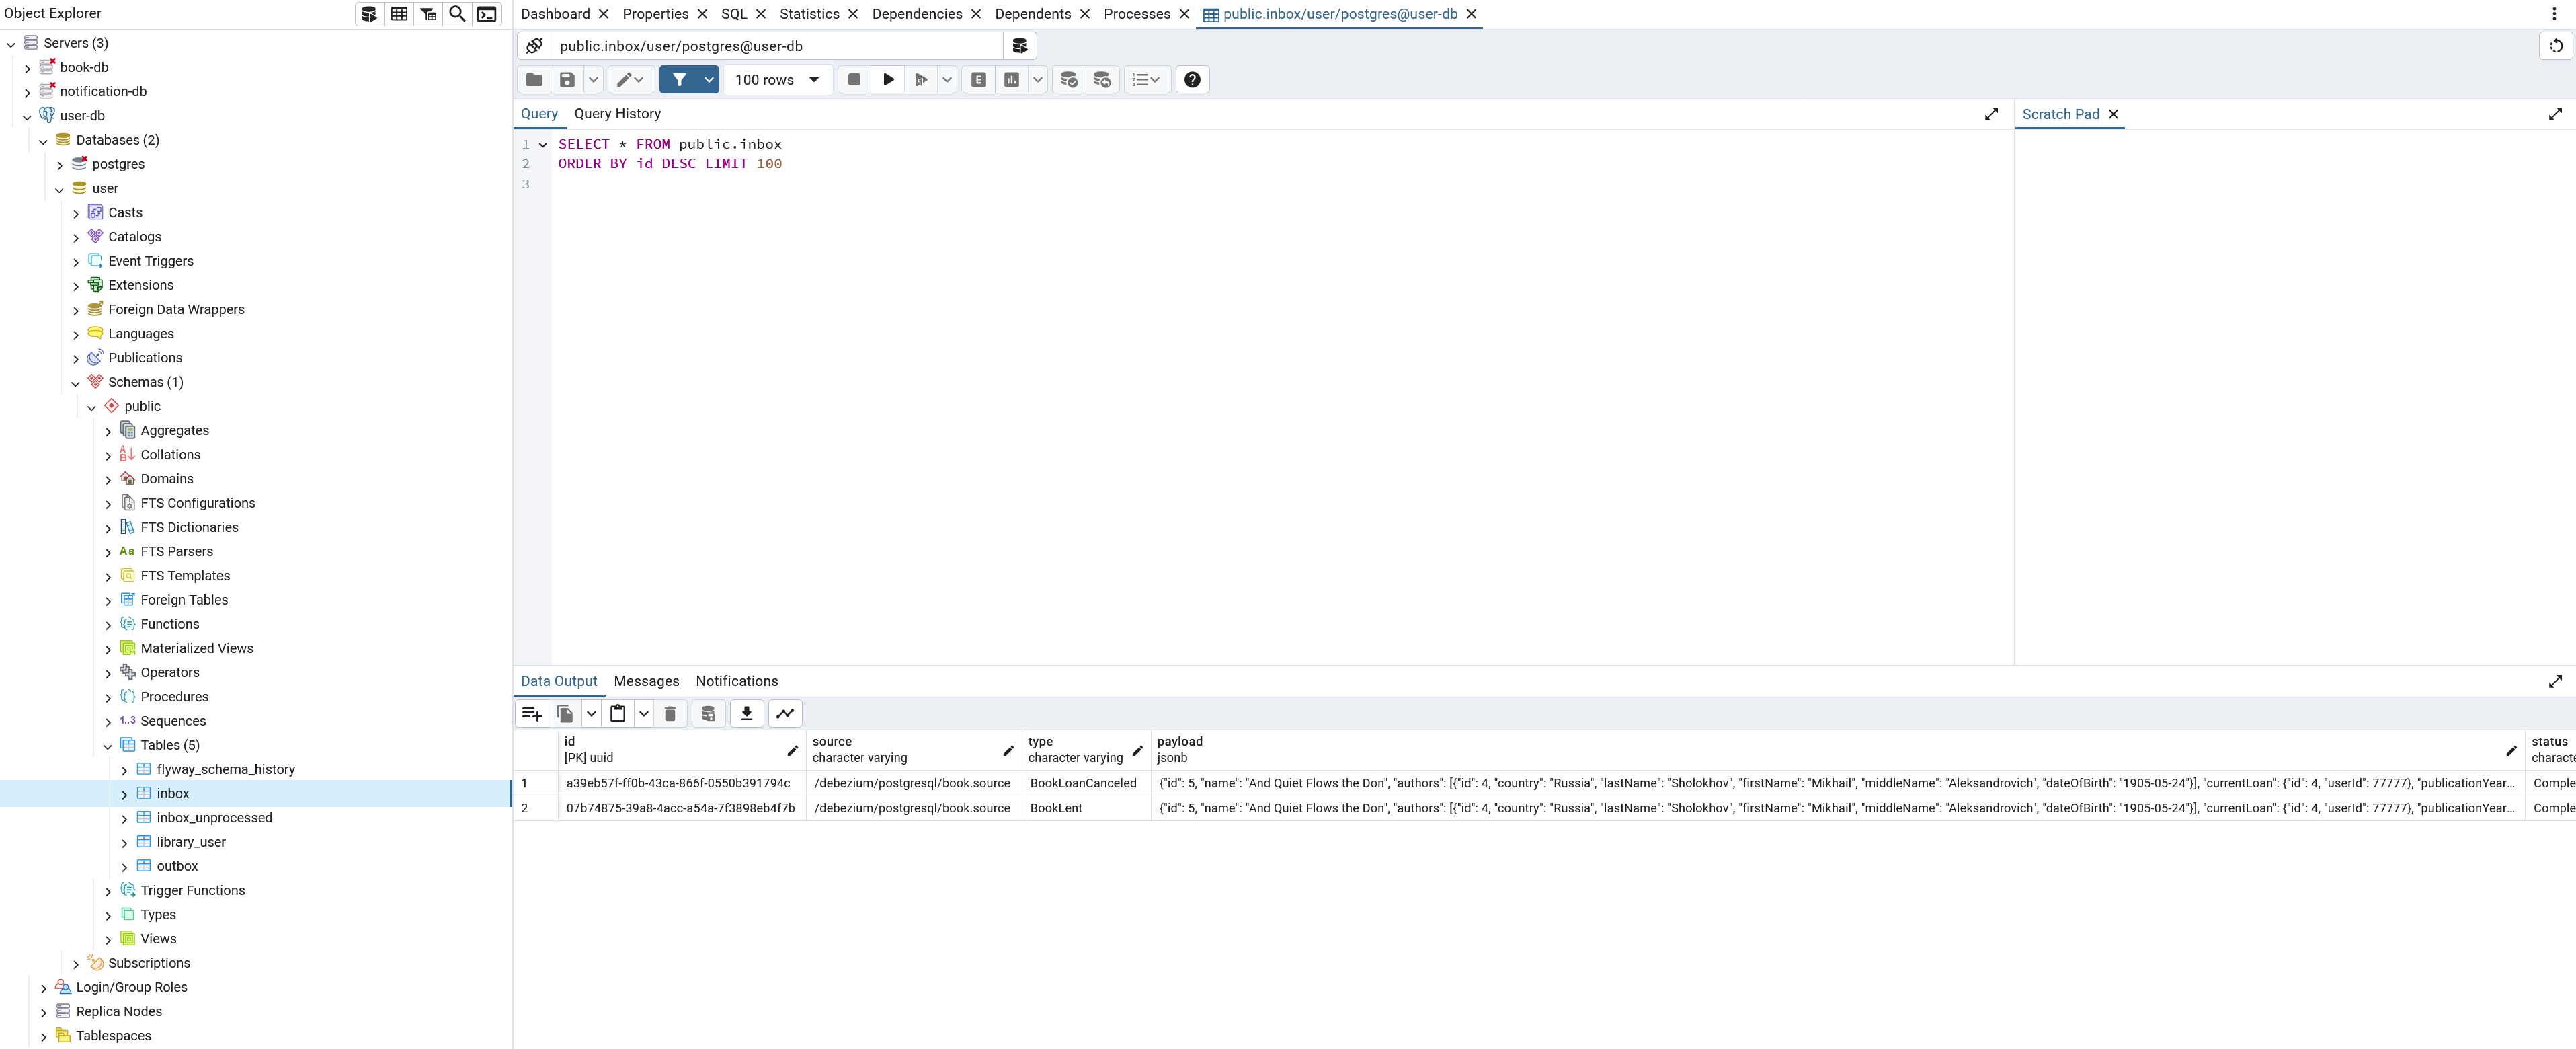
Now I change user.check.use-streaming-data to true and restart book-service. The same request is rejected immediately because the check is performed
against user_replica table of book database:
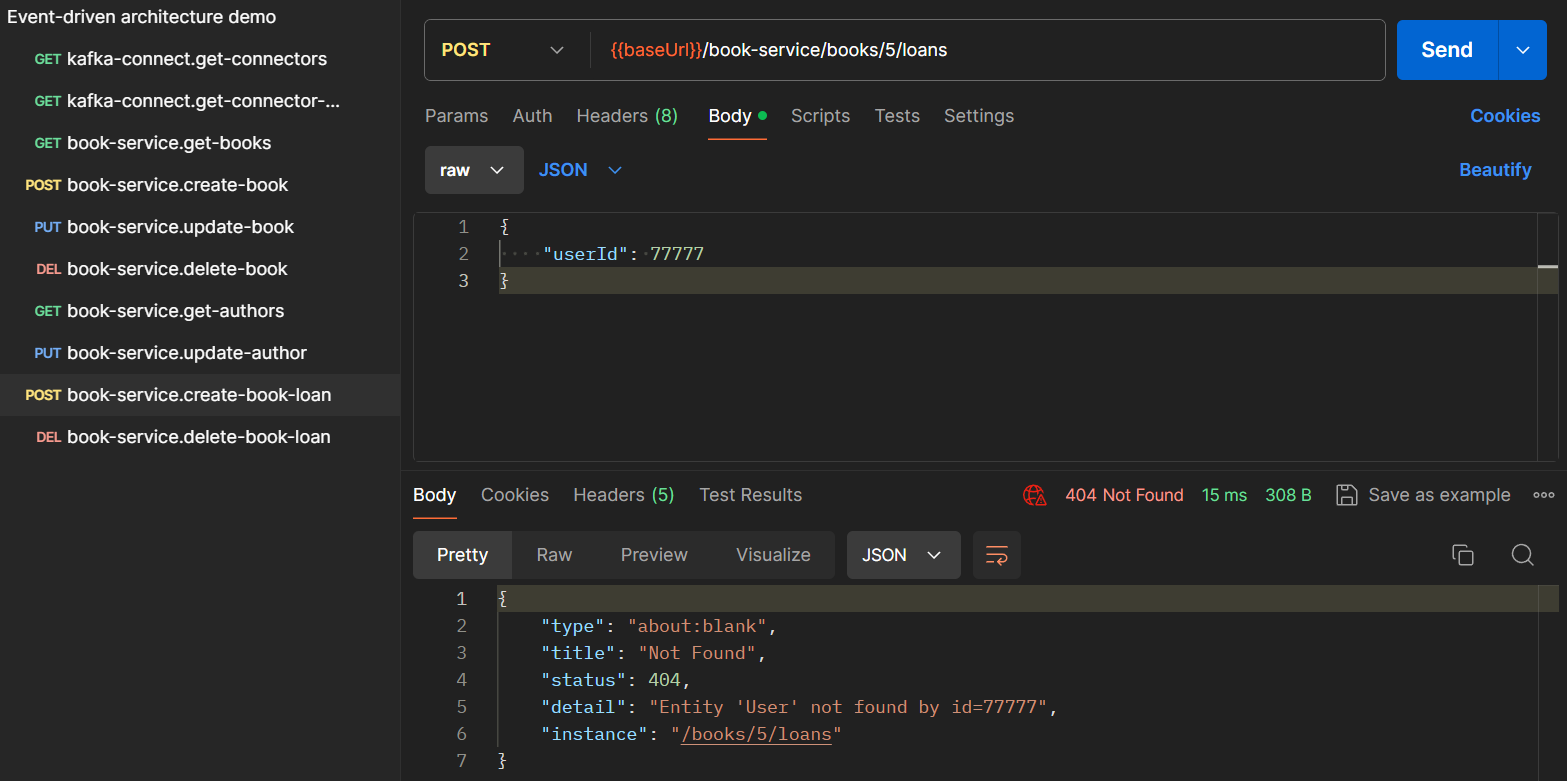
The request will only succeed if the user exists and is active:
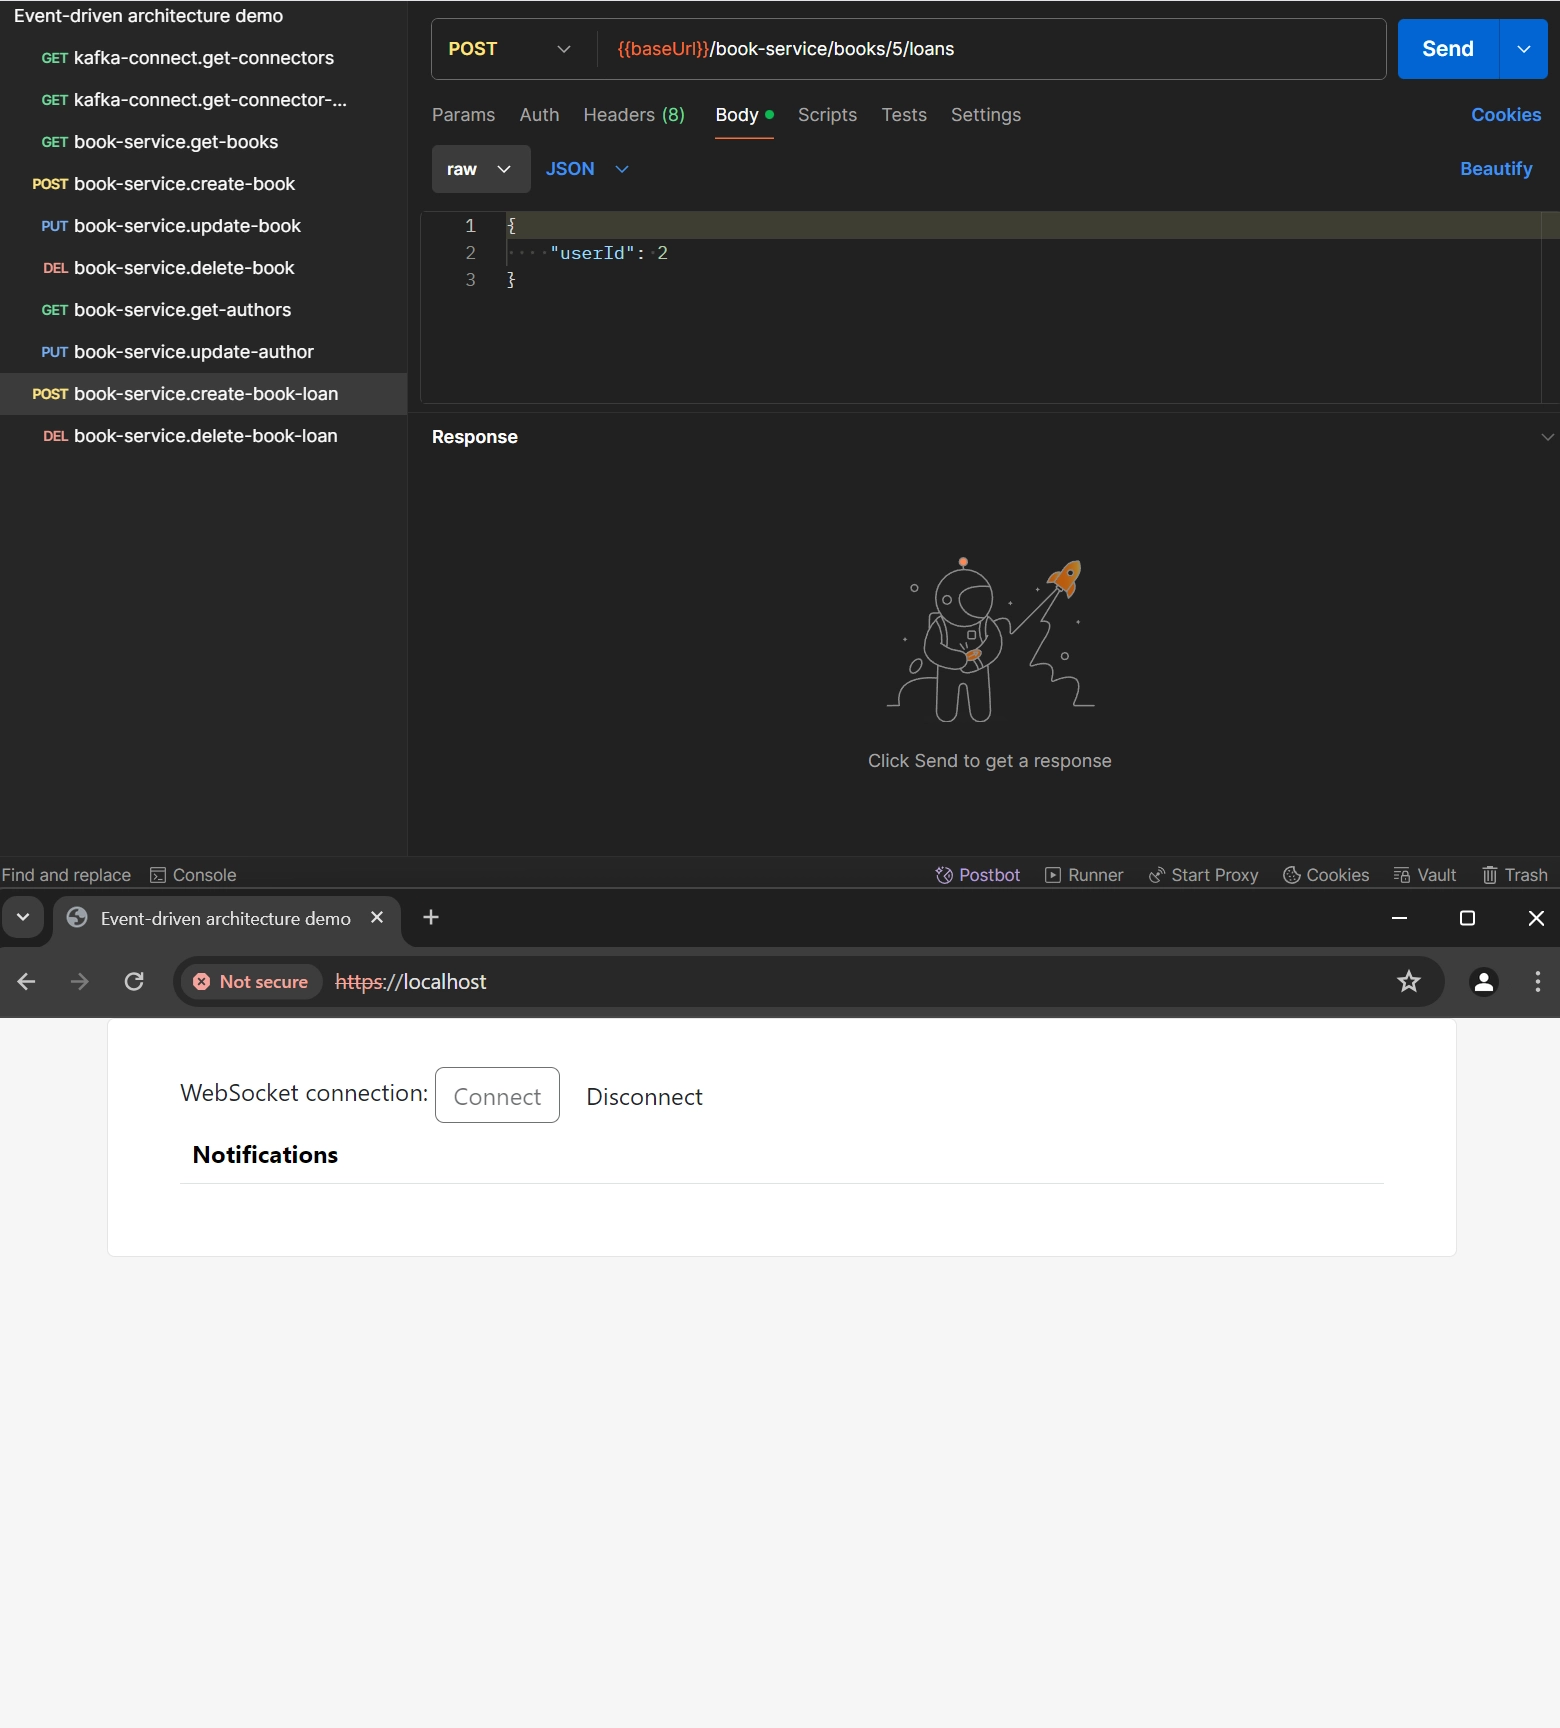
When a user returns a book to the library, DELETE {{baseUrl}}/book-service/books/{id}/loans/{id} should be executed:
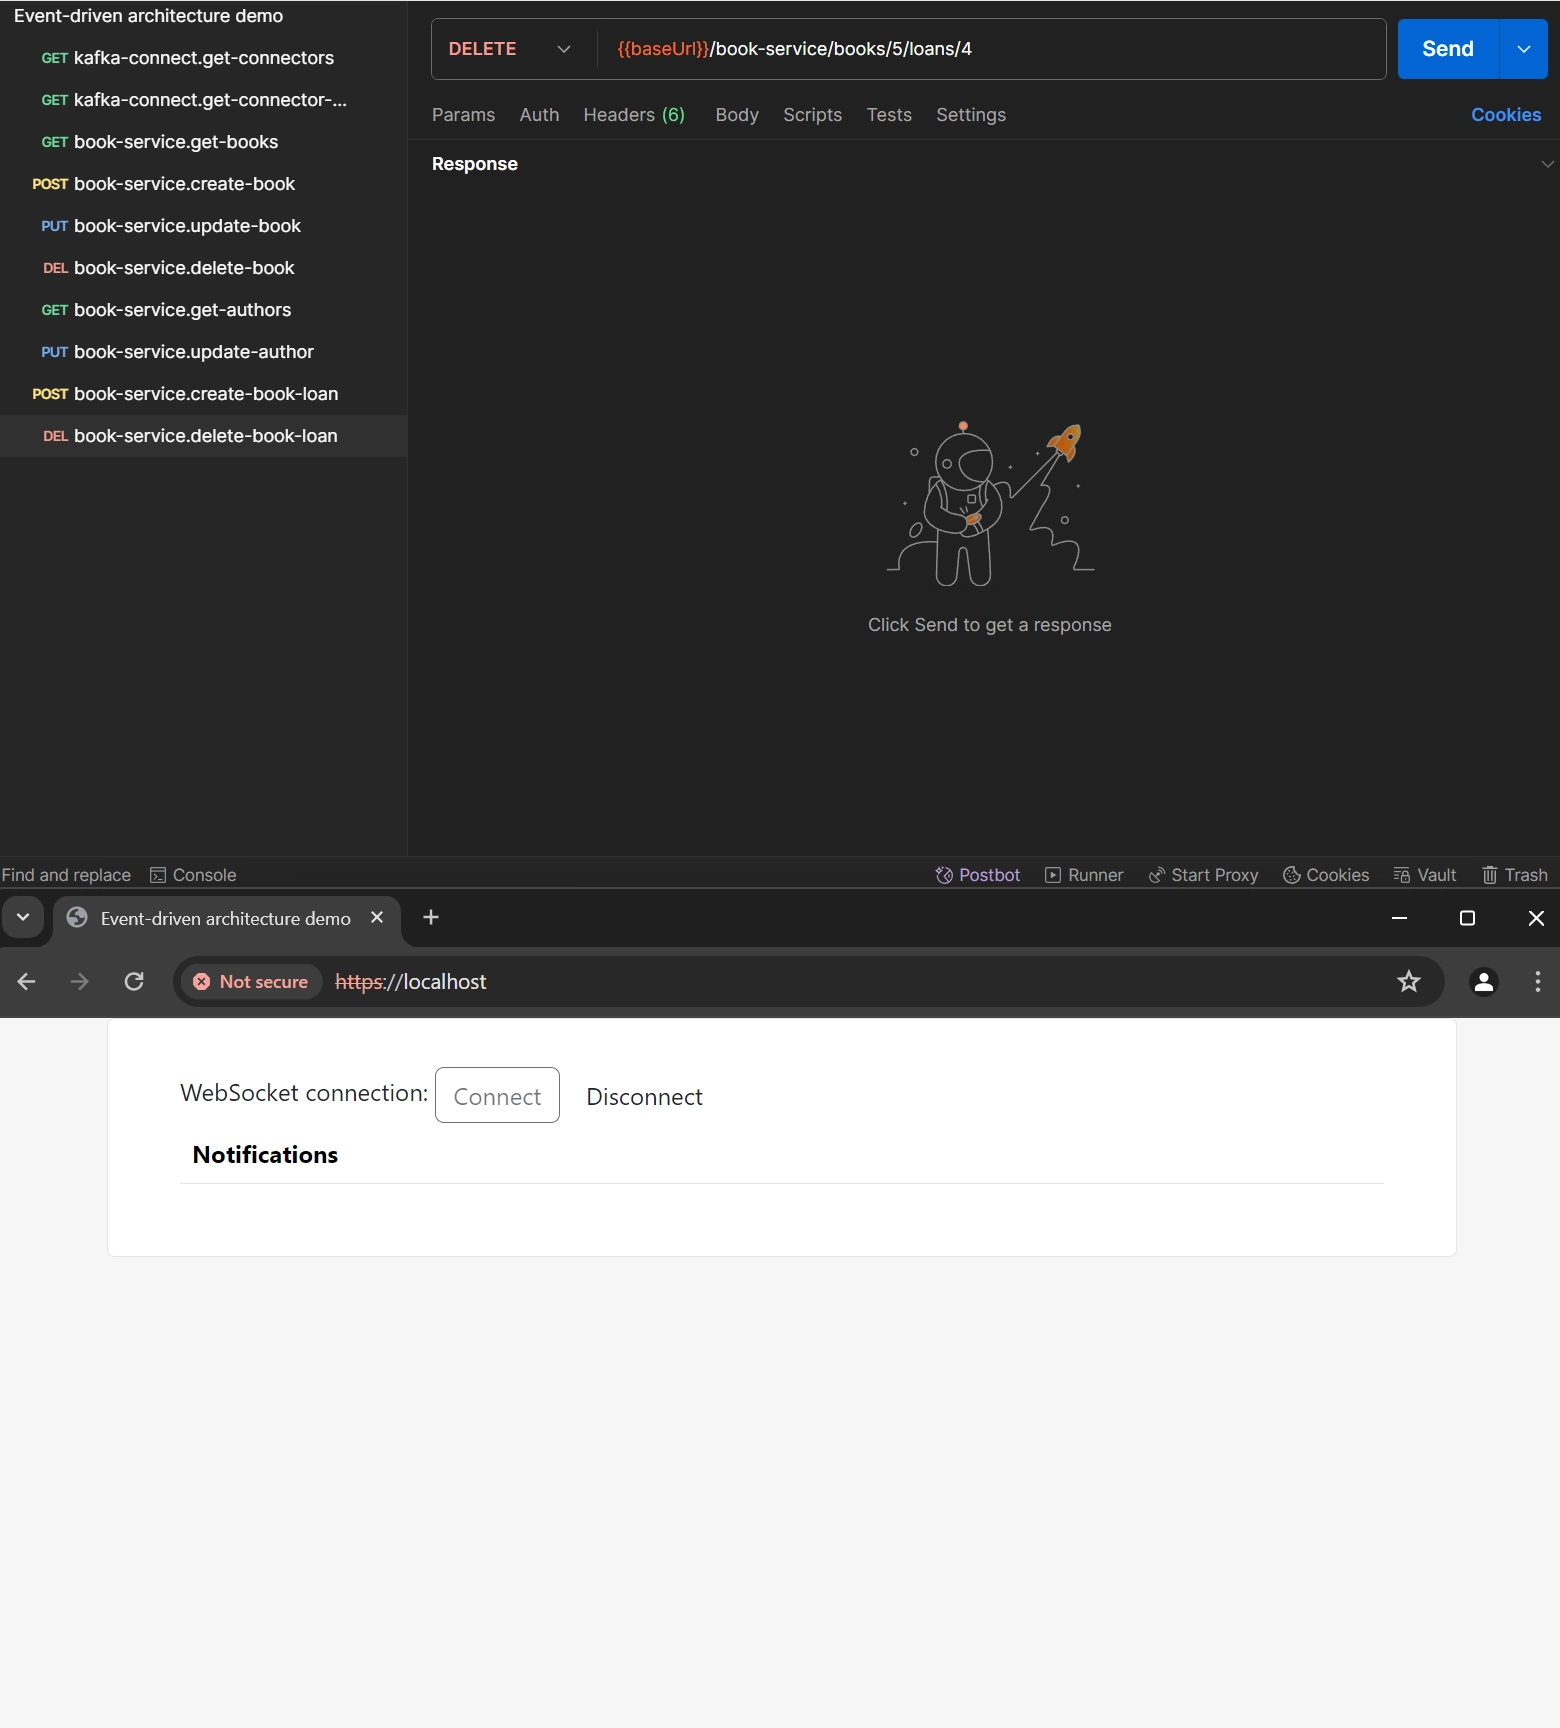
Finally, I switch to the testing environment where I will execute available write methods of the REST API. First, change the base URL to
https://eda-demo.romankudryashov.com. If you use Postman, you can either edit the mentioned baseUrl environment variable in the Postman
collection or hardcode URLs for REST API methods by replacing {{baseUrl}} with the specified value. Then, navigate to
eda-demo.romankudryashov.com in your browser.
A book can be changed by PUT {{baseUrl}}/book-service/books/{id}:
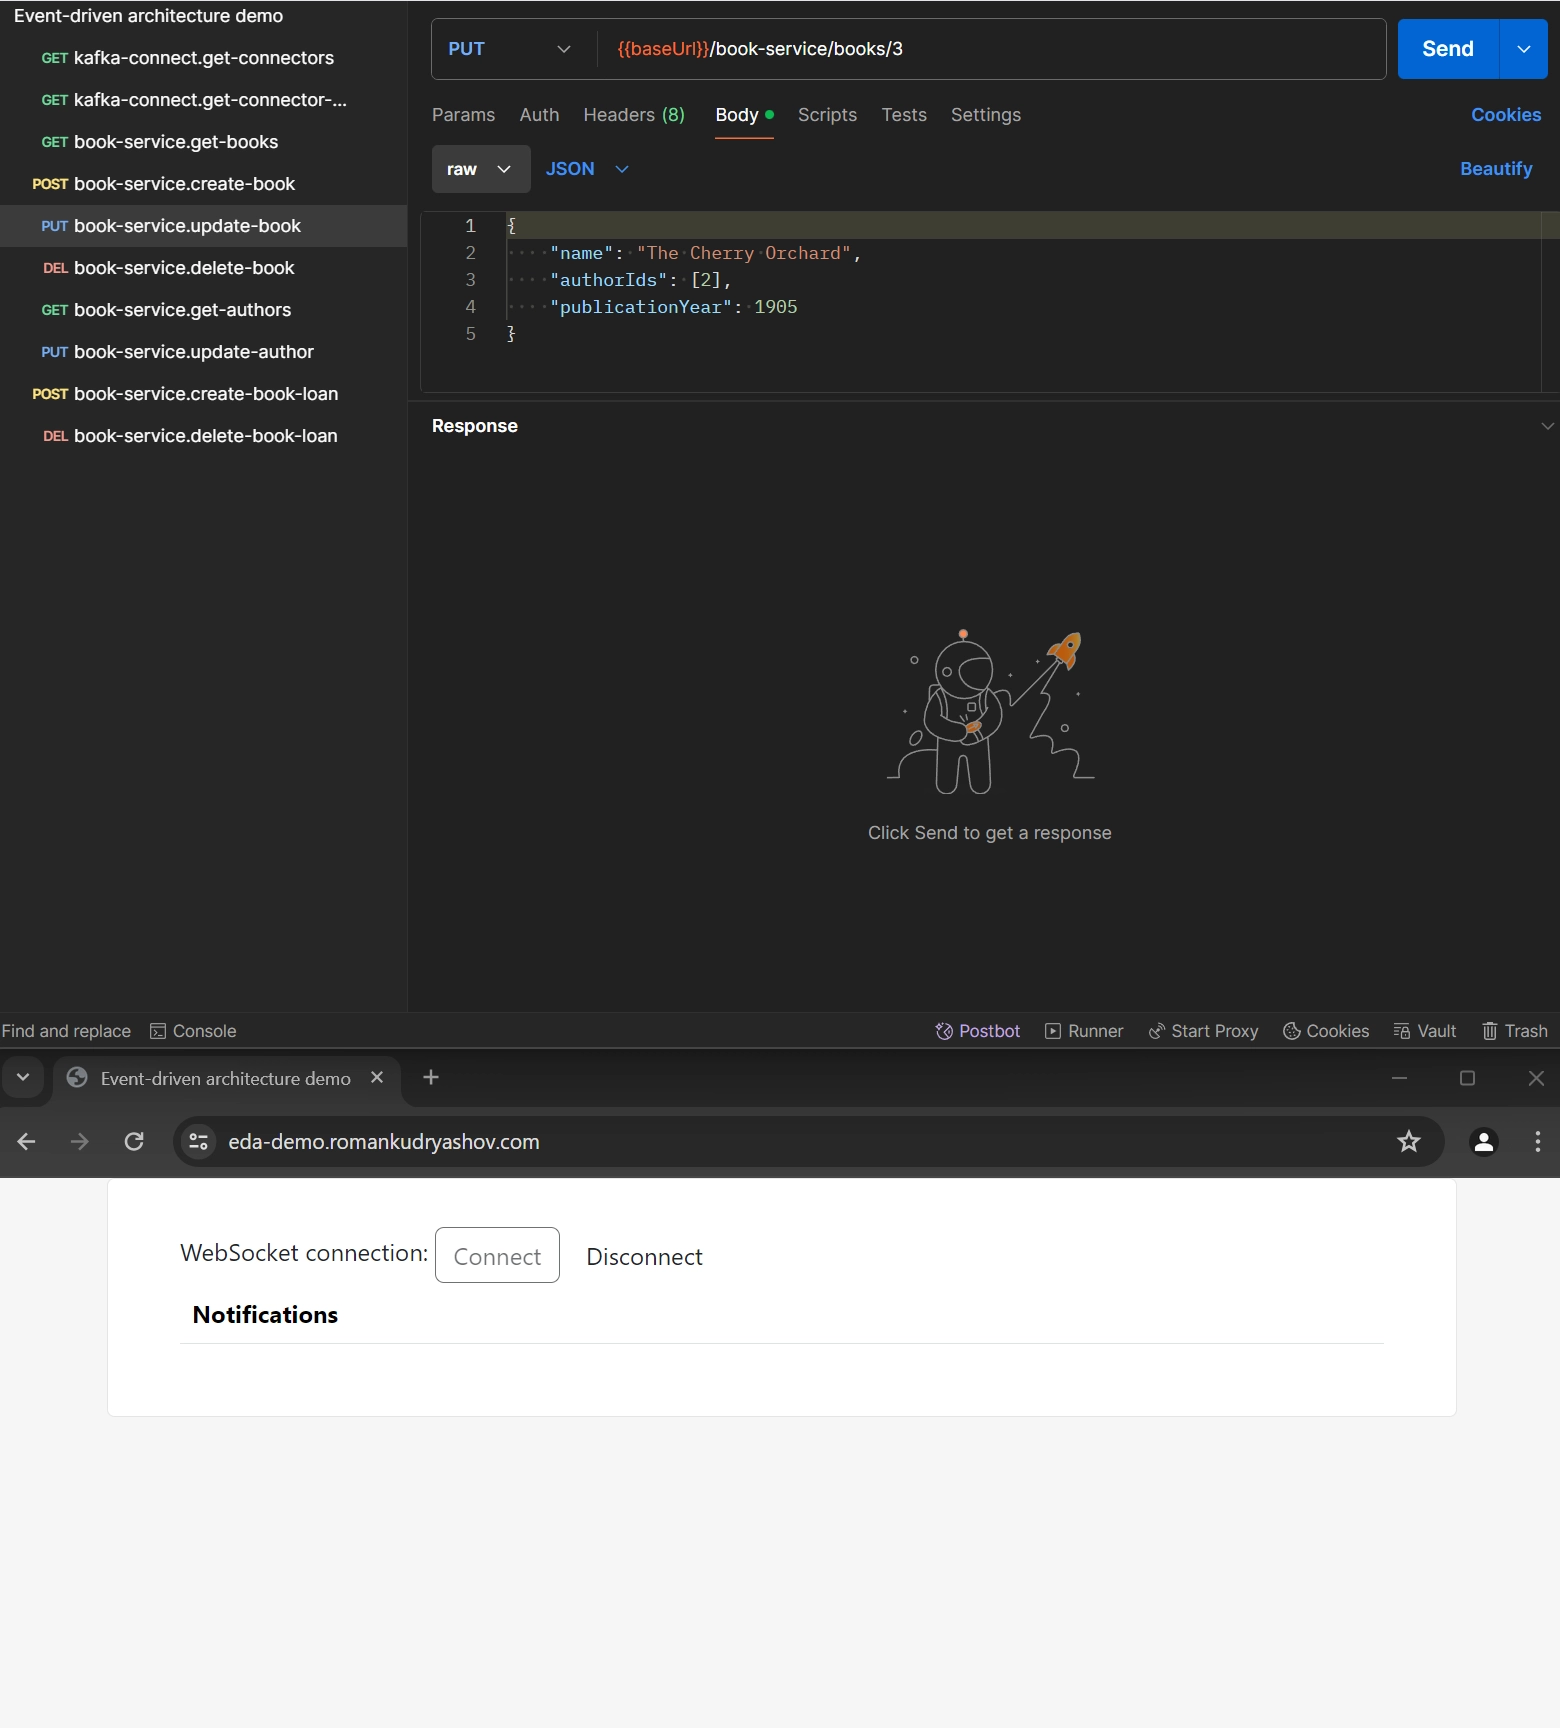
On the testing environment, you can only change publication year of the book.
An author can be changed by PUT {{baseUrl}}/book-service/authors/{id}:
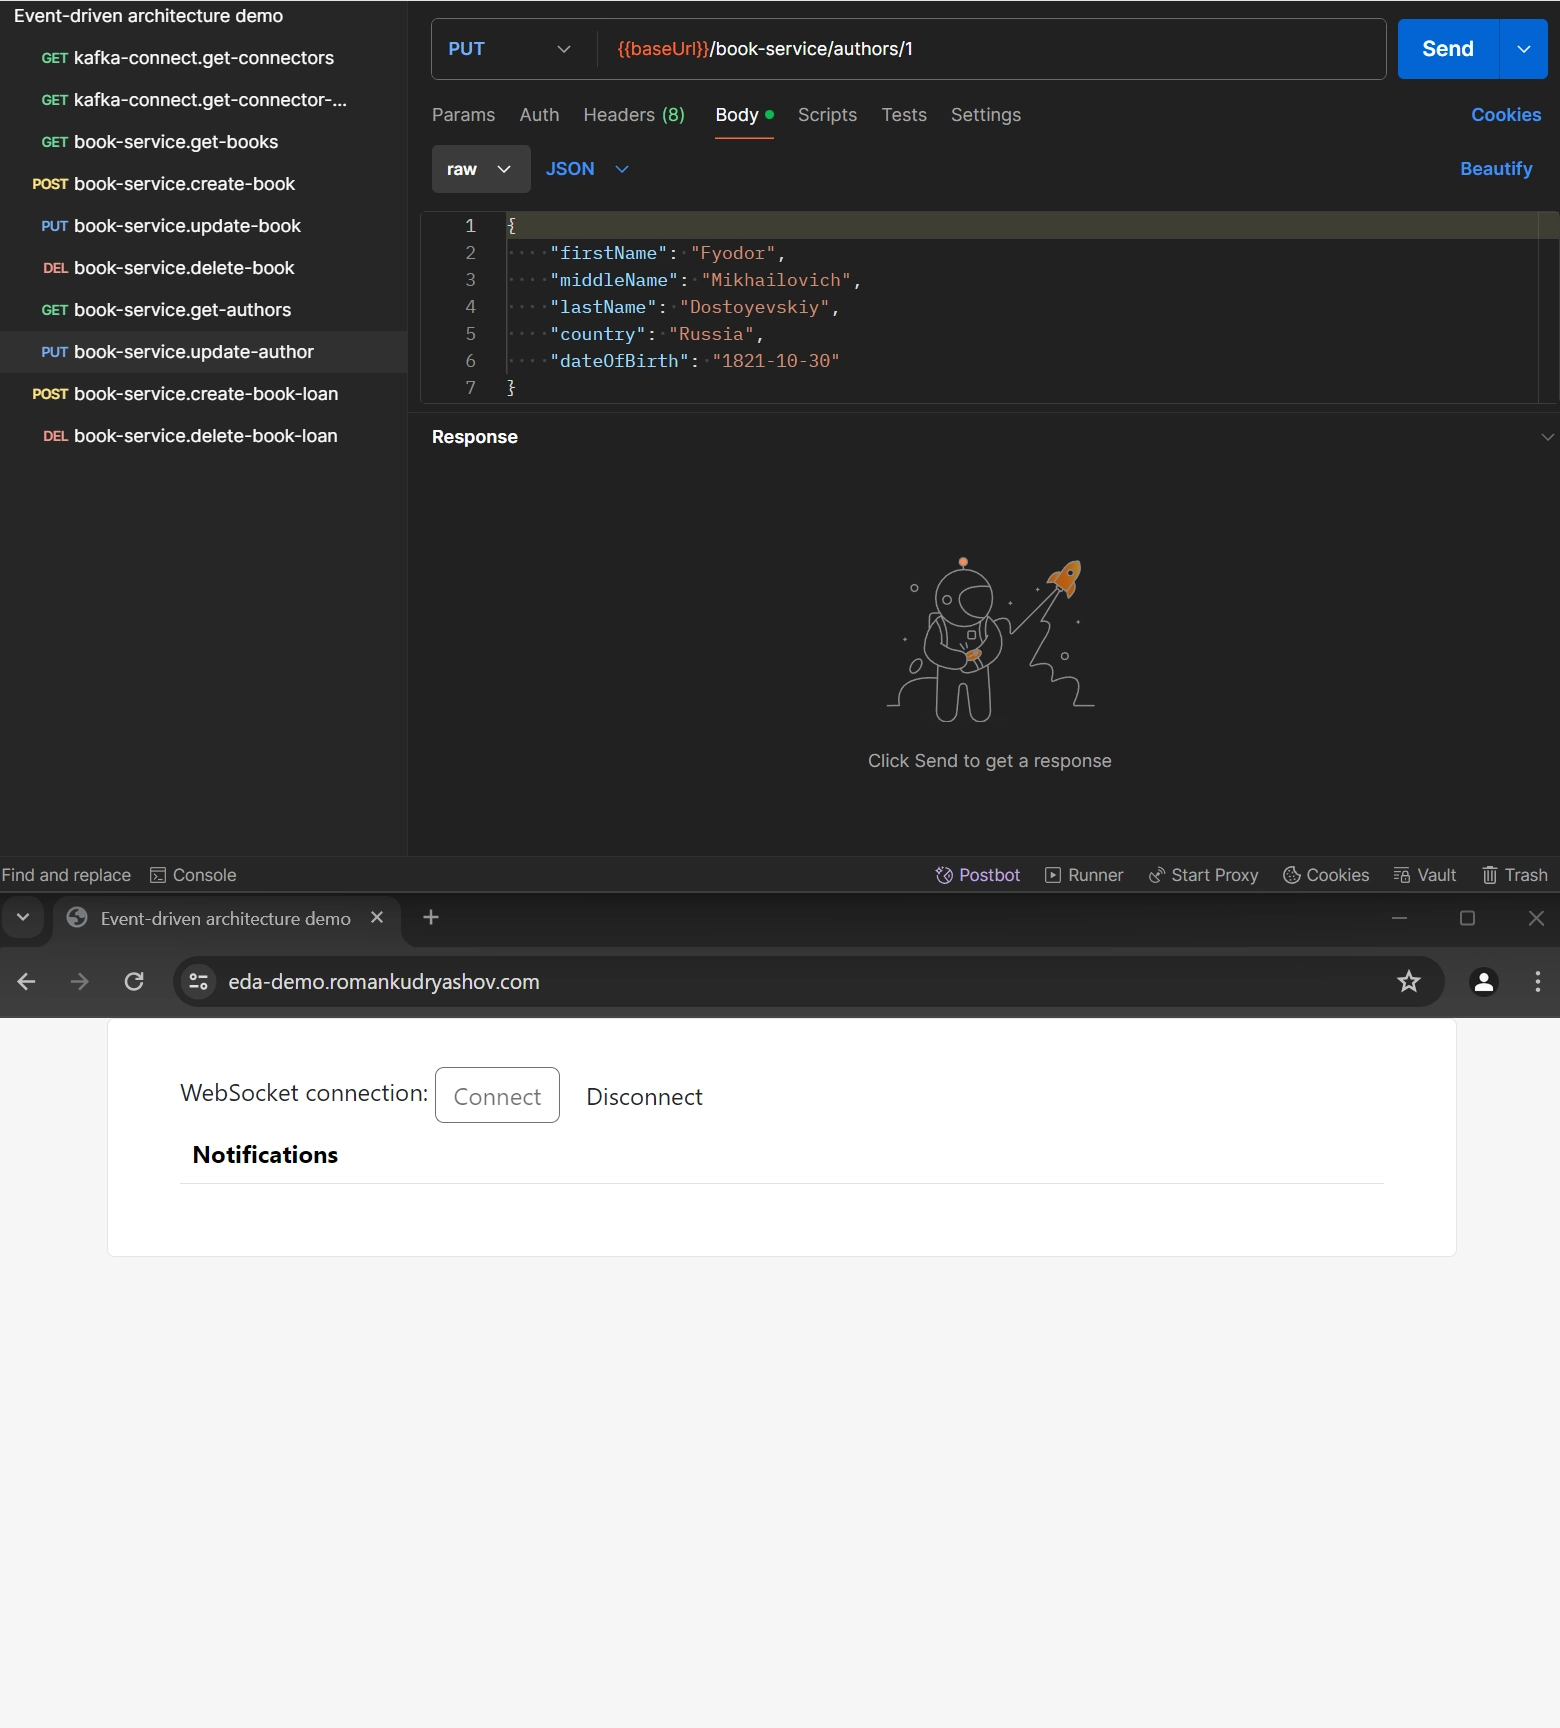
Similarly to the book entity, on the testing environment, you can only change date of birth of an author.
Two notifications received because two users borrowed two books of this author.
You can try to do it yourself here. On this environment, after a periodical project redeployment, it may take some time for user notifications to be delivered, but they should be delivered eventually.
Testing of processing messages from the inbox table
In this project, user-service is the only service that has two instances running. The second instance is needed to demonstrate how inbox messages
processing can be parallelized. It is configured with different
SPRING_APPLICATION_NAME, user-service-2, that overrides the default value in the service’s
config.
To simulate a heavy load on the service, I use this script that inserts 10,000 identical messages that differ only in their id. I expect each service to eventually process about 5000 messages.
Before starting the processing, I slightly change the default values of
configuration parameters to decrease
the processing time: the scheduled task will run every 3 seconds (instead of 5) and batch.size is 70 (instead of 50). I will observe the processing using
the following query:
select processed_by, status, count(*), now() from inbox group by processed_by, status order by processed_by, status; \watch i=3The query and the script to insert 10,000 events are performed against user database; you can enter the database using docker exec -it user-db bash.
Real time processing looks like this:
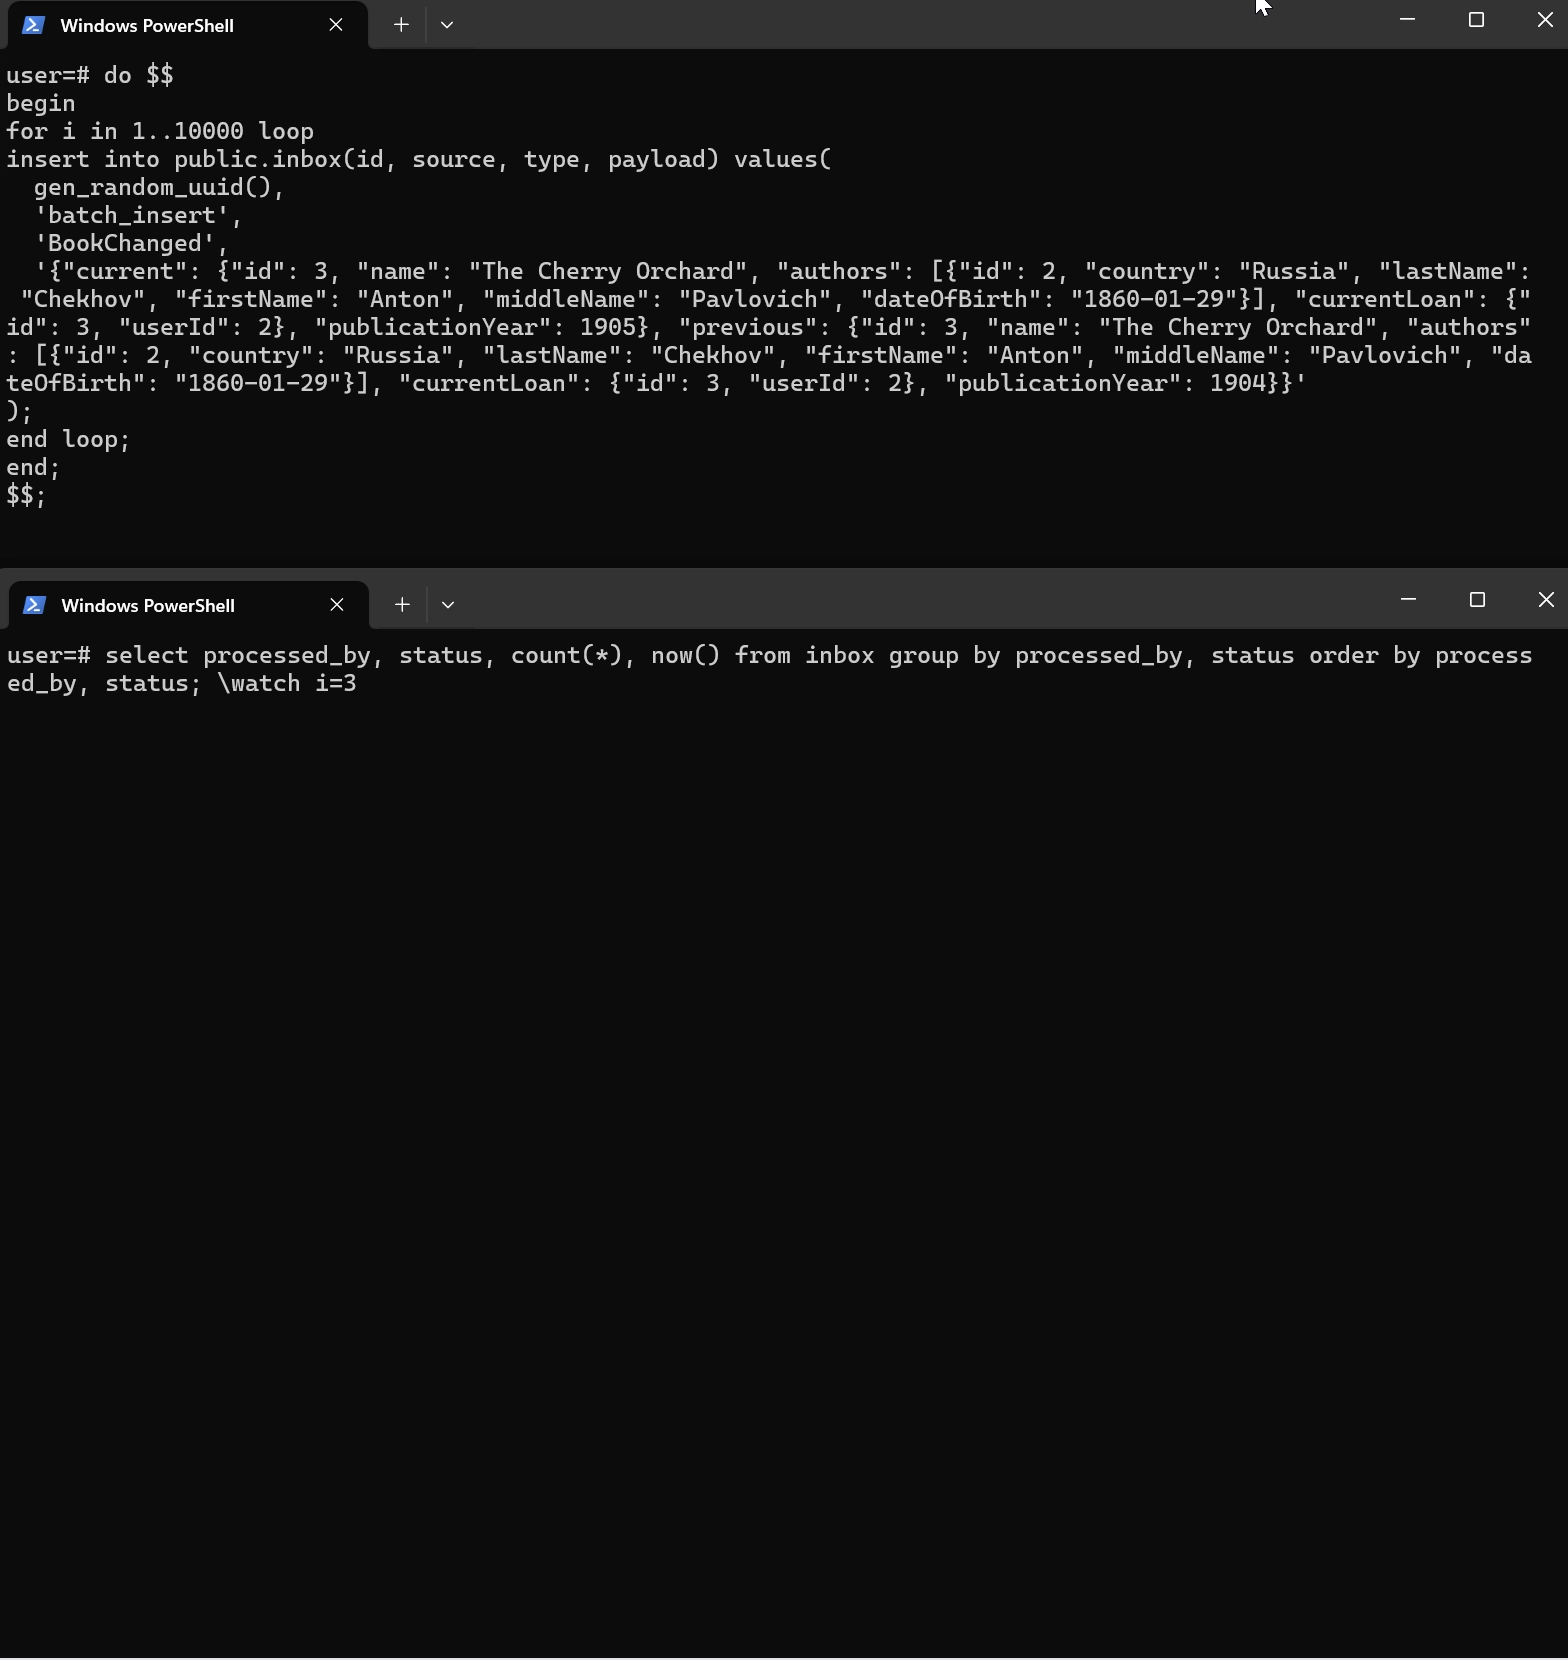
That is, it took about 3 minutes and 36 seconds to process 10,000 events by two instances of the service. Or, the speed of message processing by each microservice is 70 messages / 3 seconds ≈ 23 messages per second. I haven’t done any more intensive load testing yet.
You can play around with the processing time by changing the following configurable parameters of the service:
-
This parameter is used in two places: when inbox messages are marked and when they are processed. You can also create a second parameter to configure them separately.
-
number of instances of the service
Testing of processing invalid messages from dead letter queues
By invalid message, I mean that it is in an unexpected format for some connector. To produce such a message, I will change value.converter* properties in
configuration of book.source connector.
First, I change the encoding type used to serialize a message in CloudEvents format and its data field by changing both value.converter.serializer.type and
value.converter.data.serializer.type configuration parameters from avro to json and restart the project. Now
user.sink can’t process such messages because it
expects them as well as their data field to be serialized to Avro. I initiate producing of such a message by calling one of REST API methods of book-service,
for example, to update a book; that causes an error in user.sink:

You can see that the message appears in library.events topic as well as in library.events.dlq.ce-json topic:
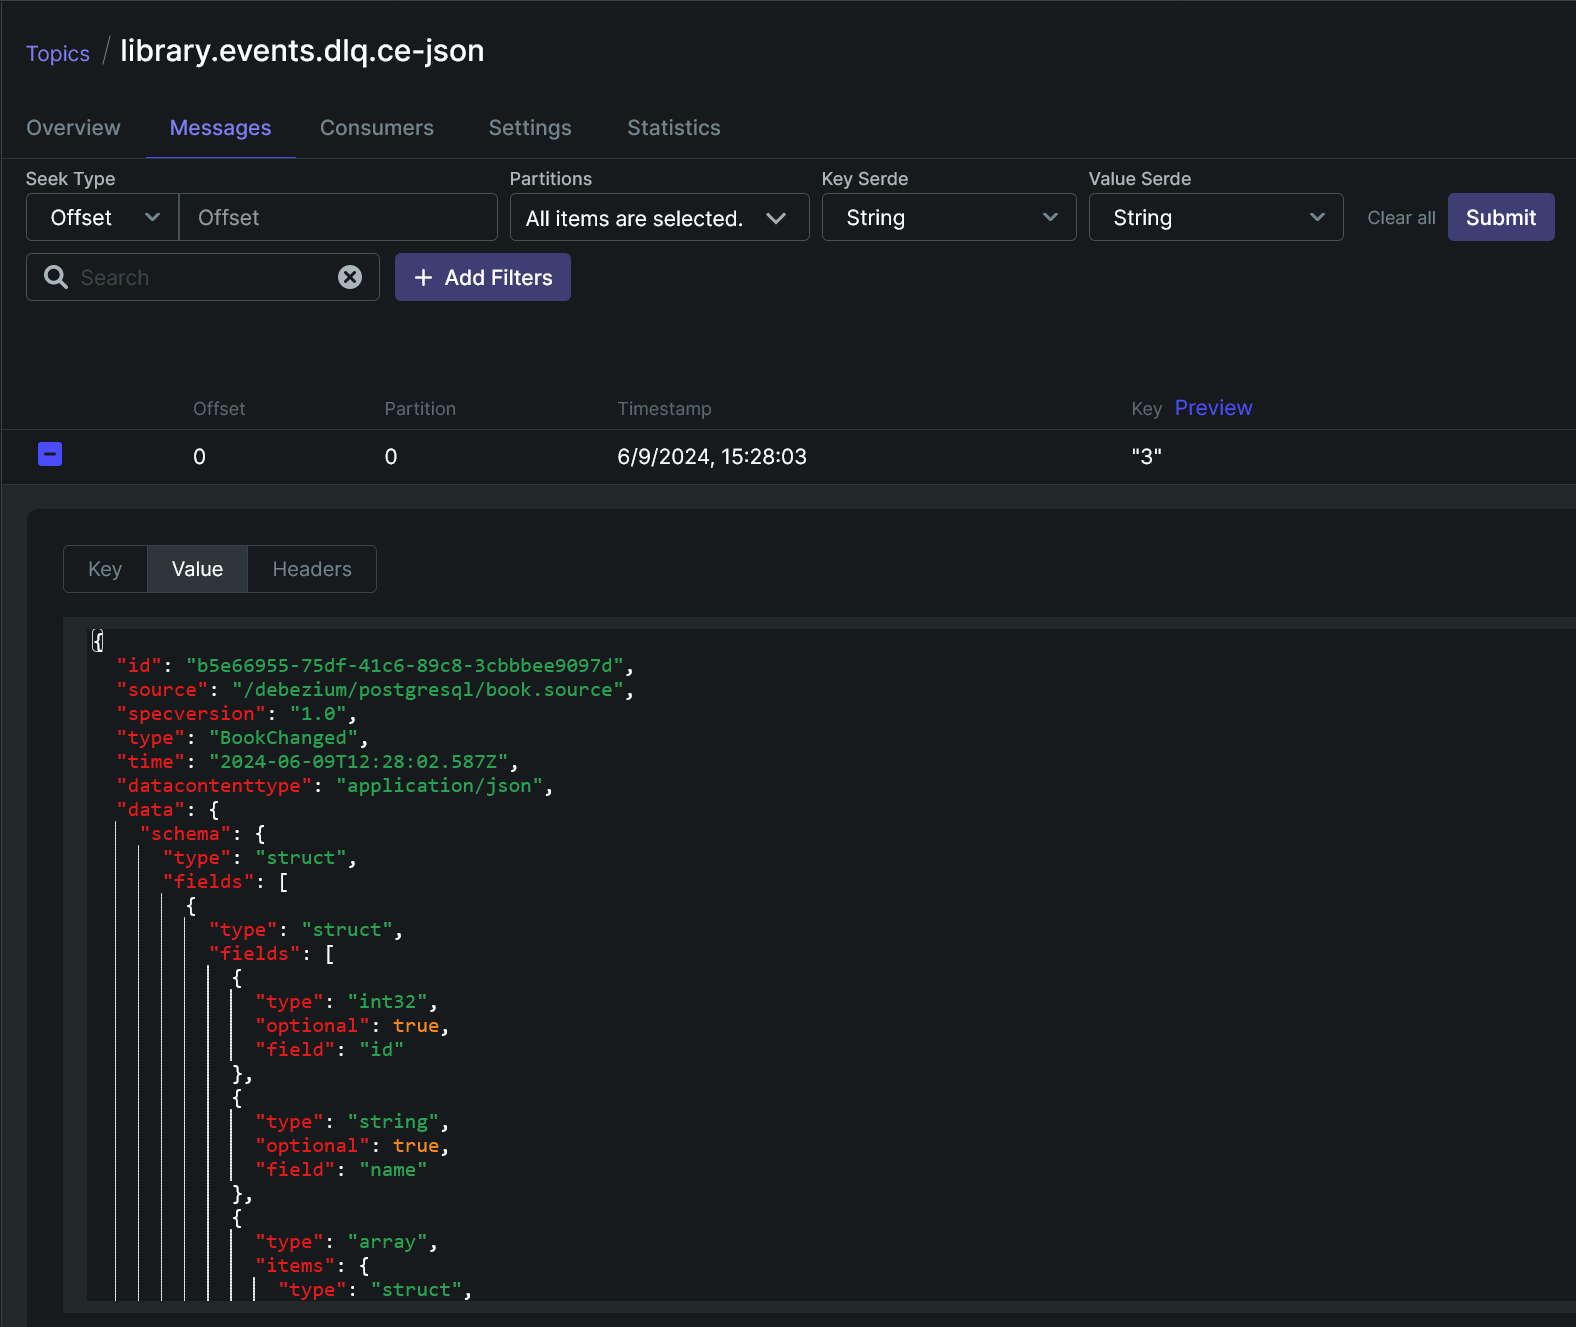
Eventually, this message is processed by
user.sink.dlq-ce-json connector, stored
in inbox table, and successfully processed by user-service:

For the second scenario, I change value.converter property of book.source connector to org.apache.kafka.connect.json.JsonConverter, restart the project again,
and use the same REST API method to produce an invalid message. Now, in addition to user.sink, user.sink.dlq-ce-json also fails at processing the message:
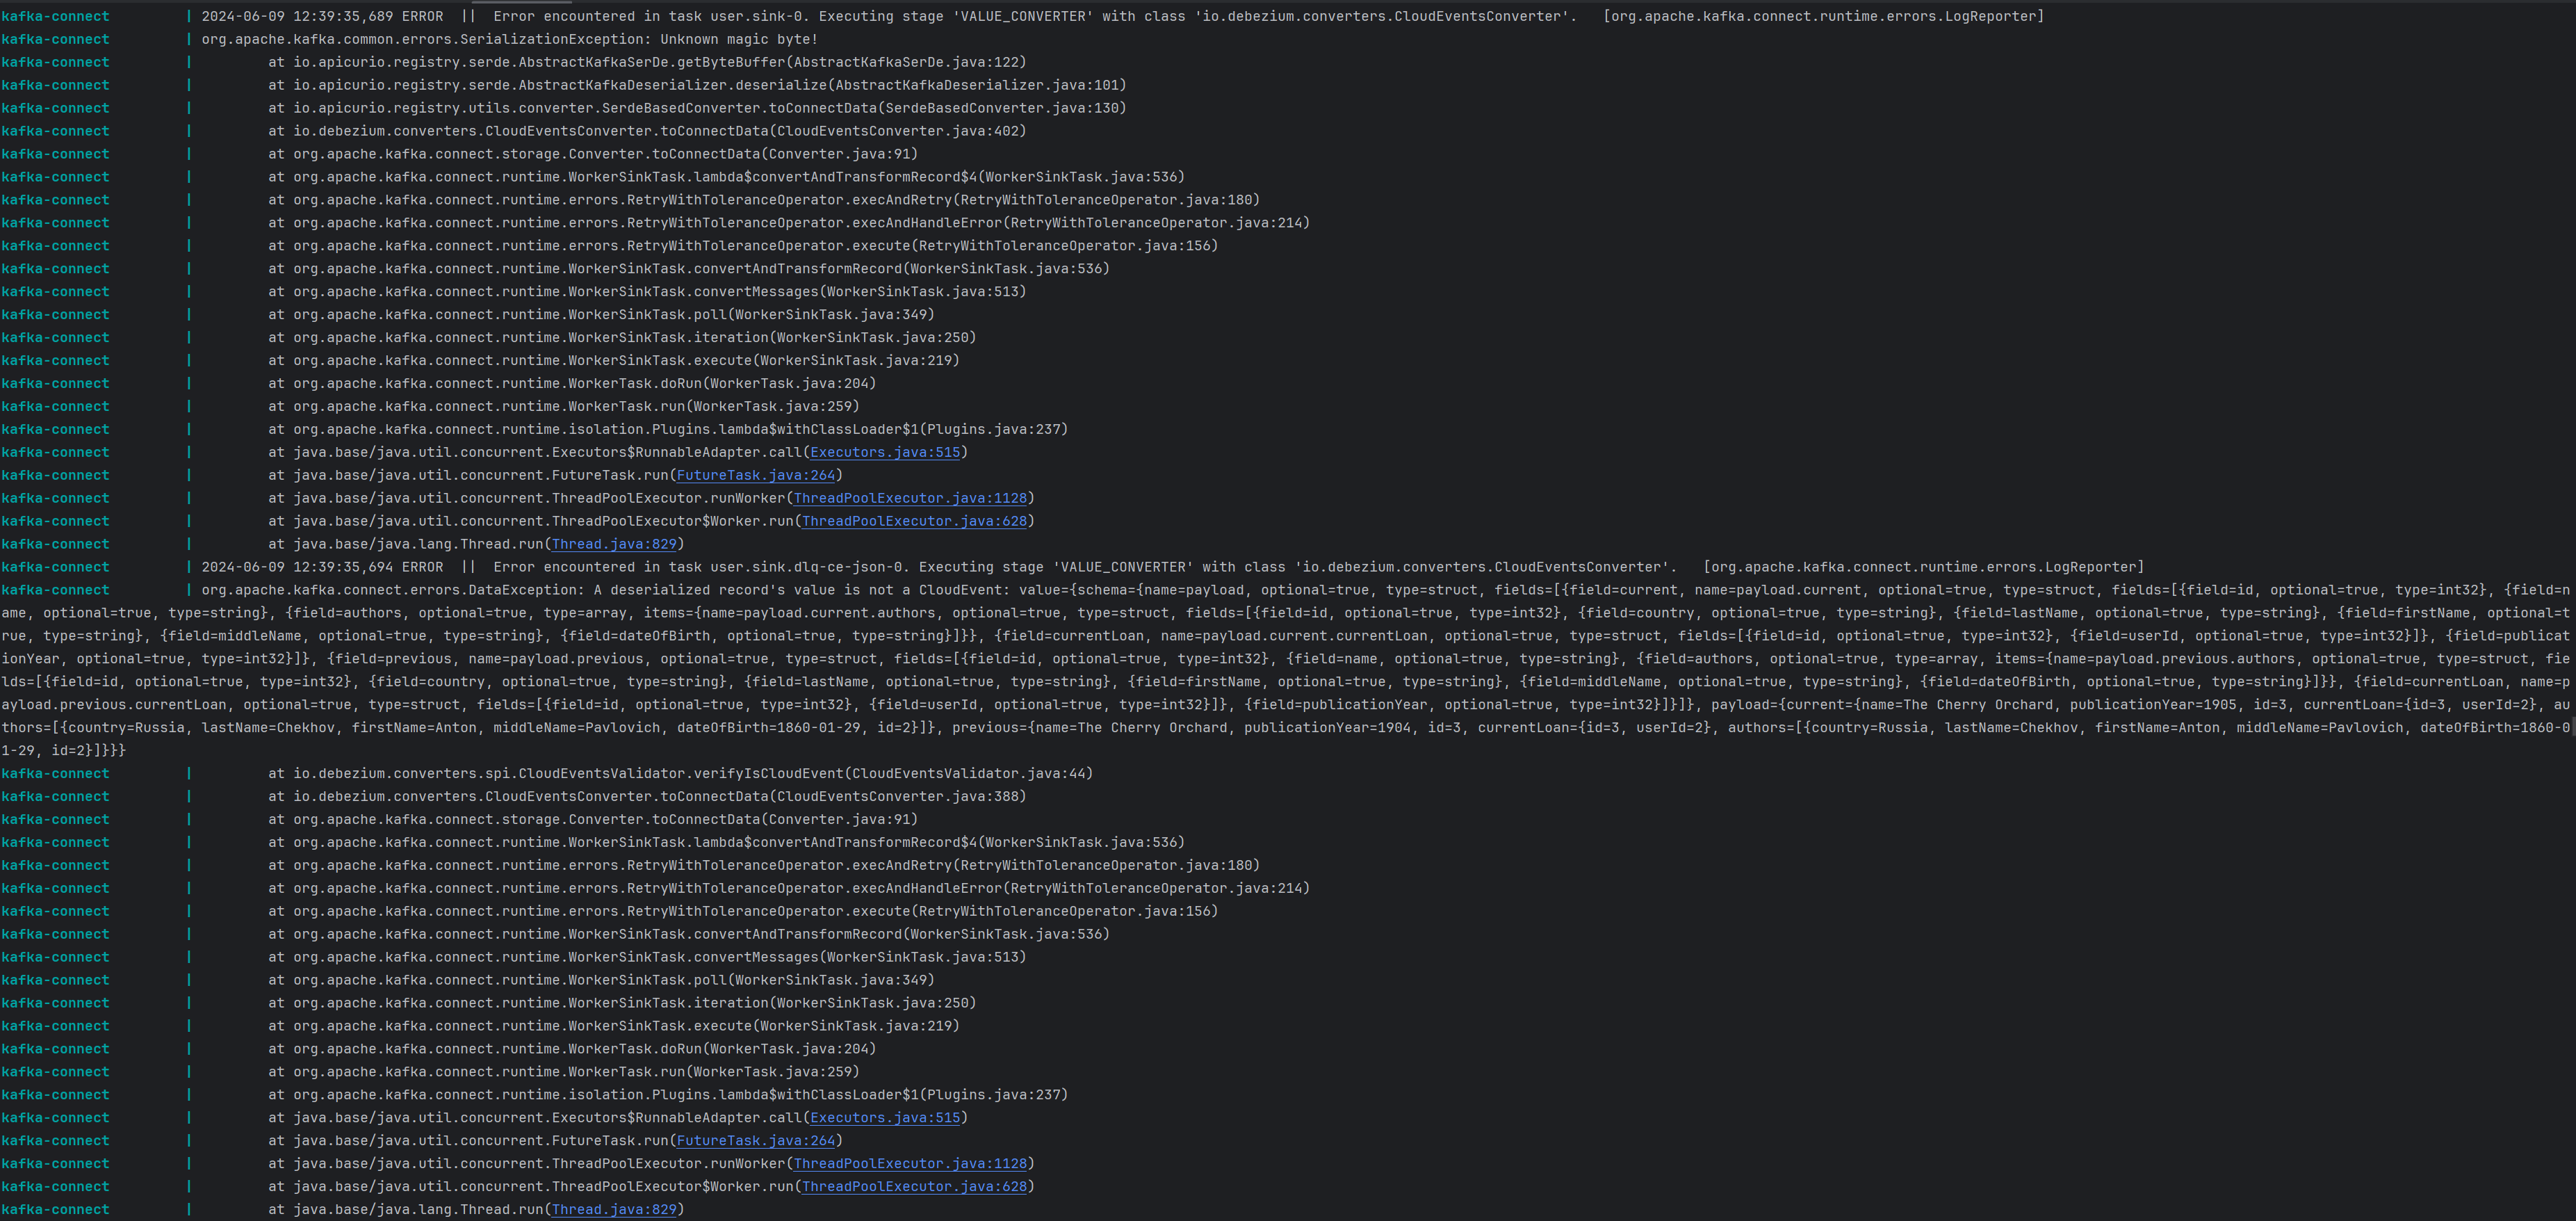
The message appears in three topics: library.events, library.events.dlq.ce-json, and library.events.dlq.unprocessed:
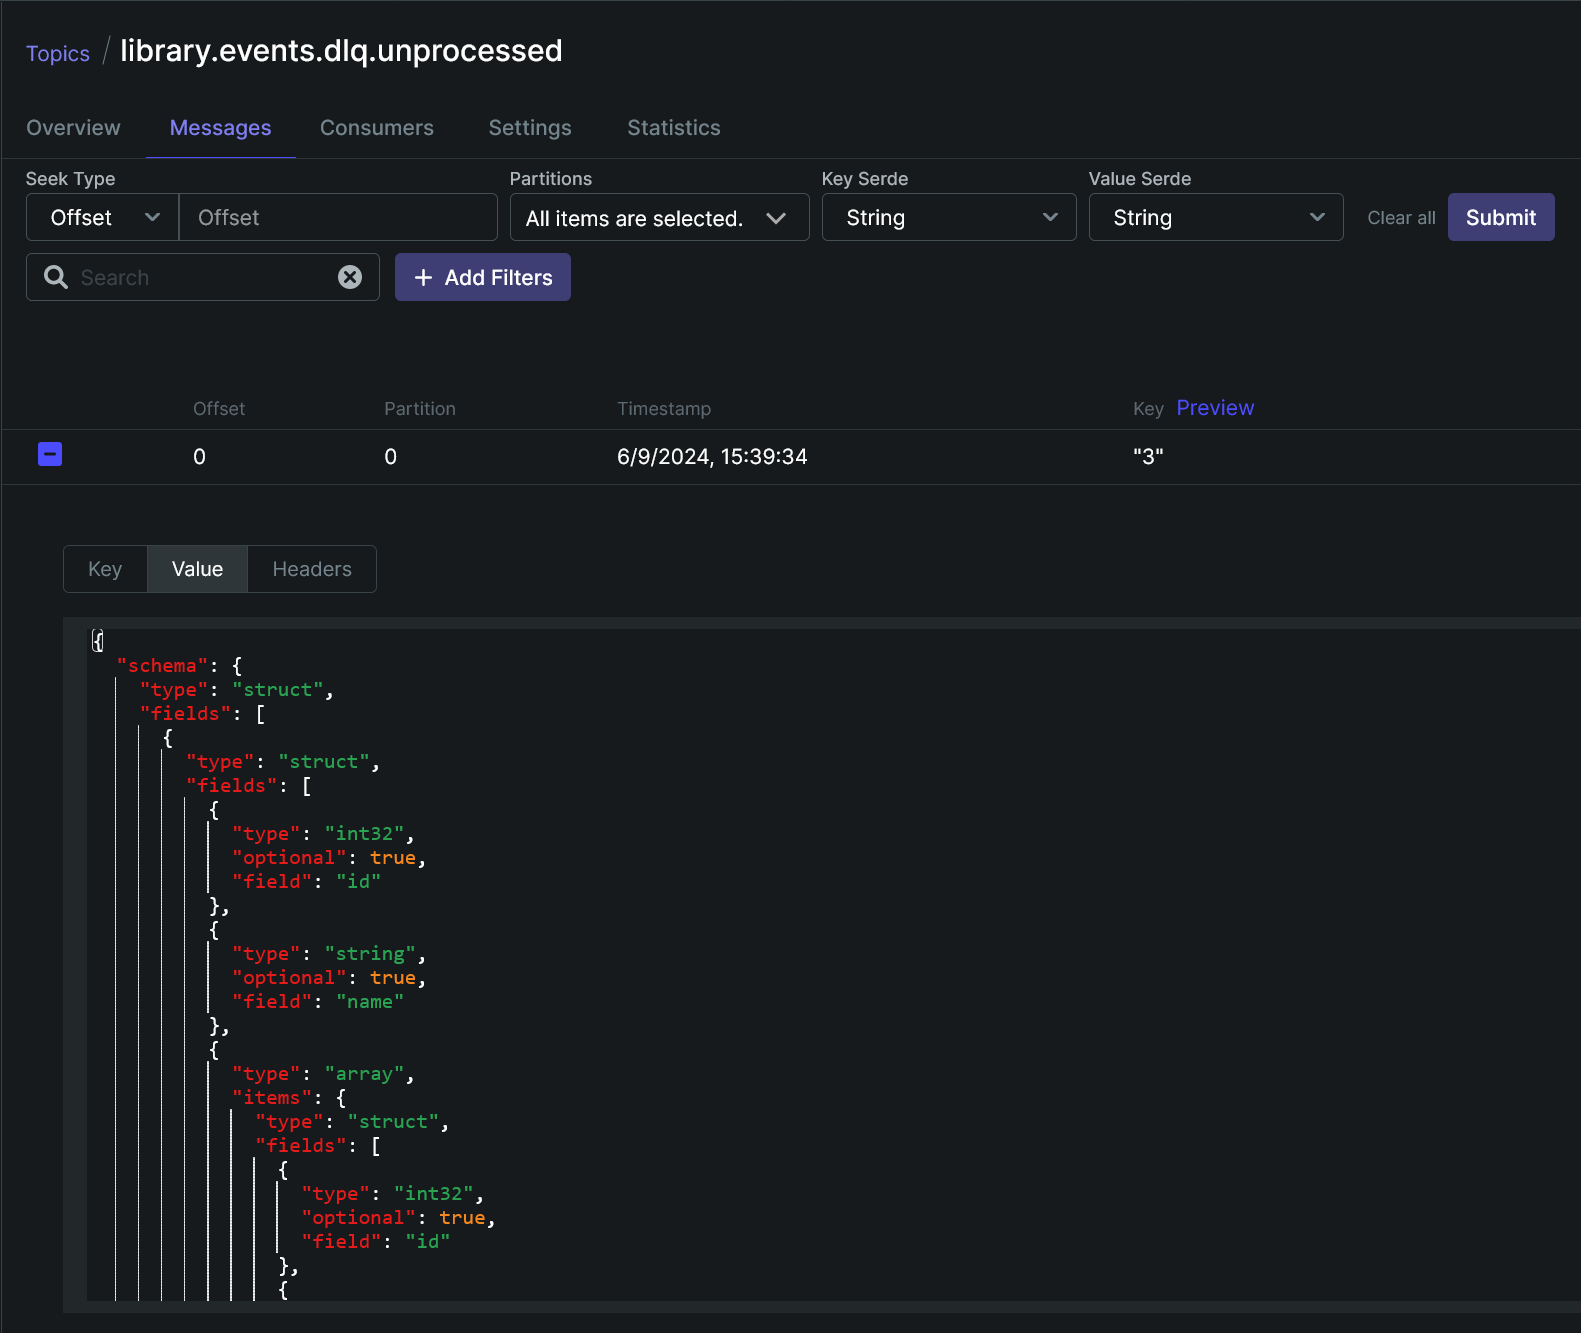
In the latest topic, headers of a message contain multiple connect.errors.* headers including a stacktrace of an error (connect.errors.exception.stacktrace
header) occurred in user.sink.dlq-ce-json connector.
Eventually, this message is processed by
user.sink.dlq-unprocessed and stored in
inbox_unprocessed:

Messages from this table won’t be processed by user-service and are intended for manual processing. The error column of the table is filled with a value of
the mentioned header containing a stacktrace of an error occurred in the previous connector.
Conclusion
In this article, I showed how to implement event-driven architecture, specifically, Transactional outbox (two different approaches), Inbox, and Saga patterns on the modern stack of technologies; the implementation includes two main parts:
-
writing microservices with Kotlin, Spring Boot 3, JDK 21, GraalVM, virtual threads, Gradle, Cloud Native Buildpacks, etc.
-
configuration of infrastructure components, where the most important part is the setting up of data/message streaming pipelines with Kafka, Kafka Connect, and Debezium. The pipelines provide communication between microservices. Also, the project is deployed to a cloud and is accessible at eda-demo.romankudryashov.com.
In such an architecture, microservices don’t communicate directly neither with each other, nor with a message broker. A message
containing business data passes from one service to another through their outbox and inbox tables using the mentioned pipelines; the pipelines
support exactly-once delivery with ordering guarantees (per partition basis). The messages are in CloudEvents format and are serialized/deserialized
using Avro. Data replication from the database of one service to the database of another was also shown (user data streaming).
I have come a long and difficult way implementing this project, and I can note the following advantages and disadvantages of the considered architecture (not event-driven architecture as such but event-driven architecture based on Transactional outbox and Inbox patterns and the considered stack of technologies for messaging implementation):
-
pros
-
reliable message delivery with exactly-once and ordering guarantees.
-
simplicity and reliability of microservices
The microservices do not interact directly neither with each other nor with Kafka, which simplifies their implementation and increases their reliability.
-
compact and standardized message format
This is achieved using CloudEvents and Avro and allows external systems to consume the events efficiently.
-
debugging and troubleshooting
Storing messages in
inboxtable makes it easier to identify and diagnose issues compared to consuming messages directly from Kafka.
-
-
cons
-
complexity
If you have not worked with the mentioned patterns and tools before, you need to learn how to:
-
implement microservices for such an architecture that, in particular, can process incoming messages from and publish outgoing messages to their databases.
-
configure data streaming pipelines, specifically Kafka Connect cluster and instances and Debezium connectors.
But now, after the implementation of the project, it should be easier for you.
-
-
additional storage space for your databases
You may need it to store every message in
inboxtable for some time (see the User service section for the reasons).As for Transactional outbox pattern implementation, you have two options:
-
if you store outbox messages in the
outboxtable (see Book service section), no additional storage space is required, unless you need to store messages for some time. -
if you write outbox messages directly to the WAL (see User service section), no additional storage space is required.
-
-
message delivery time from one service to another
-
The project is implemented using one of possible combinations of tools and no one of them is mandatory to implement Transactional outbox, Inbox, and Saga patterns; there are alternatives for each of them, for example, you can use:
-
other relational or NoSQL database
-
other message broker
-
other programming language and framework
-
other message format instead of CloudEvents with Avro
-
other schema registry or not using it at all
-
etc.
To implement the project, I chose fairly mature tools that I had already worked with before or wanted to learn.
During the implementation of the project, there were several technical limitations in the used open source tools that prevented the architecture from being implemented as intended, for example, Debezium’s Outbox SMT and CloudEvents converter didn’t work together. The implementation of the project made it possible to find and overcome these limitations and also to make other enhancements and find bugs in several open source projects, mainly in Debezium. I implemented most of them myself in Debezium and Debezium JDBC Sink Connector projects. The key features were:
-
the ability for Outbox SMT and CloudEvents converter to work together
-
creation of
DecodeLogicalDecodingMessageContentSMT -
creation of
ConvertCloudEventToSaveableFormSMT
Thanks to all open source maintainers and contributors who helped me solve different issues and errors, implemented new features, fixed bugs, and improved documentation!
I wanted to implement a demo project and write an article that I wish to have before my deep dive into event-driven architecture, data streaming, CDC topics, and related concepts and technologies. Thanks for reading!